Recently I’ve been going through old articles and updating affiliate links to the text (affiliate link) next to any affiliate link for complete disclosure. I’ve also been switching links that previously used rel nofollow to sponsored.
This is a long process as we have thousands of posts and I’m completely re-structuring how our theme and plugin collections look. To make things easier I’ve added a little code to the site which will highlight sponsored and nofollow links so I quickly locate them.
I can’t be the only one that would benefit from highlighting sponsored/rel links so I figured I would post a little guide on how I did it. Being able to quickly glance at a post and see these links will allow you to judge if there are too many and if you should remove some. It will also let you see which links don’t have any rel attribute so you can decide if you should add one or not.
Table of contents
How to Add CSS to the WordPress Editor
In order to highlight links we’ll need to add some CSS to the WordPress editor. If you are working with a theme you can easily add custom CSS to the editor using a css file otherwise you can insert inline CSS with a hook.
Using an Editor CSS file:
Simply create a new style-editor.css file in your theme and add the following:
add_action( 'after_setup_theme', function() {
    add_theme_support( 'editor-styles' );
    add_editor_style( 'style-editor.css' );
} );
WordPress will then automatically load this file in both the classic and block editors.
Adding Inline CSS:
If you aren’t working with a theme you can still add CSS to the editor inline. For this you will hook into the enqueue_block_editor_assets hook
/**
 * Hooks into "enqueue_block_editor_assets" to add inline styles to the Gutenberg Editor.
 */
add_action( 'enqueue_block_editor_assets', function() {
	wp_register_style( 'wpexplorer-editor-styles', false );
	$css = 'YOUR CSS HERE';
	wp_add_inline_style( 'wpexplorer-editor-styles', $css );
	wp_enqueue_style( 'wpexplorer-editor-styles' );
} );
For the purpose of this guide I’m going to be using the second method. This is because I will place my code inside a plugin so I can easily enable/disable the functionality.
Highlighting links based on their rel attribute is very easy! We’ll simply use the CSS tilde attribute selector. If you are new to attribute selectors I recommend you check out w3schools. So here is an example of the CSS we can use:
a[rel~=sponsored], a[rel~=nofollow] {
    background: #FFFF00;
    color: #000;
}
This CSS will make any link that has a rel sponsored or nofollow attribute look like this.
Now, because we are working with the WordPress editor it’s a good idea to target the .editor-styles-wrapper classname.
Targeting the editor-styles-wrapper element isn’t required if you are using the editor-styles method and loading a css file via your child theme or if you are targeting the classic editor. But it doesn’t hurt to just add it.
Here is the updated CSS:
.editor-styles-wrapper a:is([rel~=sponsored],[rel~=nofollow]) {
    background: #FFFF00;
    color: #000;
}If you are using an editor-style.css file simply add the code in there and save it. Otherwise you can use the following function to insert this code inline:
/**
 * Adds inline CSS to the block editor.
 */
add_action( 'enqueue_block_editor_assets', function() {
	wp_register_style( 'wpexplorer-editor-highlight-rel-sponsored-nofollow', false );
	wp_add_inline_style(
		'wpexplorer-editor-highlight-rel-sponsored-nofollow',
		'.editor-styles-wrapper a:is([rel~=sponsored],[rel~=nofollow]){background:#FFFF00;color: #000;}'
	);
	wp_enqueue_style( 'wpexplorer-editor-highlight-rel-sponsored-nofollow' );
} );
Result:
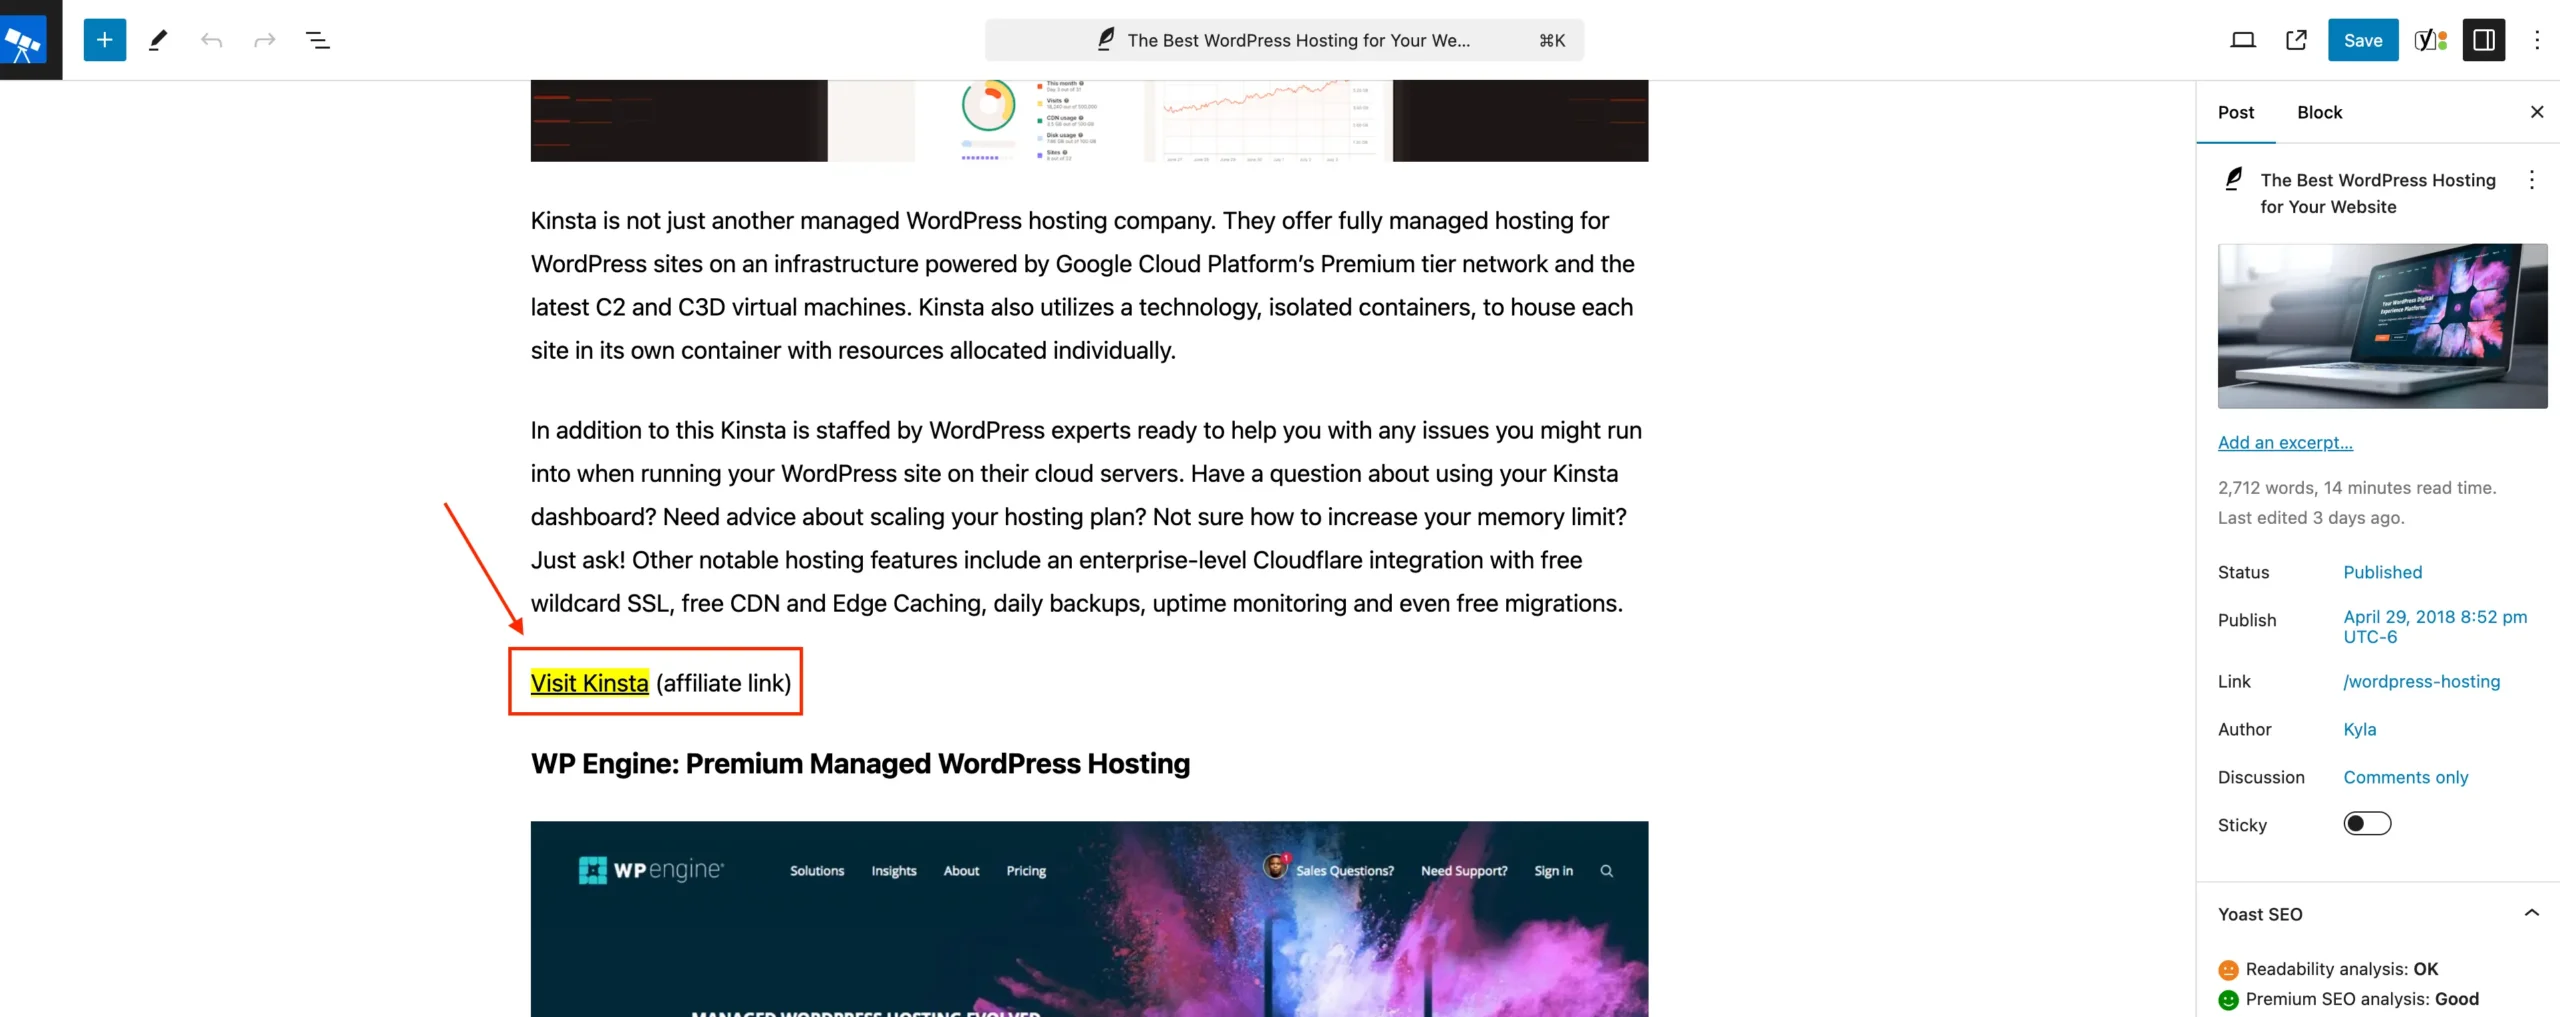
With this code added if you edit any post that has nofollow or sponsored links they will be highlighted so you can easily locate them. Here is a screenshot from our WordPress Hosting page which of course has affiliate links:

Now I can easily scan any post to locate nofollow and sponsored links! Of course you can use this concept for other things (not sure what that could be…let me know in the comments).
Download the Plugin
I created a little plugin that has the code from this guide if you want to just download and upload it to your site. You can head over and check out the plugin on Github.
The reason I don’t upload these mini plugins to the WordPress.org directory is because the review process over there is an absolute shit-show. It takes a month just to get your plugin reviewed. I don’t understand why with the amount of money WordPress makes, they can’t just hire more reviewers.
Let me know in the comments if you’ve found this plugin useful or have any questions!


