The are many plugins out there you can use to prevent SPAM comments in WordPress, but what if you wanted to implement your own solution? In this guide we’ll show you how to integrate the awesome Cloudflare Turnstile API into the WordPress comments form without using a plugin.
So what is Cloudflare Turnstile? Here is a quote from their own website:
“Turnstile delivers frustration-free, CAPTCHA-free web experiences to website visitors – with just a simple snippet of free code. Moreover, Turnstile stops abuse and confirms visitors are real without the data privacy concerns or awful UX that CAPTCHAs thrust on users”
Cloudflare Turnstile
A free solution with just a few lines of code? Awesome, sign me up! And many websites these days are already using CloudFlare (we are) anyway so for me it seems like a perfect solution.
Skip the tutorial and view full code
Step 1: Get your Cloudflare Turnstile Site & Secret Keys
Before we can dive into the code you’ll want to get the keys for the API use. If you already have Cloudflare log in otherwise sign up for a free account here. Once logged in go to the main dashboard and locate the Turnstile link in the sidebar then click on the “Add site” button.
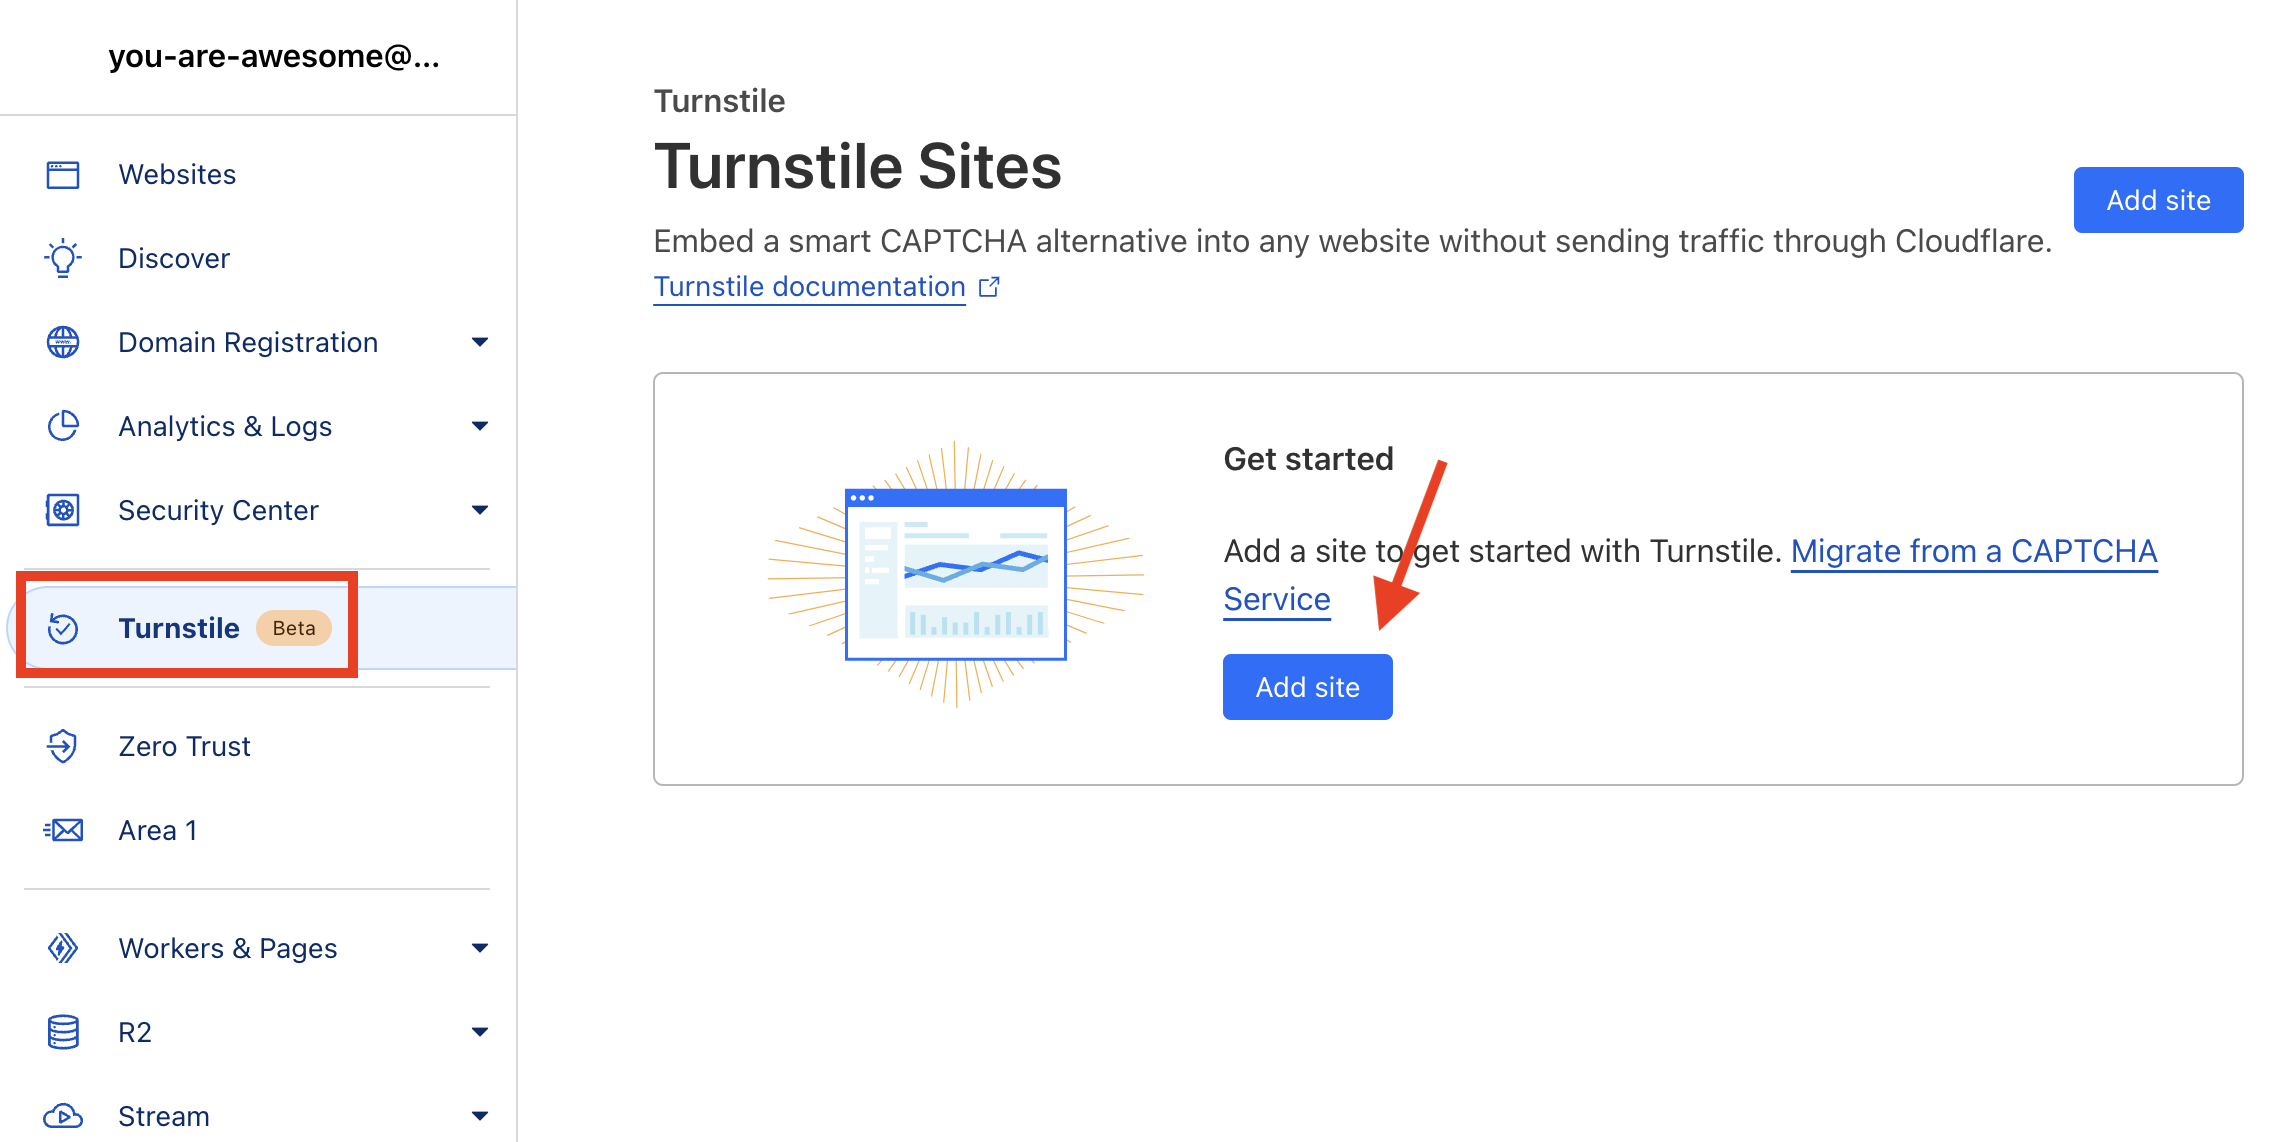
When you click the Add site button you will be redirected to a page where you will enter a site name, enter or select the domain and then select your widget mode. For the purpose of this guide and it’s what we wanted to use on our own site we’ve selected the “Managed” widget mode.
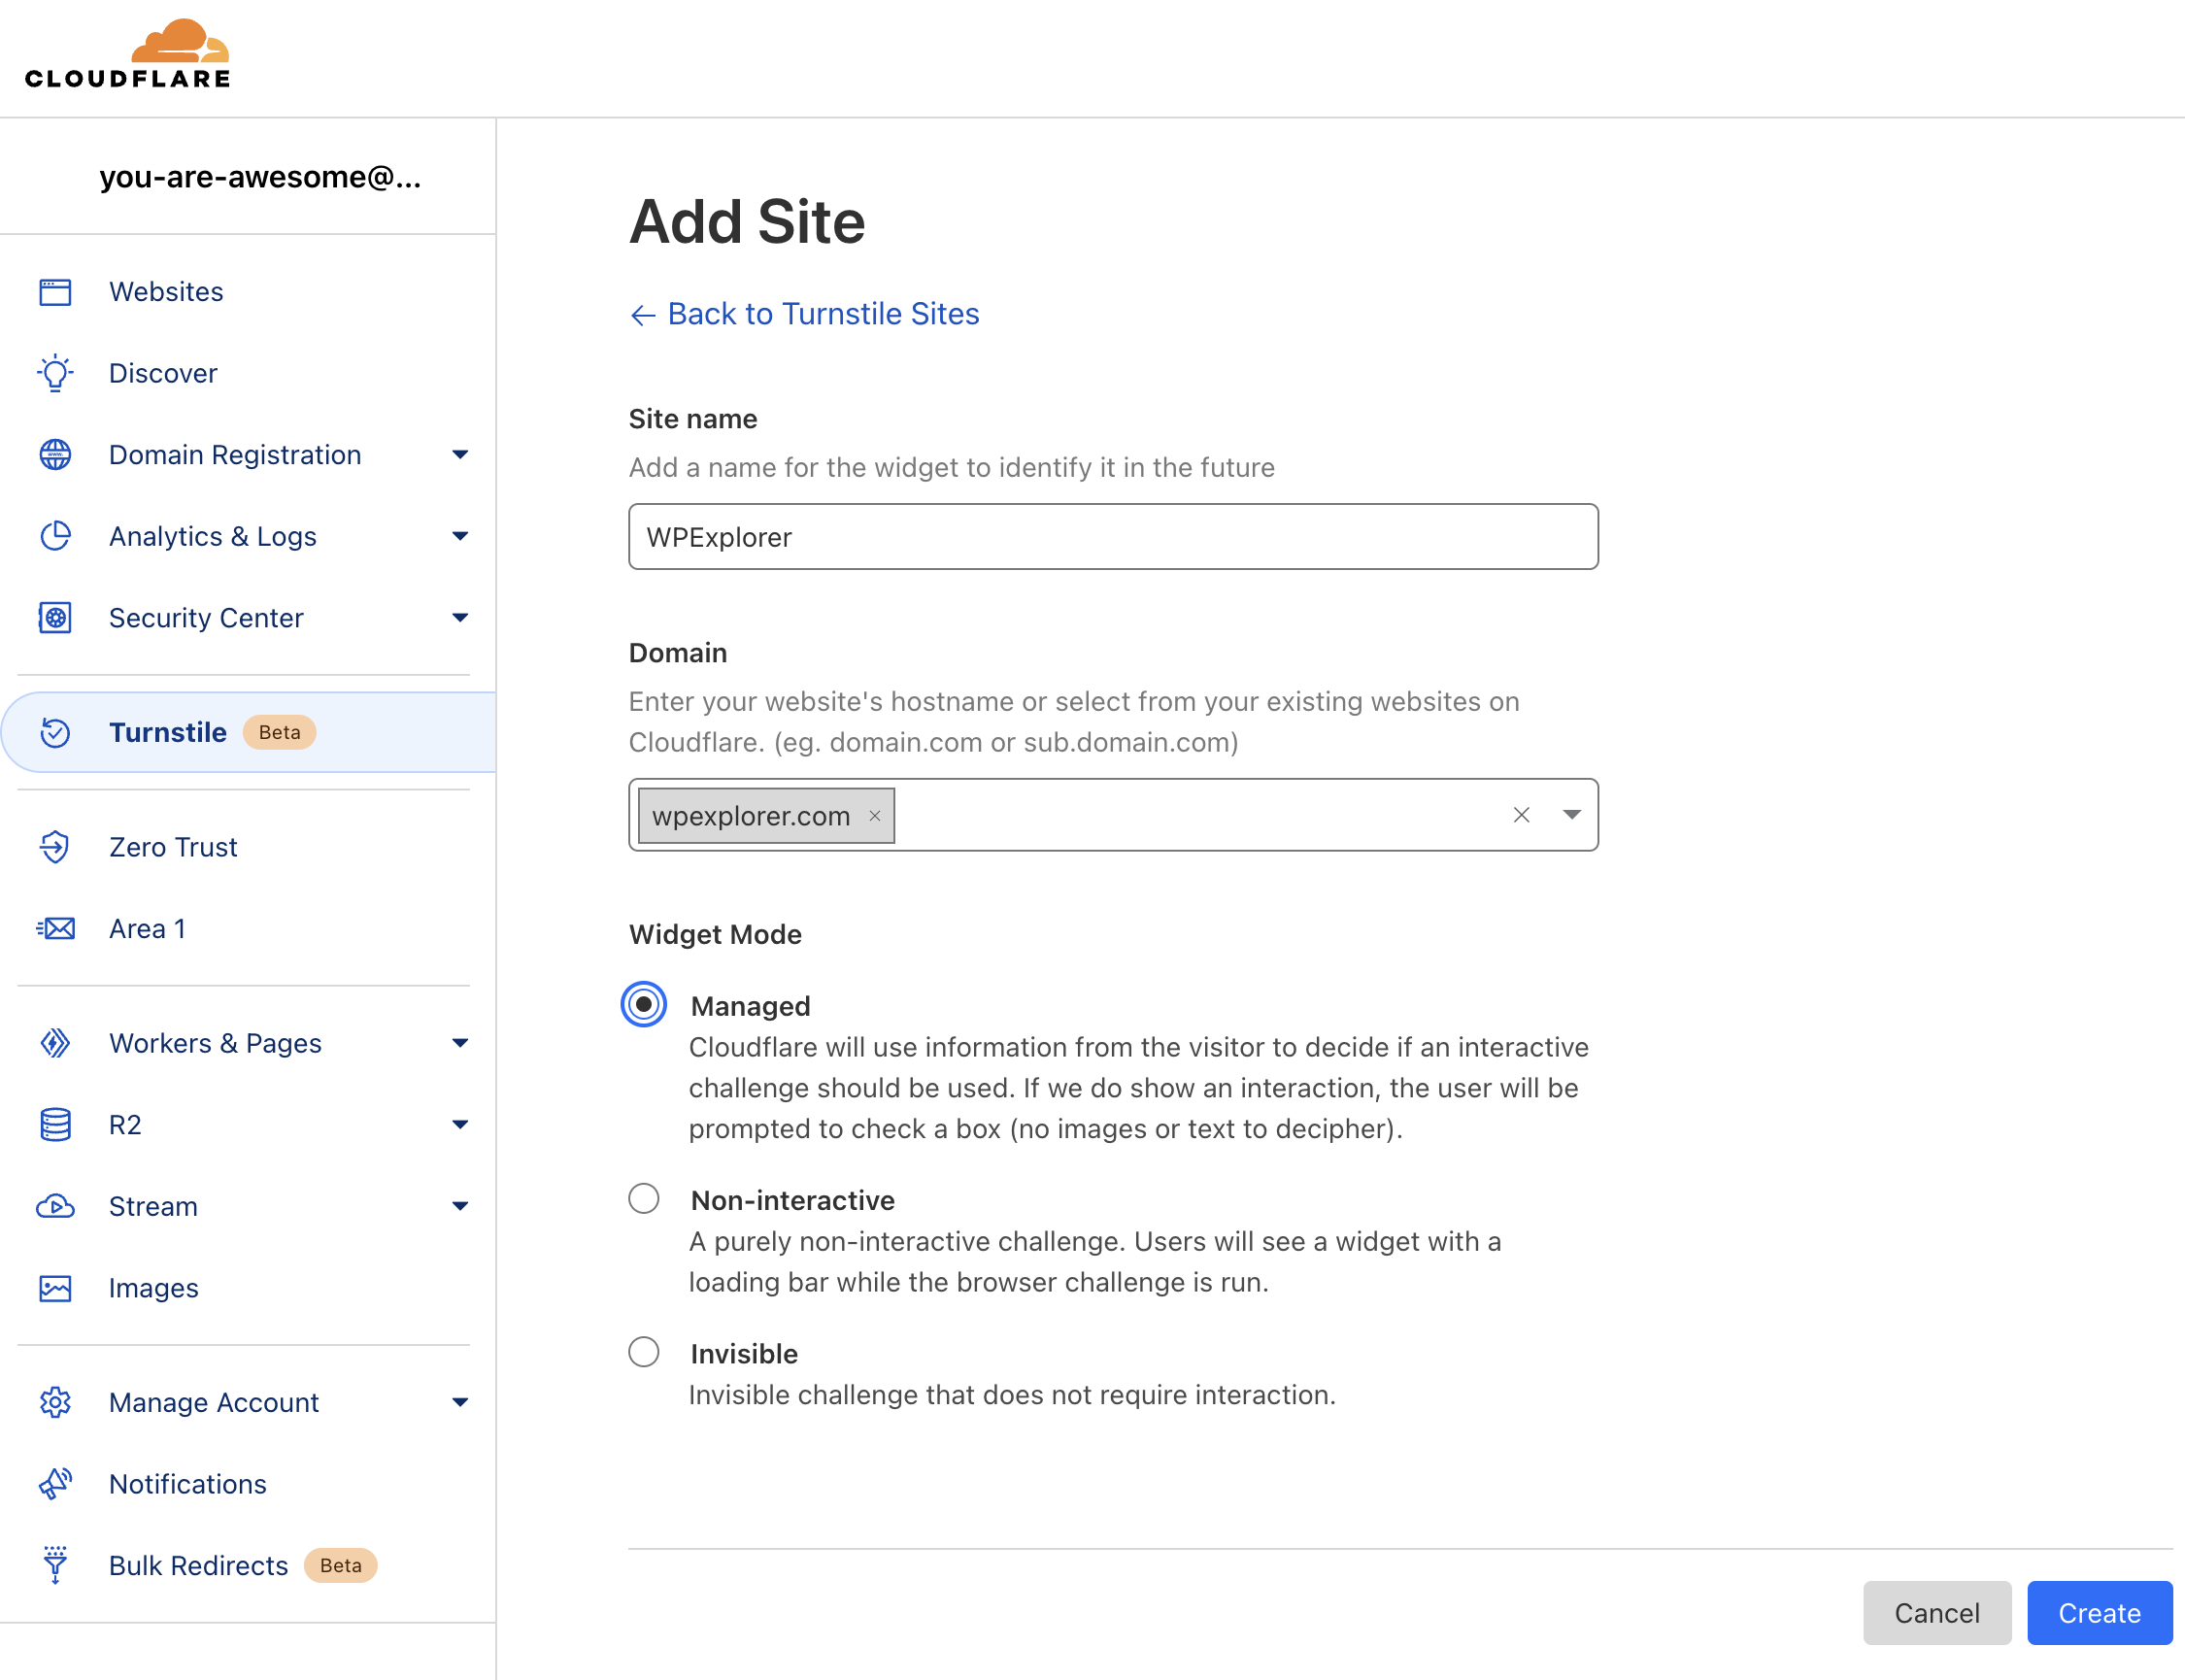
Once you’ve filled out the form click the create button which will then present you with your keys which you can copy somewhere now or just leave the window open for future referance.
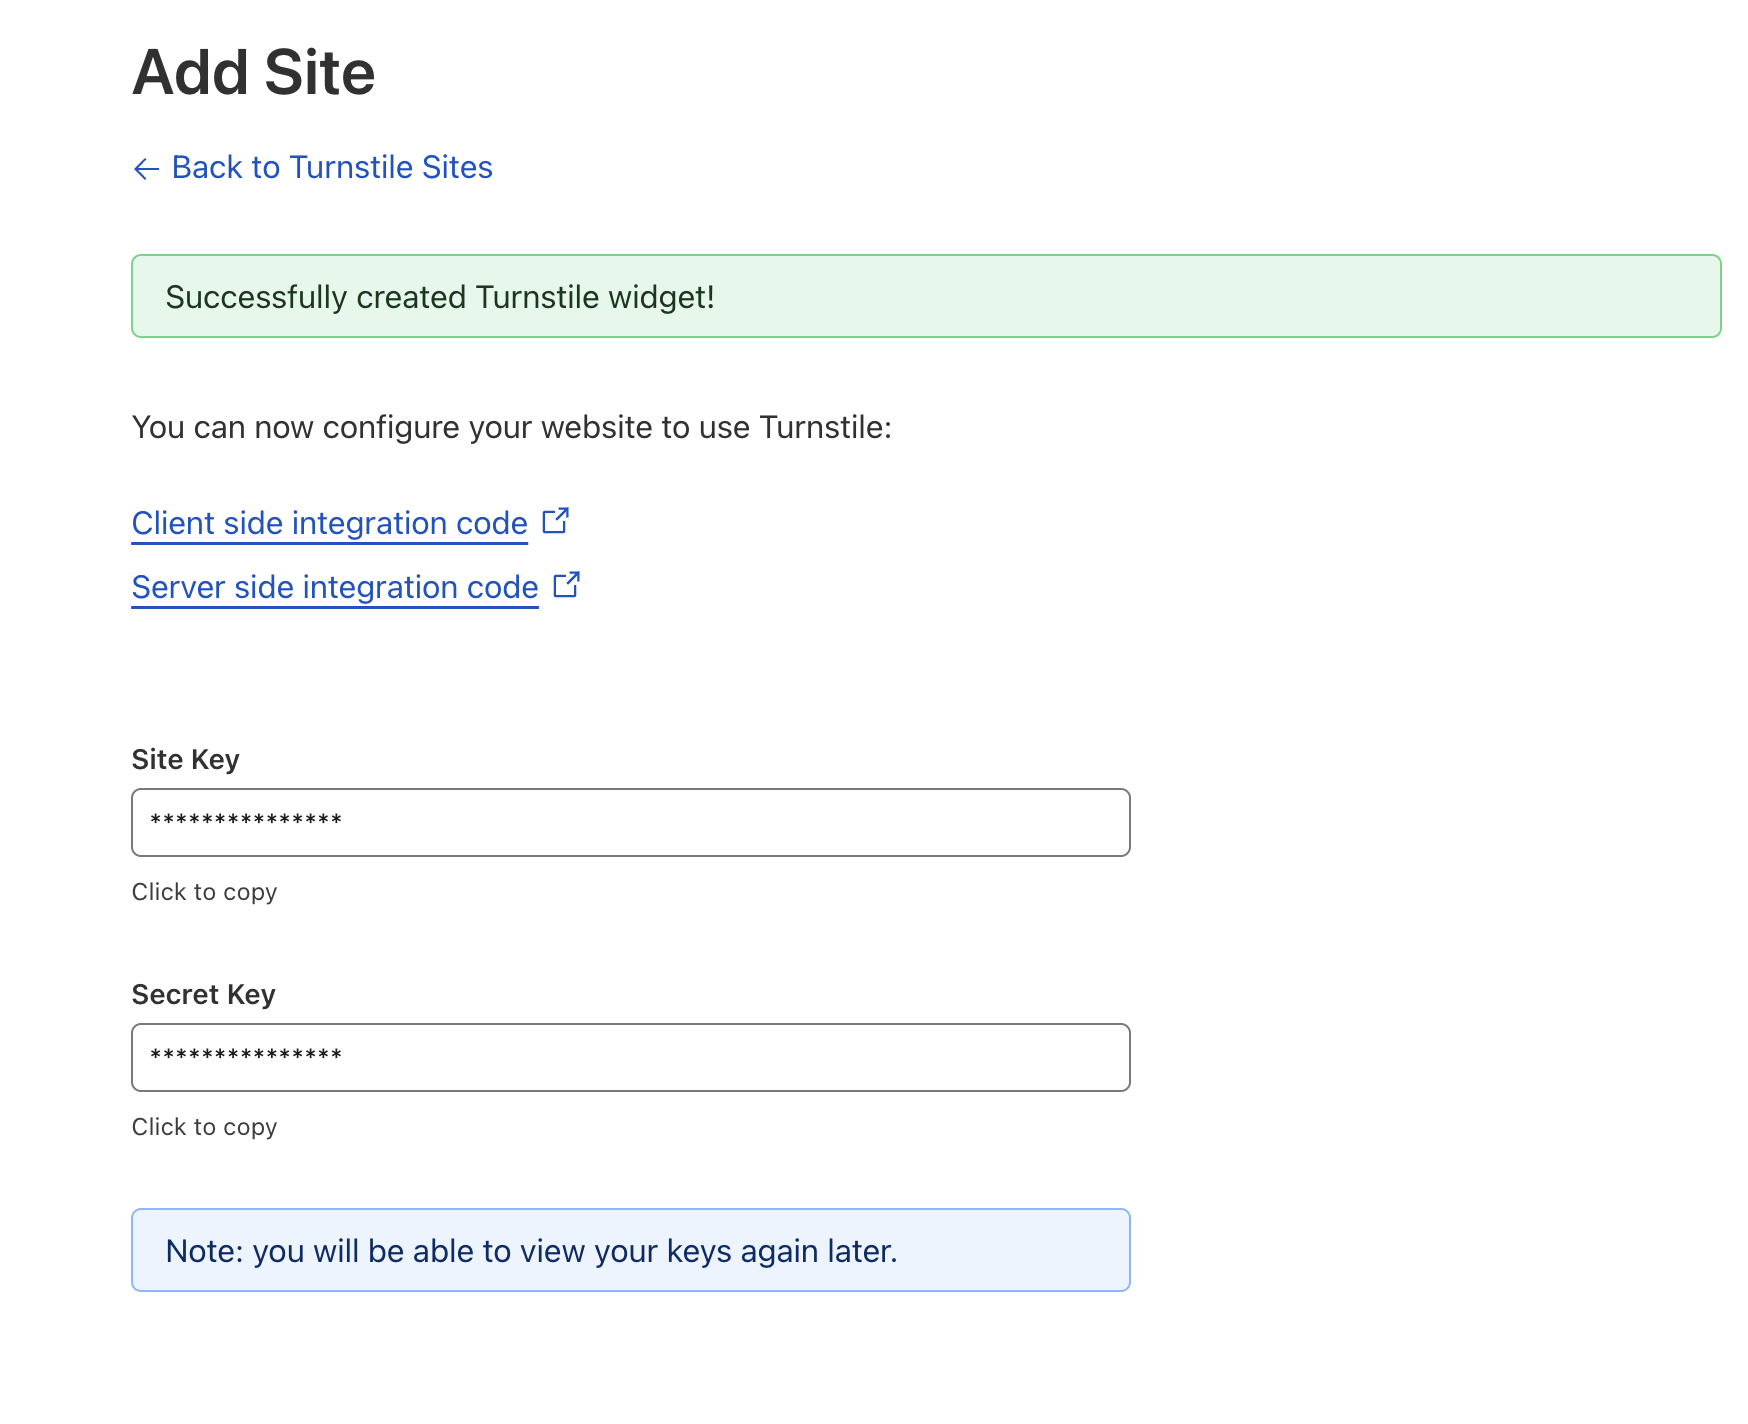
Important: I changed my key values in the screenshot above, but of course you’ll be able to actually view them.
Step 2: Create PHP Class for our Code
Now the fun begins! Let’s integrate the API into our WordPress site to make things work. As always the code snippets provided should be added in your custom theme, child theme (if working with a theme you aren’t the author of) or via your own custom plugin.
If you have followed any of my other guides out there you may know that I love working with PHP classes because it keeps all of our code neatly organized in a single place.
Start by adding the following code to your site:
if ( ! class_exists( 'WPEX_CloudFlare_Turnstile' ) ) {

	class WPEX_CloudFlare_Turnstile {

		/**
		 * Our Turnstile site key.
		 */
		private const SITE_KEY = 'YOUR_SITE_KEY_GOES_HERE';

		/**
		 * Our Turnstile secret key.
		 */
		private const SECRET_KEY = 'YOUR_SECRET_KEY_GOES_HERE';

		/**
		 * Holds the instance of our class.
		 */
		private static $instance;

		/**
		 * Create or retrieve our class instance.
		 */
		public static function instance() {
			if ( is_null( self::$instance ) ) {
				self::$instance = new self();
				self::$instance->init_hooks();
			}
			return self::$instance;
		}

		/**
		 * Init Hooks.
		 */
		public function init_hooks() {
			// We'll be adding our hooks here.
		}

	}

	WPEX_CloudFlare_Turnstile::instance();
}
Here you have your basic class with an instance method (because our class will only run once), our init_hooks() function where we’ll add our WordPress actions and a couple constants to hold our API keys.
Make sure to copy and paste your API keys into the SITE_KEY and SECRET_KEY class constants above. Example:
/**
 * Our Turnstile site key.
 */
private const SITE_KEY = 'ADD YOUR SITE KEY HERE';

/**
 * Our Turnstile secret key.
 */
private const SECRET_KEY = 'ADD YOUR SECRET KEY HERE';
And don’t confuse your keys because if you do your secret key will end up getting added to the frontend!
Step 3: Client Side Integration
With our class in place we’ll start adding the code to make things work. For this step we are going to integrate the client side code, which is the code that is added to the live site on the front-end. To do so we are going to be following the CloudFlare client-side integration guide. So the first thing we need to do is load the API script which we’ll do by hooking into wp_enqueue_scripts as such.
So lets first add a new action in the init_hooks() function that looks like this:
/**
 * Init Hooks.
 */
public function init_hooks() {
	add_action( 'wp_enqueue_scripts', [ $this, 'load_api' ] );
}
Then we’ll add a new function load_api() which should look like this:
**
 * Load the api script.
 */
public function load_api() {
	if ( ! is_singular() || ! comments_open() ) {
		return;
	}

	wp_enqueue_script(
		'cloudflare-turnstile',
		'https://challenges.cloudflare.com/turnstile/v0/api.js',
		[],
		'v0',
		false
	);
}
Basically we are adding a check at the top of the function to ensure the script only loads when we need it and then we are using wp_enqueue_script() to actually load the script on the site.
Just loading the script isn’t going to actually do anything, the next step is to insert a new element inside our comments form which will look like this:
<div class="cf-turnstile" data-sitekey="<YOUR_SITE_KEY>"></div>To do this we’ll add an other action to our init_hooks function but this time hooking into comment_form_after_fields. So your updated function will look like this:
/**
 * Init Hooks.
 */
public function init_hooks() {
	add_action( 'wp_enqueue_scripts', [ $this, 'load_api' ] );
	add_action( 'comment_form_after_fields', [ $this, 'add_comment_form_fields' ] );
}
Then we are going to add the accompanying add_comment_form_fields function to the class:
/**
 * Inserts the turnstile API div into our comment form.
 */
public function add_comment_form_fields( $fields ) {
	echo '<div class="cf-turnstile" data-sitekey="' . self::SITE_KEY . '"></div>';
}Important: I’ve only hooked into the comment_form_after fields which runs when users are logged out. For my own site I don’t need to check if logged in users are bots, but if this is a concern to you you will want to duplicate the add_filter function and change comment_form_after_fields to comment_form_logged_in_after.
If you want to add the check for logged in users as well your extra action should look like this:
add_action( 'comment_form_logged_in_after', [ $this, 'add_comment_form_fields' ] );Step 4: Server Side Integration
If you are following the guide you should now be able to inspect one of your posts that has comments enabled on the frontend and see both the api script added to your site <head> tag and a new div added to your comment form.
The next step is to make things work which is going to be done server side by sending a request to Cloudflare via the wp_remote_get() method and to do this we’re going to hook into the pre_comment_on_post hook so that our checks run when a comment is submitted.
Lets start by adding another action to our init_hooks() which looks like this:
add_action( 'pre_comment_on_post', [ $this, 'verify_comment' ] );And as always we’ll add another function to go with our action, but for now let’s leave it empty like such:
/**
 * Verifies our comment on submission.
 */
public function verify_comment( $comment_post_id ) {
	// Things will go here.
}
We are leaving the function empty for now, because we want to create another function specifically for sending the data to Turnstile to check.
The reason to write a separate function is incase we want to update our class in the future to add the check to other areas of the site such as the WP login screen.
Add the turnstile_check() function to the class like such:
/**
 * Turnstile check.
 */
public function turnstile_check( $turnstile_response ): bool {
	if ( ! $turnstile_response ) {
		return false;
	}

	$url = 'https://challenges.cloudflare.com/turnstile/v0/siteverify';
	$args = [
		'body' => [
			'secret'   => self::SECRET_KEY,
			'response' => $turnstile_response
		]
	];

	$post = wp_remote_post( $url, $args );

	if ( ! $post || is_wp_error( $post ) ) {
		return false;
	}

	$response = json_decode( wp_remote_retrieve_body( $post ) );

	return ( ! empty( $response->success ) && $response->success );
}
The previous code will send the data to Cloudflare Turnstile for checking and if a successful response is returned the function will return true otherwise it will return false.
Now, let’s go back to our verify_comment function and add the code necessary to run the turnstile_check function. Here is what your updated code should look like:
/**
 * Verifies our comment on submission.
 */
public function verify_comment( $comment_post_id ) {
	if ( is_user_logged_in() ) {
		return;
	}

	if ( ! array_key_exists( 'cf-turnstile-response', $_POST ) ) {
		wp_die( '<strong>CAPTCHA ERROR:</strong> Please click the captcha checkbox.<p><a href="javascript:history.back();">« Go back</a></p>' );
	}

	if ( ! $this->turnstile_check( $_POST['cf-turnstile-response'] ) ) {
		wp_die( 'WE DON'T TAKE KINDLY TO BOTS AROUND HERE.' );
	}

	return true;
}Important: At the top of the function you can see we are adding an extra check to prevent any code from running if the user is logged in. This is because we are only adding the Turnstile SPAM check for logged out users, so make sure to remove the extra is_user_logged_in() check if you want to run the check for everyone.
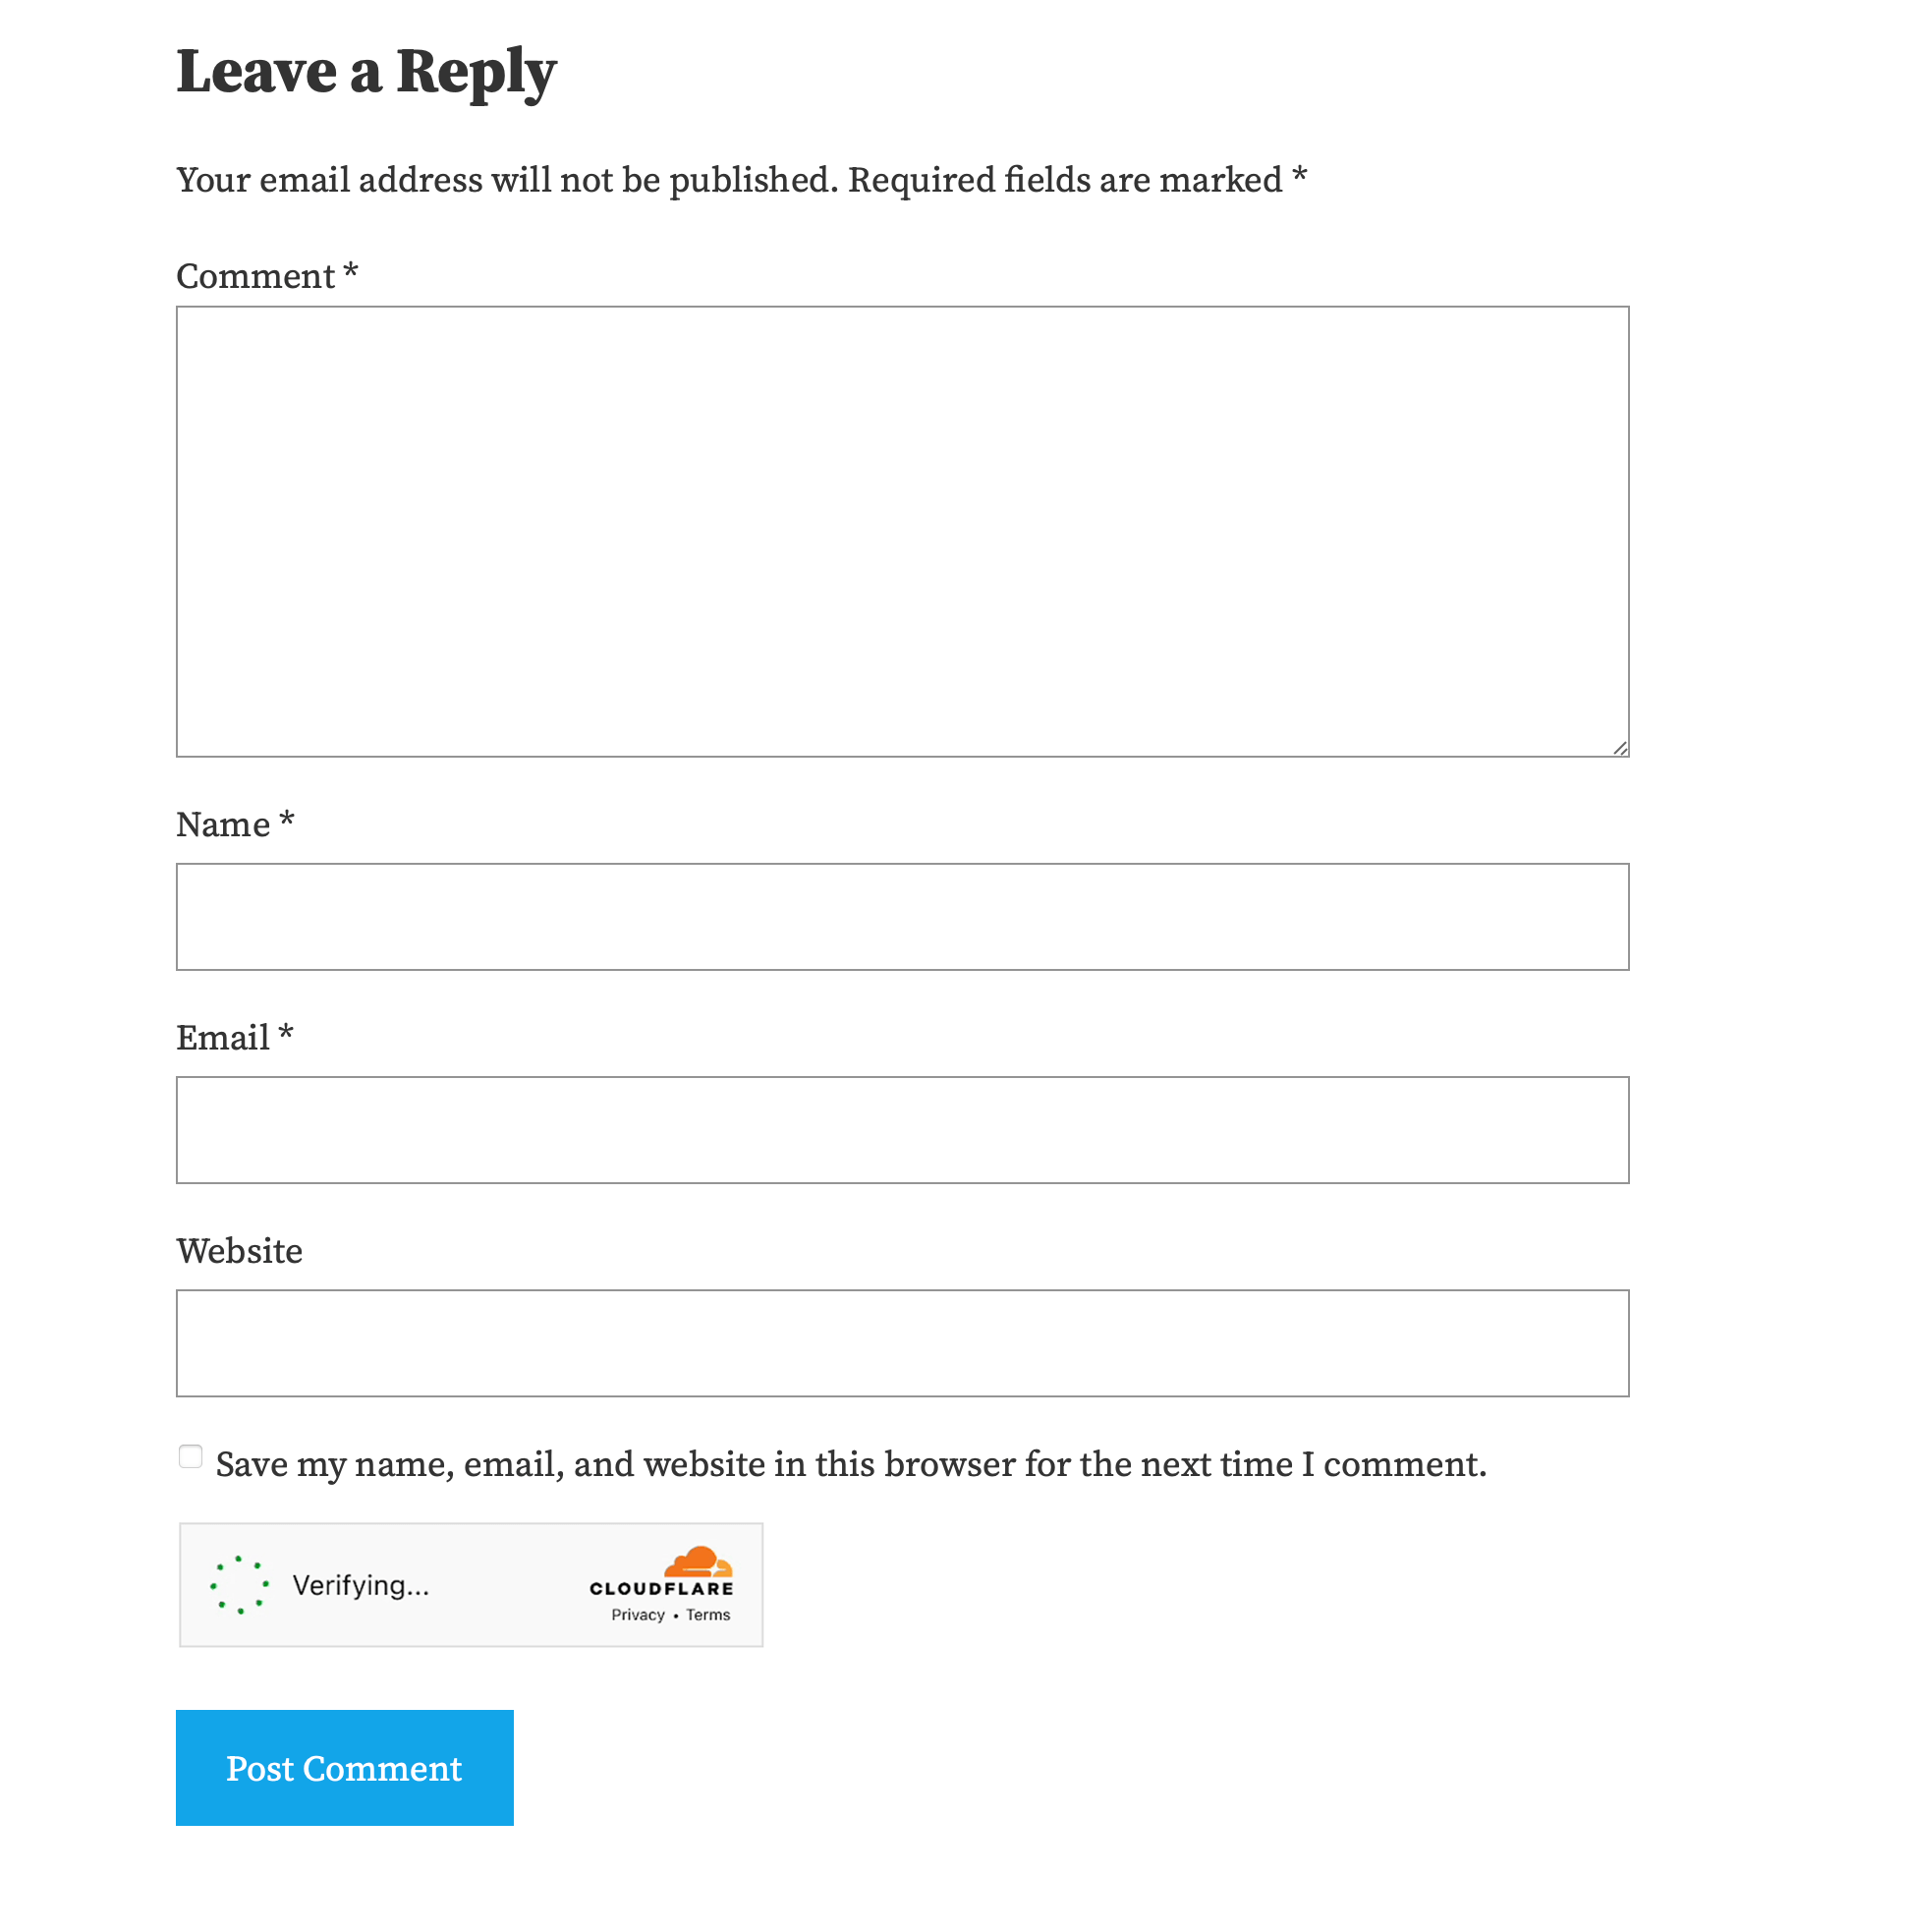
If you followed a long you should have a working CloudFlare Turnstile captcha for your comments which should look something like this on the frontend.
The Full Code
If you didn’t want to follow the tutorial or want to double check if you did everything correctly here is the complete and finished class:
if ( ! class_exists( 'WPEX_CloudFlare_Turnstile' ) ) {

	class WPEX_CloudFlare_Turnstile {

		/**
		 * Our Turnstile site key.
		 */
		private const SITE_KEY = 'YOUR_SITE_KEY_GOES_HERE';

		/**
		 * Our Turnstile secret key.
		 */
		private const SECRET_KEY = 'YOUR_SECRET_KEY_GOES_HERE';

		/**
		 * Holds the instance of our class.
		 */
		private static $instance;

		/**
		 * Create or retrieve our class instance.
		 */
		public static function instance() {
			if ( is_null( self::$instance ) ) {
				self::$instance = new self();
				self::$instance->init_hooks();
			}
			return self::$instance;
		}

		/**
		 * Init Hooks.
		 */
		public function init_hooks() {
			add_action( 'wp_enqueue_scripts', [ $this, 'load_api' ] );
			add_action( 'comment_form_after_fields', [ $this, 'add_comment_form_fields' ] );
			add_action( 'pre_comment_on_post', [ $this, 'verify_comment' ] );
		}

		/**
		 * Load the api script.
		 */
		public function load_api() {
			if ( ! is_singular() || ! comments_open() ) {
				return;
			}

			wp_enqueue_script(
				'cloudflare-turnstile',
				'https://challenges.cloudflare.com/turnstile/v0/api.js',
				[],
				'v0',
				false
			);
		}

		/**
		 * Inserts the turnstile API div into our comment form.
		 */
		public function add_comment_form_fields( $fields ) {
			echo '<div class="cf-turnstile" data-sitekey="' . self::SITE_KEY . '"></div>';
		}

		/**
		 * Verifies our comment on submission.
		 */
		public function verify_comment( $comment_post_id ) {
			if ( is_user_logged_in() ) {
				return;
			}

			if ( ! array_key_exists( 'cf-turnstile-response', $_POST ) ) {
				wp_die( '<strong>CAPTCHA ERROR:</strong> Please click the captcha checkbox.<p><a href="javascript:history.back();">« Go back</a></p>' );
			}

			if ( ! $this->turnstile_check( $_POST['cf-turnstile-response'] ) ) {
				wp_die( 'WE DON'T TAKE KINDLY TO BOTS AROUND HERE.' );
			}
		}

		/**
		 * Turnstile check.
		 */
		public function turnstile_check( $turnstile_response ): bool {
			if ( ! $turnstile_response ) {
				return false;
			}

			$url = 'https://challenges.cloudflare.com/turnstile/v0/siteverify';
			$args = [
				'body' => [
					'secret'   => self::SECRET_KEY,
					'response' => $turnstile_response
				]
			];

			$post = wp_remote_post( $url, $args );

			if ( ! $post || is_wp_error( $post ) ) {
				return false;
			}

			$response = json_decode( wp_remote_retrieve_body( $post ) );

			return ( ! empty( $response->success ) && $response->success );
		}

	}

	WPEX_CloudFlare_Turnstile::instance();
}
See how easy that was? No need to go out and install some bloated plugin to accomplish such a simple task. If you have any issues, questions or feedback let me know in the comments below (which are of course protected by Clouflare Turnstile).

