In today’s digital landscape, user convenience and seamless authentication experiences are crucial factors in determining the success of a website. For WordPress website owners, incorporating a user-friendly login system that simplifies the onboarding process is paramount. Among the various login options available, integrating a Google one-click login feature can significantly enhance user experience and attract a wider audience.
The traditional process of creating and managing user accounts in WordPress can be time-consuming and tedious, both for the website owners and their visitors. However, by implementing a Google one-click login functionality, you can streamline the authentication process, saving time and effort for both parties.
We’ve already discussed enabling Facebook login through your website, and today we’ll cover setting up one-click Google login. We will discuss the following:
-
Why Add Google One-Click Login to Your Site?
-
Does Your Website Need One-Click Login?
-
How to Add Google One-Click Login?
Qode Themes: Top Picks
View Collection

Bridge
Creative Multi-Purpose WordPress Theme

Stockholm
A Genuinely Multi-Concept Theme
Startit
Fresh Startup Business Theme
help reduce cart abandonment rates.
-
Education and eLearning platforms: Platforms that offer online courses, learning management systems, or educational resources can benefit from one-click Google login. Students and learners often prefer a streamlined login process, as it eliminates barriers to accessing educational content.
-
Community and membership websites: Websites that revolve around communities, memberships, or exclusive content can use one-click Google login to provide a frictionless experience for their members.
-
Service-based platforms: Websites that offer services such as booking functionality, professional networks, online marketplaces (including websites for selling your art) can benefit from one-click Google login.
These are just a few examples, but in general, any website that aims to streamline the login and registration process, improve user experience, and enhance security can benefit from incorporating one-click Google login.
Nextend Social Login and Register, a freemium plugin whose free version allows you to add Google, Facebook and Twitter login, while the premium one allows PayPal, TikTok, Slack and other logins.
So, the first thing to do is to find, install and activate the free Nextend plugin. When you’re done, navigate to Settings>Nextend Social Login. There you’ll see the option for configuring Google login.
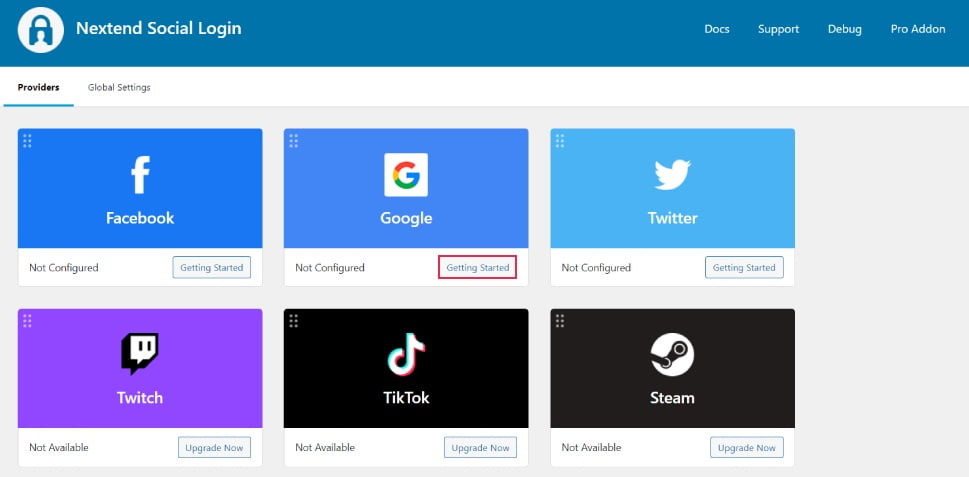
After clicking on Getting Started, a page will open on which you’ll be prompted to create a Google app. It sounds scarier than it is but don’t worry – it’s very simple and we’ll guide you through the process.
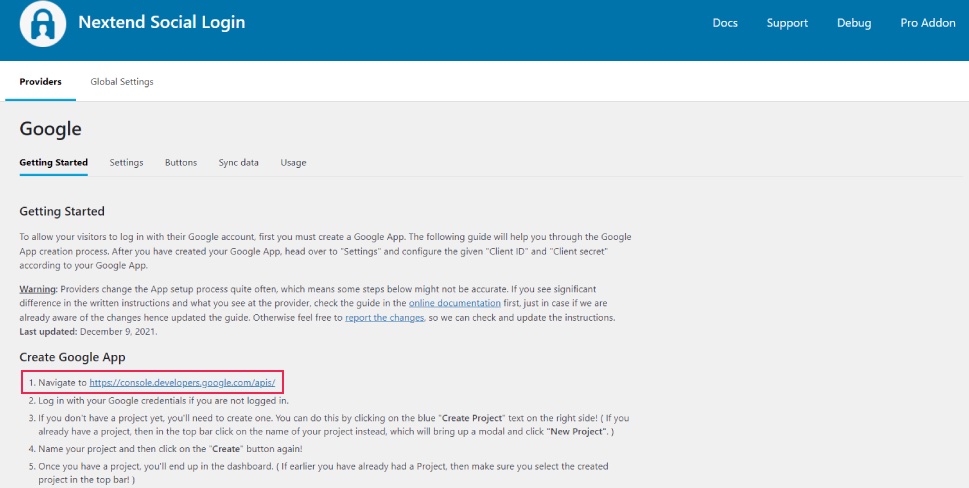
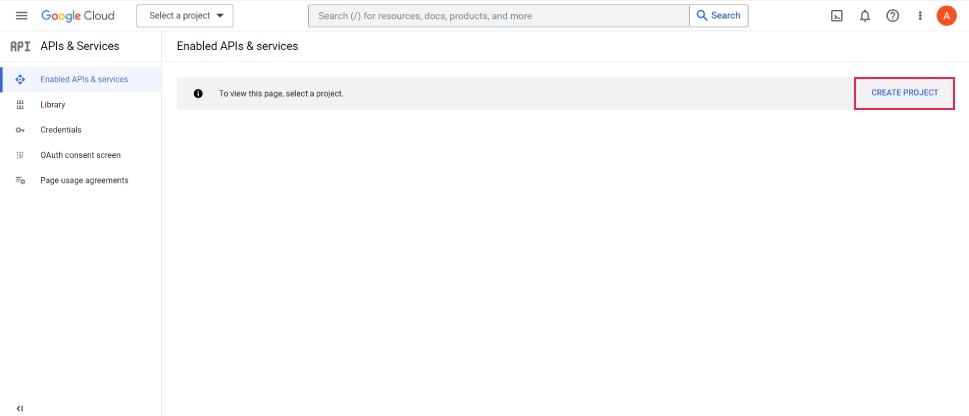
Your next stop is the Google Cloud Console, specifically the APIs & Services page. Start by clicking on Create Project.
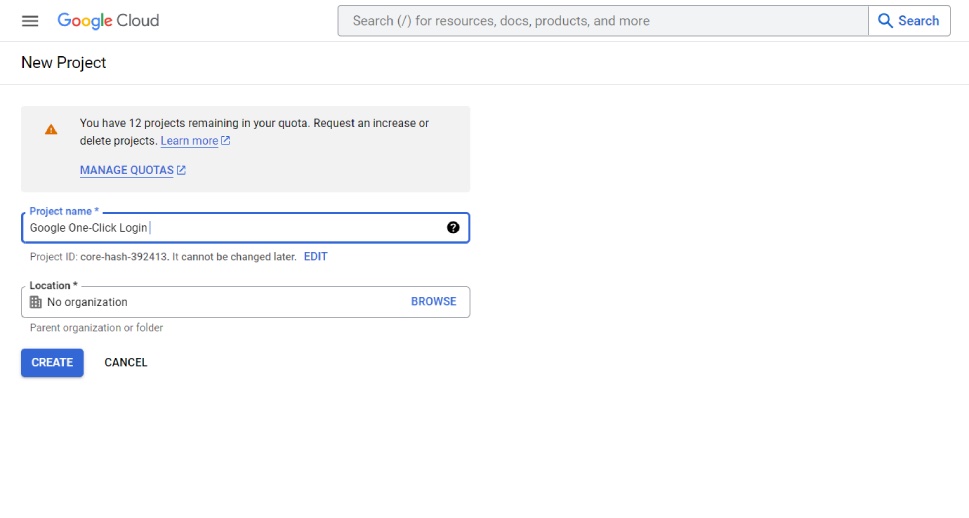
Here you can give your project a name – any name you like, and also select the organization, if you have any connected through Google Workspace. When you’re done, click on Create.
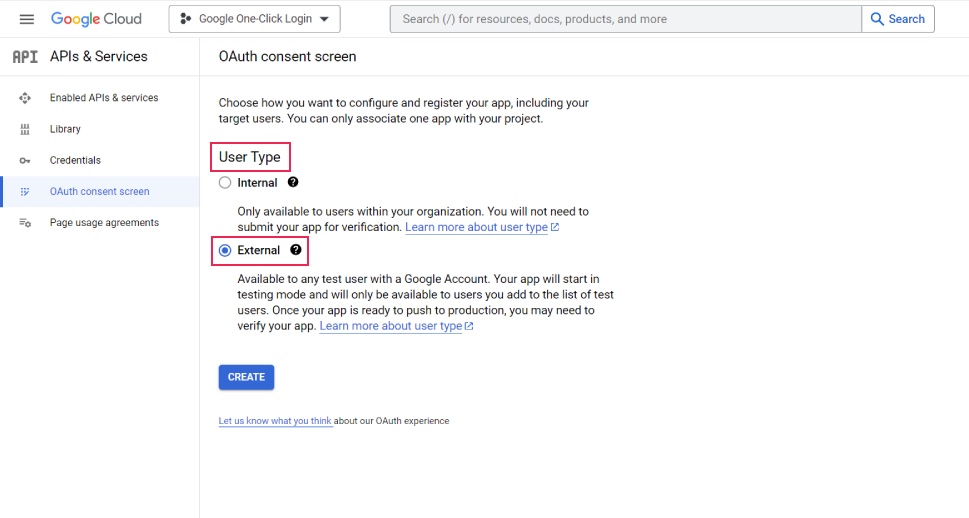
On the following screen, click on OAuth consent screen.

The next step is to set the user type for the app. You have two choices – internal and external. The internal one allows access only to the individuals with login credentials within your organization. The external one allows access to any user with a Google account. Obviously, that’s the one you should select.
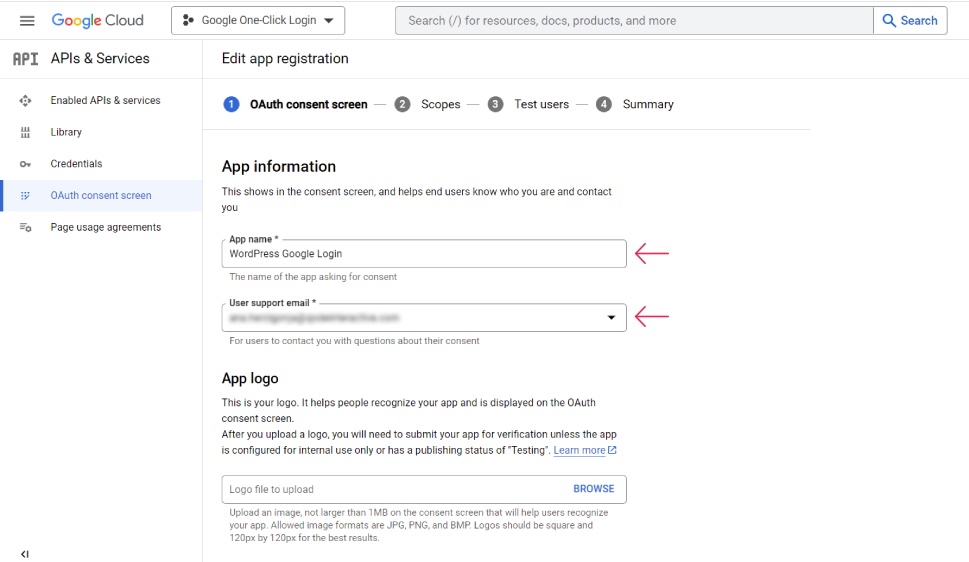
Next, you need to fill in some basic information. Start with giving the app a name (it can be any name you like) and registering your email. You can also upload a logo so that the users can easily associate the app with you. Note, however, that if you upload a logo it can undergo a lengthy verification process by Google, and it may take up to several weeks.
On the following page, you will enter your domain name, the link to your privacy policy page, and so on.
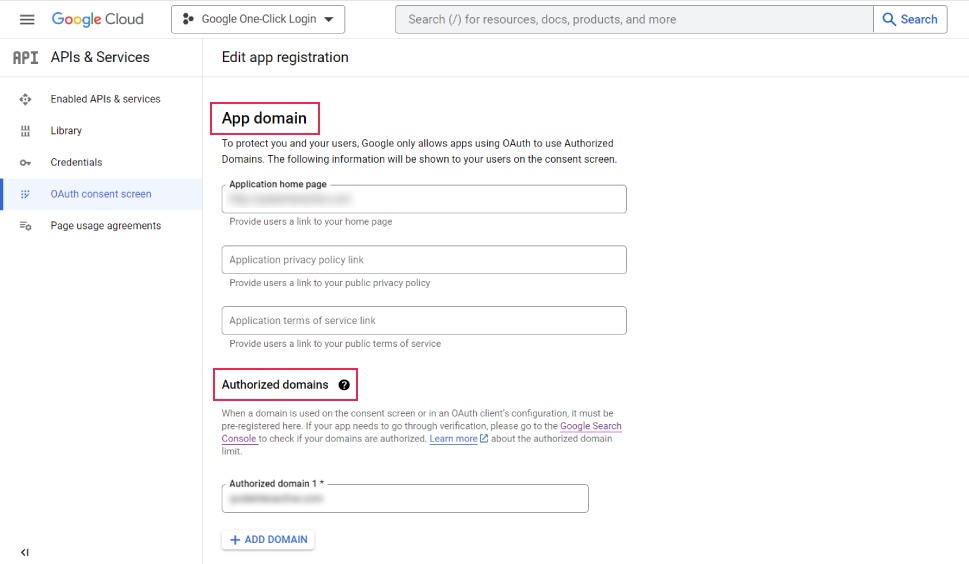
Note that, in order to create an app for a website, you need to have a domain registered and potentially verified with Google Search Console. Enter the authorized domain by clicking on Add Domain.
Finally, enter your email and click on Save and Continue.
The next screen is for determining the scopes of the app.
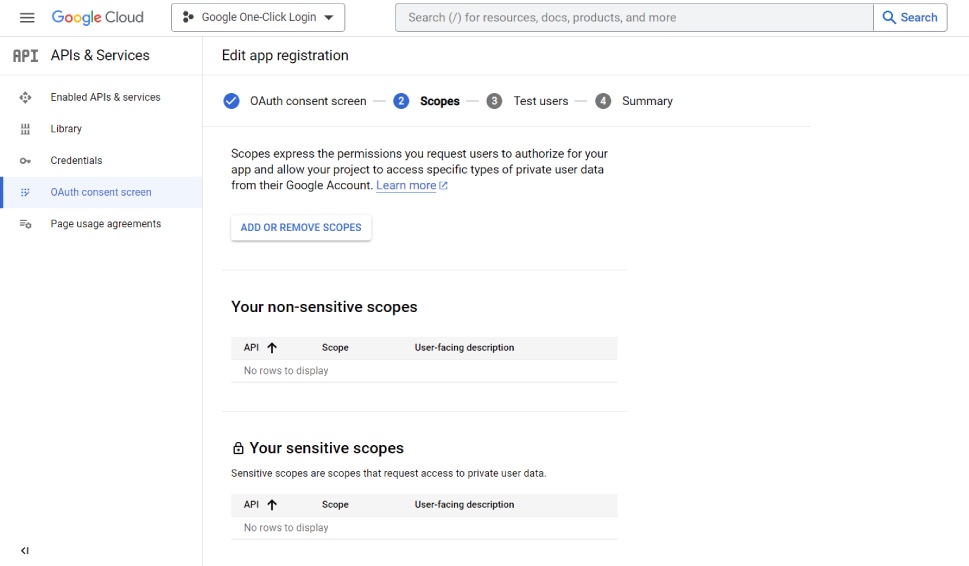
You don’t have to set anything particular here so you can just scroll down and click on Save and Continue. The same goes for the following page – Test users.
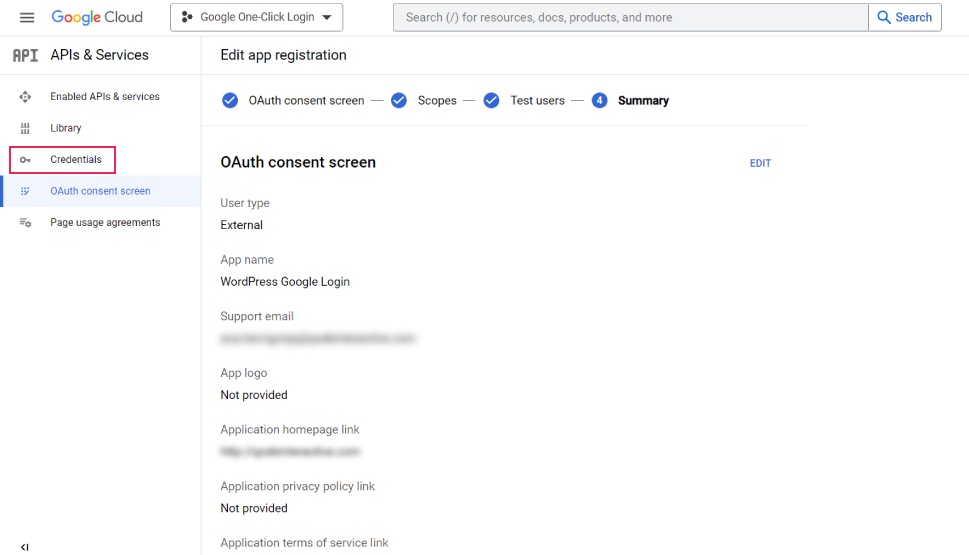
The final page is the summary of what you’ve set – the app name, type, domain, associated email and so on. Go through all these and edit whatever needs editing. If everything is fine, in the left hand dashboard menu, click on Credentials.
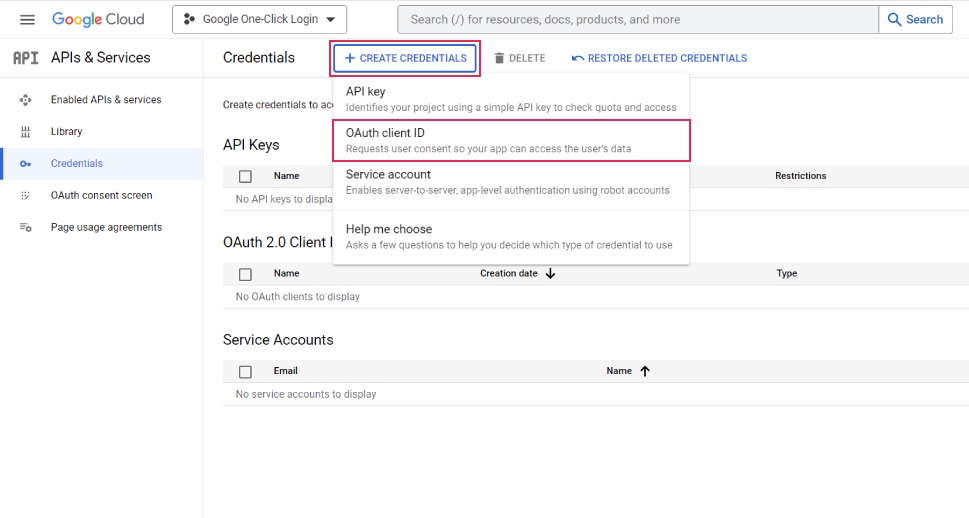
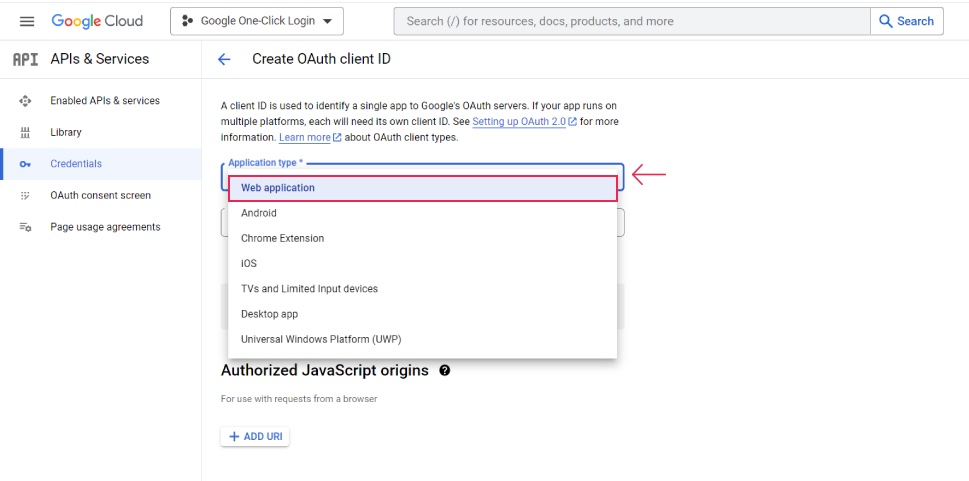
Here, click on +Create Credentials at the top menu bar and select OAuth Client ID.
Open the Application Type menu and select Web application.
Now scroll down to Authorized redirect URIs and click on +Add URI.
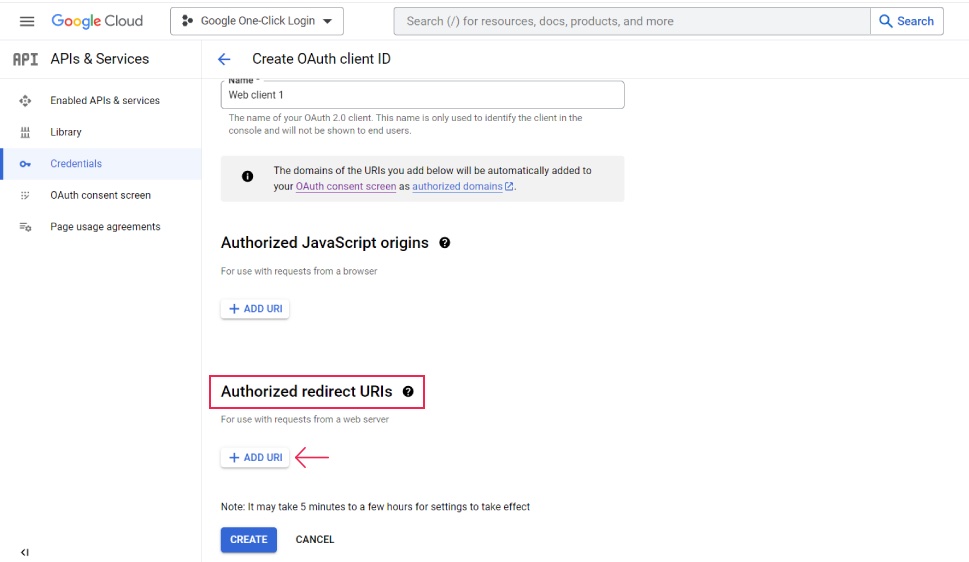
And now – and this is an important part – enter the following URI:
http://example.com/wp-login.php?loginSocial=google
Just make sure to change “example.com” to your own domain name!
Finally, scroll down and click on Create.
You will see the following popup:
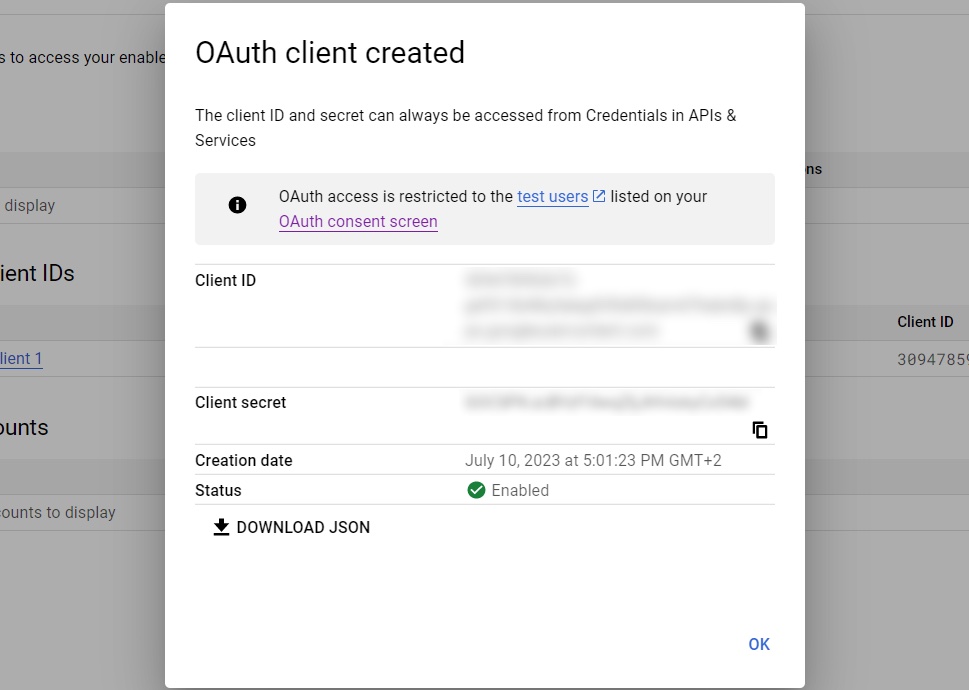
You need the Client ID and Client secret keys because you will have to paste them into the plugin settings to connect the app with your website.
Go back to your WordPress admin as you left it. Scroll down to the button saying I am done setting up my Google App.
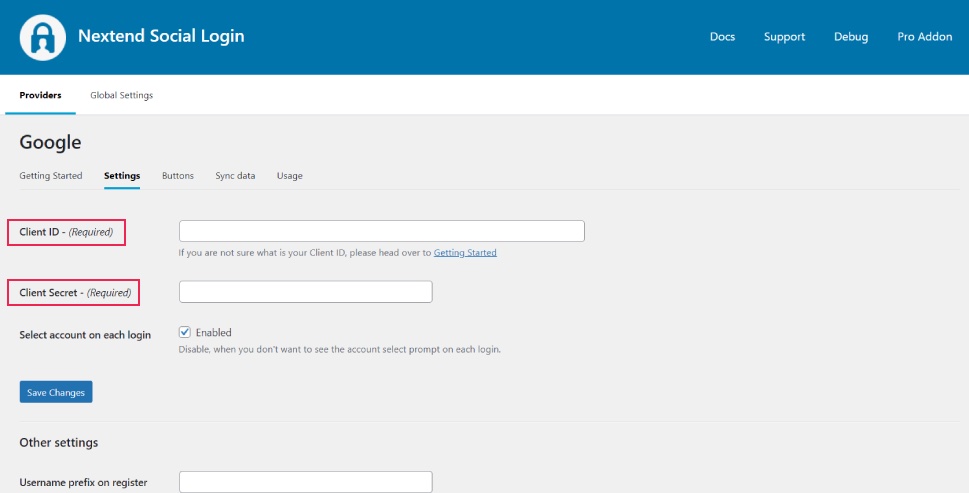
Now paste your Client ID and Client Secret keys. Select whether you want to enable or disable the account select prompt for each login. When you’re done, click on Save Changes.
After this, you will be prompted to Verify Settings.
If everything is fine, click on Enable. After this, you should get a message from Google saying Works Fine – Enabled. If not, you can re-verify the settings.
Now that you’ve configured and connected the app, you can configure the style of your login prompt. Start by clicking on Buttons in the menu.
Here you can set the button skin, choosing between Dark, Light and Legacy. Here you will also specify the login label and link label.
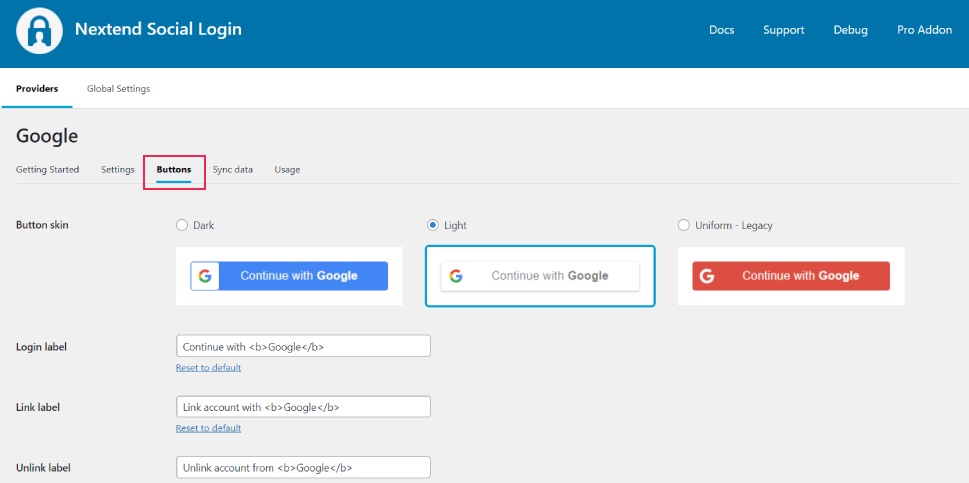
Click on Save Changes when you’re done.
Finally, after you’ve connected and customized the login app, it’s time to take it out of the test mode. Go back to Google Cloud and turn off the popup with keys.
Click on OAuth Consent Screen in the left hand dashboard menu. Find the button saying Publish App, click on it and then, in the popup, when asked to Push to Production in the popup, click on Confirm.
You should see the status saying Verification not required.
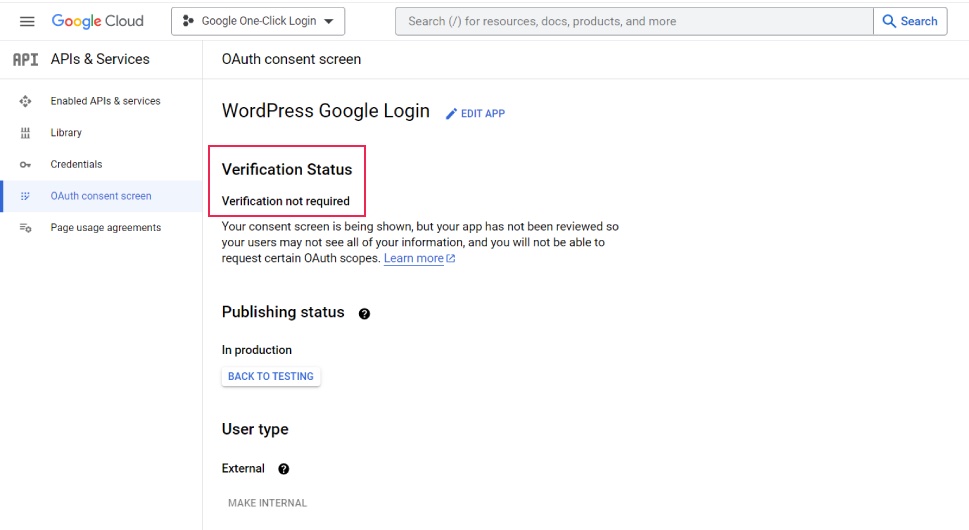
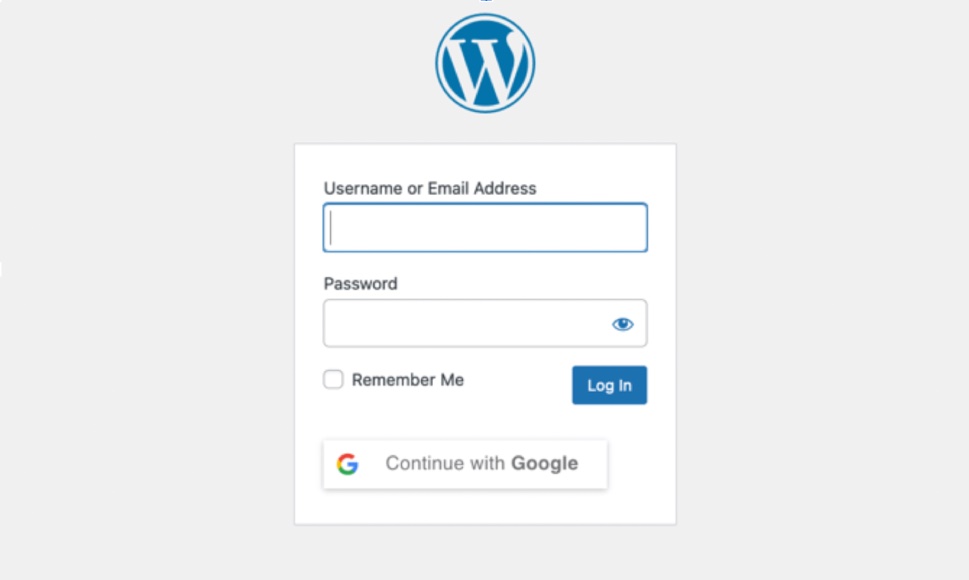
This means that everything is fine and your users should now have the ability to log in with their Google credentials.
The Nextend plugin also allows you to create a shortcode that you can use to add the login form on any page of your site. This is convenient in case parts of your website are gated or behind a paywall or you have any other reason to require login for them.
Wrapping Up
Although it involves creating an app, adding Google one-click login to your website is actually not that complicated and shouldn’t take more than 10 minutes of your time. Plus, it’s free! So if adding Google login makes sense for you, there’s really no reason why you wouldn’t offer this convenient extra option to your users.