
You have a passion for creating awesome digital products like eBooks, software, courses, or even artwork? The good news is that now you can sell them and start earning passive income. And how? Well, by selling them online.
And what if you don’t have your own product to sell but you still want to tap into that market? No worries! A digital products marketplace is your answer. It’s like a virtual mall where you connect creators with consumers. You provide the platform, they provide the products, and everyone wins!
In this tutorial, we will show you how to create a digital products marketplace in nine easy steps. So, keep reading!
-
Why You Should Create a Digital Products Marketplace
-
Most Profitable Digital Products to Sell in 2024
-
How to Create a Digital Products Marketplace Using WordPress
-
Digital Products vs Physical Products to Sell
-
Creating a Digital Marketplace – Key Takeaways
eCommerce WordPress Themes
View Collection

Tonda
A Modern Elegant WooCommerce Theme

Biagiotti
Beauty and Cosmetics Shop

Gioia
Modern Fashion Shop
latest data shared by ResearchAndMarkets.com shows that the global market is estimated to grow from $23,328.73 billion in 2021 to $33,313.50 billion in 2026 at a rate of 7.4%. The market is then expected to grow at a CAGR of 6.3% from 2026 and reach $45,149.00 billion in 2031.
If you want to get a slice of this huge pie, you need to jump in directly, with an online presence. The industry is not showing any signs of slowing down, so you really shouldn’t wait.
Why? Well, digital products are just plain convenient. They’re:
-
Easy to Access: No waiting for shipping, just download and go!
-
Globally Available: Reach customers anywhere with an internet connection.
-
Scalable: Sell the same product to infinite customers without restocking.
-
Low Overhead: No warehouses or physical products to manage.
So, if you have a skill for design, love writing, or are a coding wizard, you can create a valuable digital product and share it with the world. And if you don’t have products of your own, you can easily connect with creators and sell through your platform.
9 Types of Digital Products to Sell on Your WordPress Website.
Register a Domain Name
-
Buy a Hosting Plan
-
Install WordPress on Your Control Panel
-
Install a Multivendor Marketplace Plugin
-
Install a Suitable Theme
-
Configure the Basic Settings of Your Marketplace
-
Prepare Your Admin Store
-
Allow Vendors to Register on Your Marketplace
-
Promote, Promote, and Promote
Now let’s get into the details!
domain name for your marketplace. Your domain name should reflect your brand identity and be easy for customers to remember. And if your preferred domain is taken, there’s still a lot you can do to maintain your branding idea.
-
Check Availability: Once you have a few domain name ideas in mind, it’s time to check if they’re available. Use an online domain registrar, type in your desired domain name, and the registrar will let you know if it’s up for grabs.
-
Choose the Right Extension: A domain extension is the suffix at the end of your domain name, like .com, .net, or .org. While .com is the most popular and widely recognized, you can also choose other extensions based on your needs.
-
Register Your Domain: Once you’ve found the perfect domain name that’s available, it’s time to register it, which typically involves providing your contact information and payment details.
Your domain name is the foundation of your digital presence, so take your time to choose the name that reflects your brand and resonates with your audience.
reliable hosting provider that offers features like good uptime, security, and customer support. Popular options include Bluehost, SiteGround, HostGator, etc.
-
Choose the Right Plan: Hosting providers offer different plans depending on your needs and budget. For a digital products marketplace, you’ll likely need a plan that provides enough storage, bandwidth, and resources to handle your website’s traffic and transactions.
-
Register Your Hosting Plan: Once you’ve selected a hosting provider and plan, you’ll need to sign up and register for the hosting service. This typically involves providing your contact and payment information, choosing your billing cycle (monthly, yearly, etc.), and configuring any additional services or features you may need.
After registering, you’ll receive login credentials to access your hosting account’s control panel. Then change the password for you.
install WordPress manually, simply ask your hosting provider to install WordPress on your behalf and provide the credentials. They will happily do that for you.
However, if you want to install WordPress on your own, follow this procedure:
Log in to your control panel and look for an option or section related to website management or software installations.
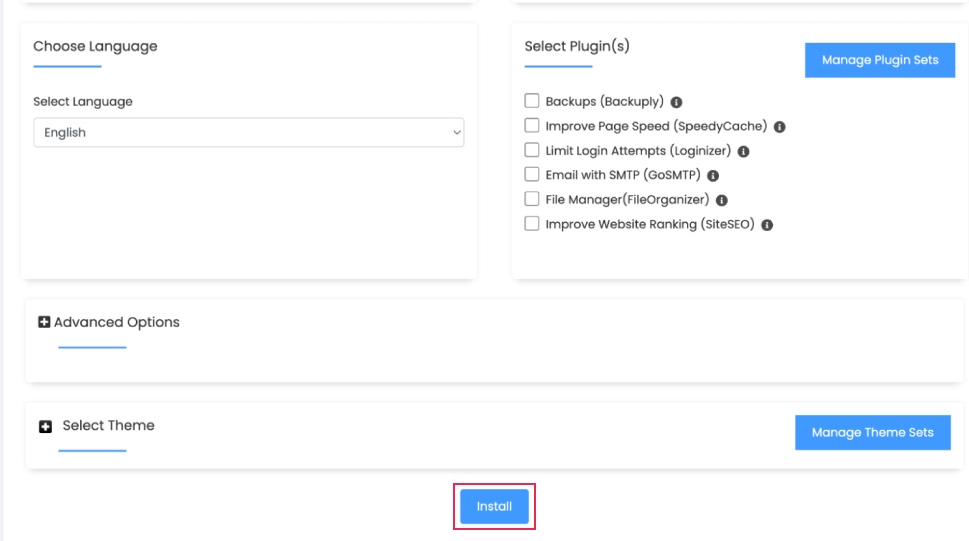
Once you’ve located the installer, select WordPress from the list of available applications. Follow the prompts to begin the installation process. You need to provide some basic information, such as your desired website name, username, and password for the WordPress admin area.
After providing the necessary information, initiate the installation process. The installer will automatically set up WordPress on your hosting account, including creating the necessary databases and configuring the required files.
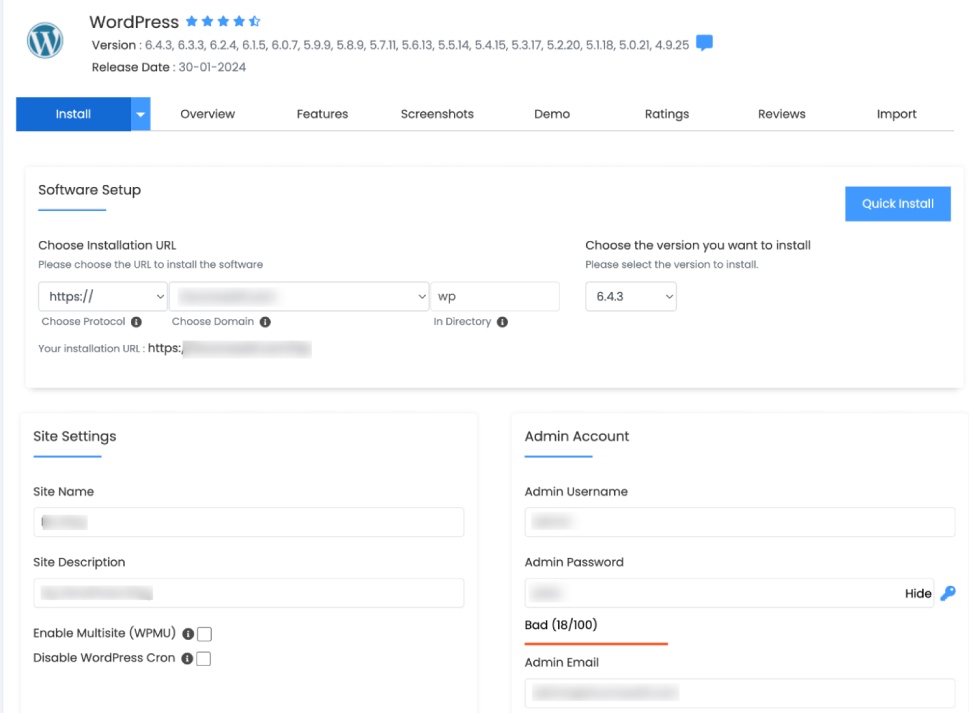
Once the installation is complete, you’ll receive confirmation along with login details for your WordPress dashboard. This dashboard is where you’ll manage your website’s content, design, and functionality.
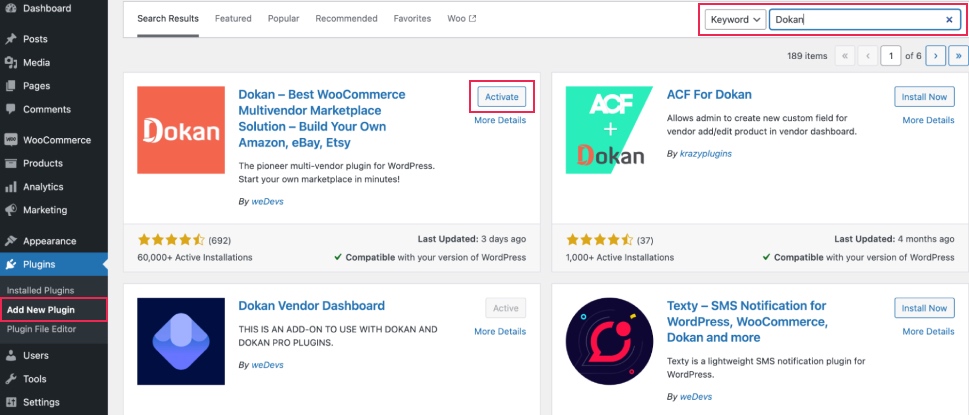
Dokan is the most popular multivendor solution with more than 50,000 active installations. Also, Dokan comes with dedicated support for creating digital product marketplaces.
Let’s check how you can install the Dokan plugin!
Navigate to your WordPress dashboard -> Plugins -> Add New Plugin, then type Dokan into the search box and install the plugin from the search result.
After activating the plugin, click on the Activate button to activate the plugin.
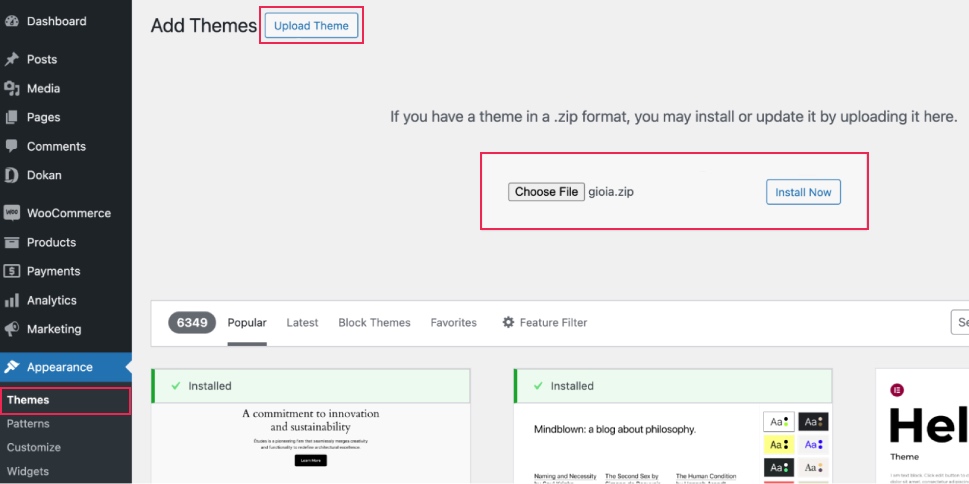
Gioia – Modern Fashion Shop theme. It is a feature-rich, superbly designed theme, completely WooCommerce and Dokan compatible. You can use this theme to give your multivendor marketplace a professional look.
Let’s see how you can install and activate this theme on your website.
Since Gioia is a premium theme, you have to purchase it first. After purchasing the theme, go to the WordPress dashboard -> Appearance -> Themes -> Add New Theme -> Upload Theme, then upload the theme as a .zip file.
Finally, install and activate the theme to use it on your website.
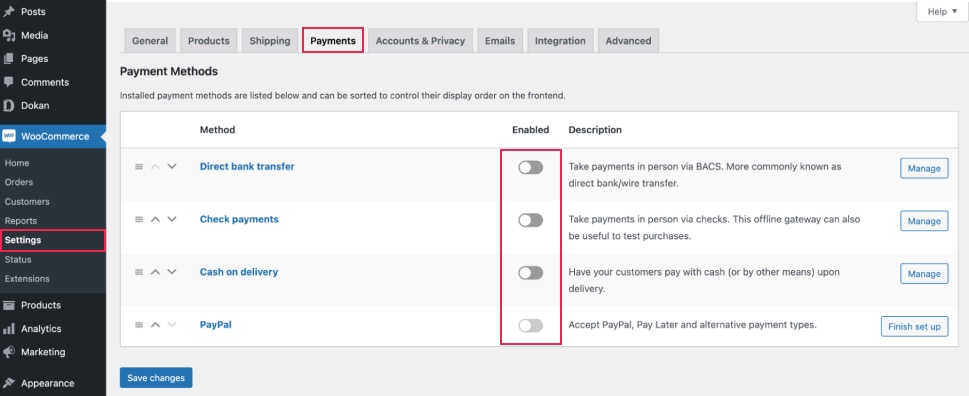
WooCommerce PayPal Payments” plugin and you will find the PayPal option here.
It’s an optional step for you. If you don’t want to be a seller on your own marketplace, you can skip this step. However, you’ll still get commissions from your registered vendors if you don’t have an admin store.
But if you want to earn more, you can create your store and start selling as a vendor from your own marketplace. Let’s check how you can do that!
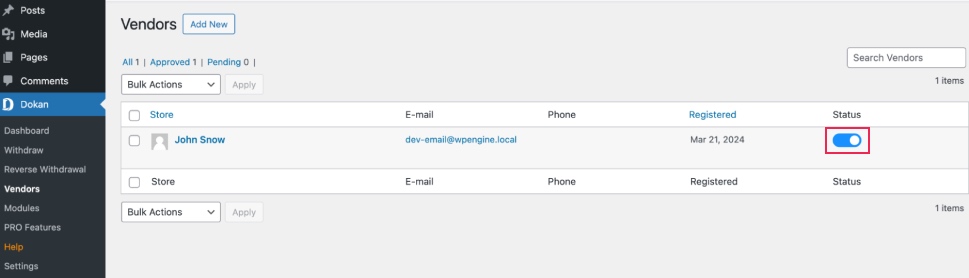
First, you need to enable yourself as a seller. To do that go to Dokan –> Vendors and enable selling by turning on the Status button.
As an admin, you’ll get two ways to upload products. You can upload products from frontend or backend.
Let’s check how to upload products from the backend:
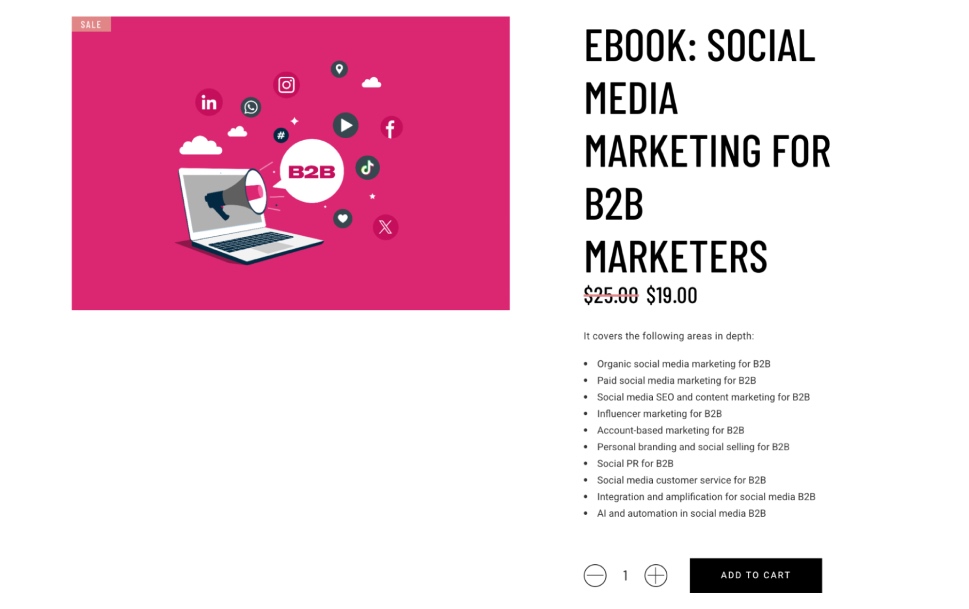
Go to your WordPress Backend -> Products -> Add New. There you’ll find options to add the product’s name, description, image, category, tags, price, and so on.
Note: Since it’s a digital product, don’t forget to click on the Downloadable box.
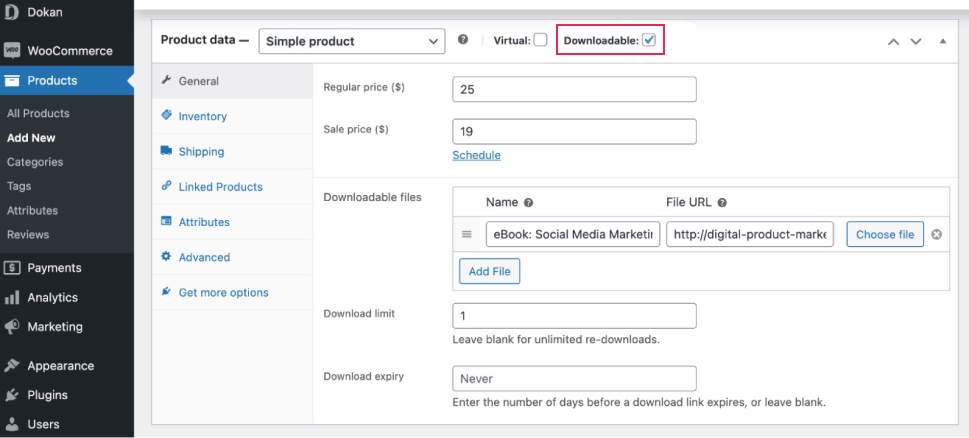
When you’re done, click the “Publish” button to publish the newly added product.
That’s how you can add products from the backend.
Now let us show you how to add products from the frontend. Your registered vendors will also add products following this same process.
Go to your WordPress Dashboard -> Visit Vendor Dashboard -> Products. Then click on the Add new product.
Now add the product title, image, price, etc to complete the process.
Don’t forget to tick the Downloadable box.
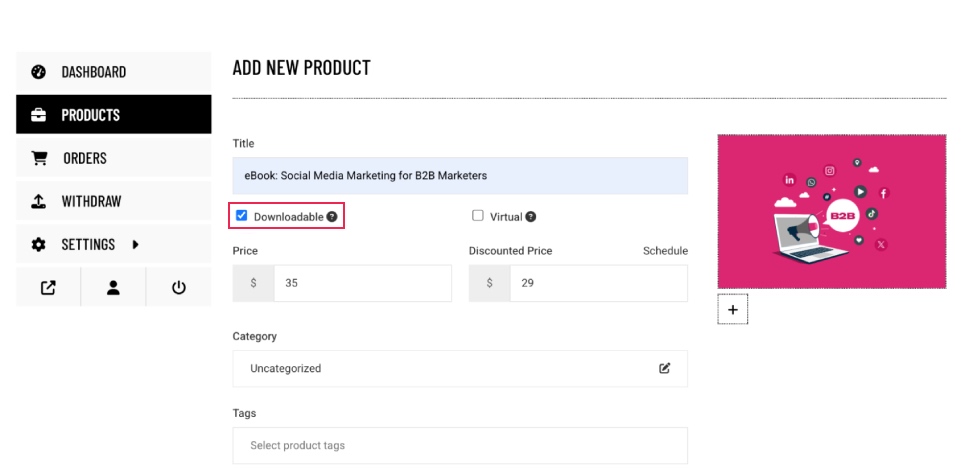
Once you’re done with the configuration, hit the Publish button to publish the product.
Here is the preview of the product that we have just added:
After adding all the functionalities and configuring your marketplace, you can invite vendors to sign up for your marketplace. To make sure vendors can sign up for your marketplace, enable the “Anyone can register” option from WP Admin –> General –> Settings.
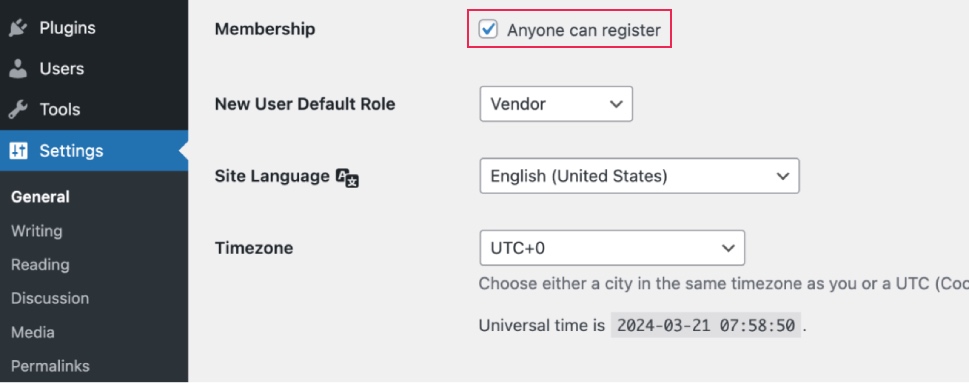
It will open the default registration form for vendors to sign up.
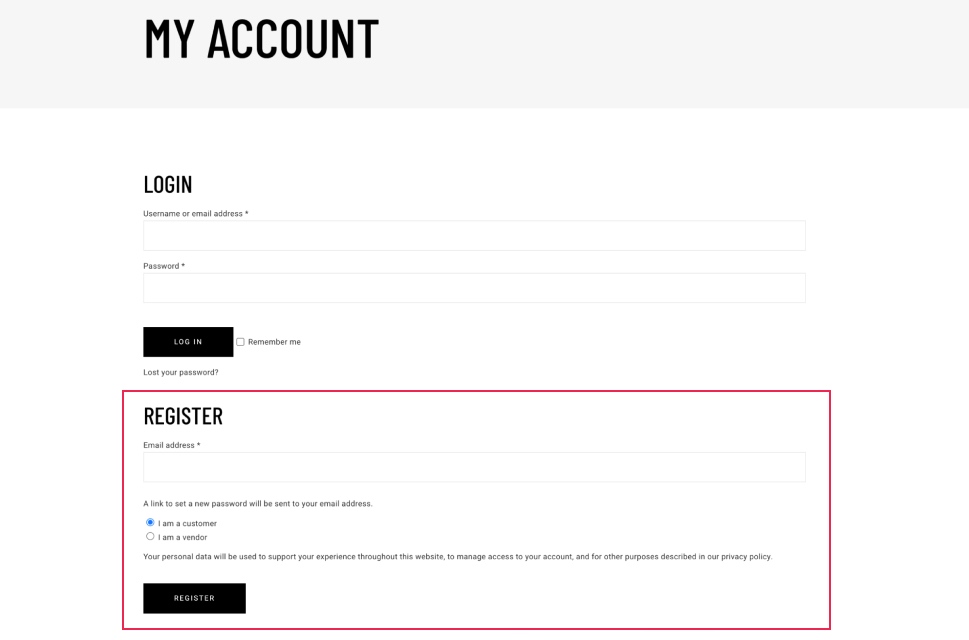
That’s all! This is how you can allow your vendors to register on your digital products marketplace.
You’ve built a beautiful marketplace, and stocked it with amazing digital products – now it’s time to promote it.
Here are some ways to promote your marketplace:
-
Social Media Savvy: Utilize the power of social media platforms like Facebook, Instagram, and Twitter. Share engaging content, showcase your vendors’ products, and run targeted ads to reach your ideal audience.
-
Content is King: Create valuable blog posts, articles, or videos related to your niche. This establishes you as an authority, attracts organic traffic, and positions your marketplace as the go-to destination for digital goodies.
-
Email Marketing Magic: Build an email list and send engaging newsletters featuring new products, promotions, and vendor spotlights.
-
SEO Optimization: Optimize your marketplace with relevant keywords to help potential customers find you in search engine results.
-
Influencer Outreach: Partner with influencers in your niche to spread the word about your marketplace to their dedicated audience.
-
Community Building: Foster a sense of community by creating forums or social groups where vendors and customers can connect and interact.
Bear in mind that promotion is an ongoing process. Track your results, experiment with different strategies, and adapt as needed. The key is to consistently put your marketplace out there and build relationships with your target audience.
By implementing these promotional tactics, you’ll attract vendors, and customers, and watch your digital marketplace flourish!
Easy to Create and Distribute
Digital Products: Creating digital products like eBooks, software, or online courses is a breeze. Once you’ve made them, you can distribute them instantly over the internet to anyone, anywhere. No shipping is required!
Physical Products: Making physical products often involves more steps. You’ve got to source materials, manufacture them, package them up, and then ship them out. It can be time-consuming and costly.
Low Management Costs
Digital Products: Since everything’s online, you don’t need to worry about renting a physical space or stocking inventory. Your main costs are usually related to creating the product itself and marketing it.
Physical Products: Running a business selling physical goods can be expensive. You’ve got rent, utilities, staff wages, and inventory costs. It can eat into your profits pretty quickly.
Scalability
Digital Products: Once you’ve created a digital product, you can sell an unlimited number of copies without any extra effort. Whether you’re selling to one person or a million, it doesn’t matter – it’s all digital!
Physical Products: Selling physical products has limits. You can only produce so many items at once, and you might need to invest in more resources if demand suddenly spikes.
Environmental Impact
Digital Products: They’re eco-friendly! No need for paper, plastic, or transportation – it’s all online.
Physical Products: Producing physical goods can have a big environmental footprint, from manufacturing processes to shipping emissions.
The digital product market is booming, and creating a marketplace with WordPress offers a fantastic opportunity to tap into this potential.
Here are the key takeaways to keep in mind:
-
Target the Right Niche: Identify a specific market for your digital products and cater your branding and marketing efforts to that audience.
-
Embrace the Power of Digital: Digital products offer convenience, scalability, and lower overhead costs compared to physical products.
-
Choose Your Domain Wisely: Your domain name is your online identity, so pick one that’s catchy, memorable, and reflects your brand.
-
Find a Reliable Host: Your hosting plan is the foundation of your marketplace. Choose a provider with features that meet your needs and scale as you grow.
-
WordPress Makes it Easy: Building your marketplace with WordPress is a user-friendly and cost-effective way to get started.
-
Choose the Right Multivendor Plugin: Multivendor plugin like Dokan make it easier to seamlessly manage your multivendor marketplace.
-
Promote, Promote, and Promote: Spread the word about your marketplace through various channels like social media, content marketing, and influencer outreach.
Now you know how to create a digital products marketplace using WordPress. So, create your own multivendor marketplace now! If you have any questions related to this tutorial, feel free to ask us using the comment box. Take care!


