Are you wondering how to create a video and image WordPress slider?
Sliders are a great way to show off your content and grab the attention of your website visitors. They can highlight important or featured content without taking up a ton of space on the page.
In this article, we will provide a step-by-step tutorial on how to easily create a video and image WordPress slider with Soliloquy.

Why Create a Video and Image WordPress Slider?
Let’s face it: content sliders are awesome. When done right, they conserve precious screen real estate and help engage visitors immediately upon landing on your page.
A video and image slider is a slider that contains both videos and images. Sometimes, you will want both videos and images in one slider rather than creating sliders for one or the other.
Let’s say you have a real estate website for various home listings. You can add pictures of the home along with a video walkthrough inside, giving users a more interactive experience.
Or you can use your content slider to add user testimonials or portfolio items. Some plugins may even offer an auto-play function so visitors will see the video immediately.
Beyond that, a slider is a great way to group content in one place. Rather than spacing your videos and images vertically, you can categorize them all in one slider.
If you want to showcase testimonials on your landing page, then it’s much better to have them in a slider so that visitors can watch them all at once rather than scrolling down.
You could also use a slider to showcase featured content so that you can direct traffic to your most important pages.
With that being said, we will be covering how to create a video and image WordPress slider on your website.
Step 1: Install a WordPress Slider Plugin
The easiest way to create a video and image slider is with Soliloquy. It is the best WordPress slider plugin, with over 900,000 installs. You can easily create simple sliders using images from the media library along with videos hosted on third-party platforms like YouTube.
When added to your website, the slider will look great on all devices, including laptops, desktops, tablets, and smartphones.

That’s why many websites use Soliloquy sliders on their most important pages, such as the home page, sales page, and landing page.
Best of all, you don’t have to write a single line of code to do it!
To get started, all you have to do is install and activate the Soliloquy plugin on your website. If you need help with installation, check out our guide on how to install a WordPress plugin.
The good news is that you can use the free version of Soliloquy for this tutorial.
That said, you may want to consider the Pro version if you need addons such as a lightbox feature, password protection, featured content, and other integrations like Instagram, Pinterest, and WooCommerce.
Step 2: Add Responsive Video Slides in WordPress
Upon activation, you will need to head over to Soliloquy » Add New in the WordPress admin area.
From there, you can give your slider an appropriate title.
Now, you are ready to add all of the media content to your slider. Here is where you can add both videos and images.
Go ahead and click on ‘Select Files From Other Sources.’
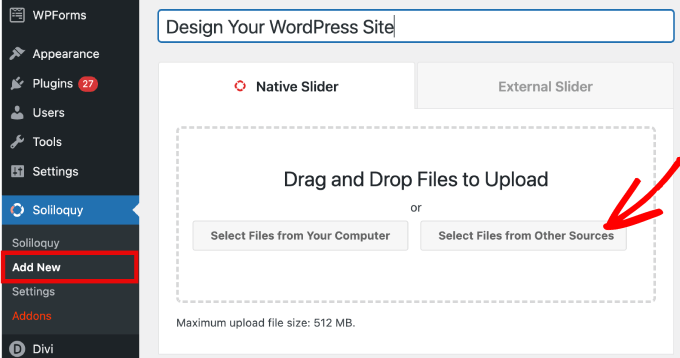
Note: While you could upload videos from your computer to WordPress, we don’t recommend it since it will slow down your site. Instead, you should use YouTube or another video hosting platform. Check out our list of the best tips to speed up WordPress performance to learn more strategies.
You will see a popup window appear with options to insert media files. We will start by inserting our video slides.
To do that, head over to the ‘Insert Video Slide’ tab. Give your video slide a title, video URL, image URL, alt text, and caption.
Make sure you grab the video URL from a third-party hosted platform like YouTube.
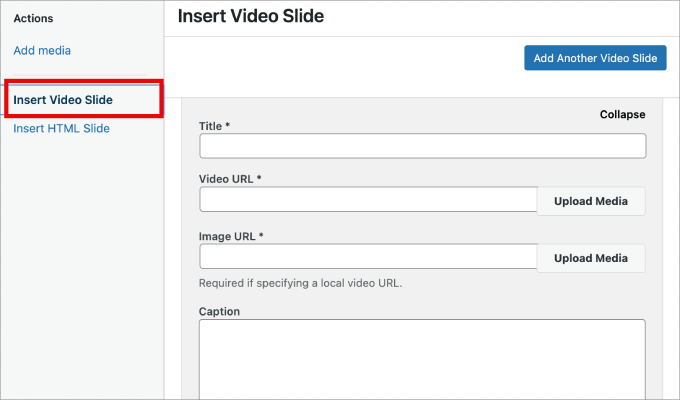
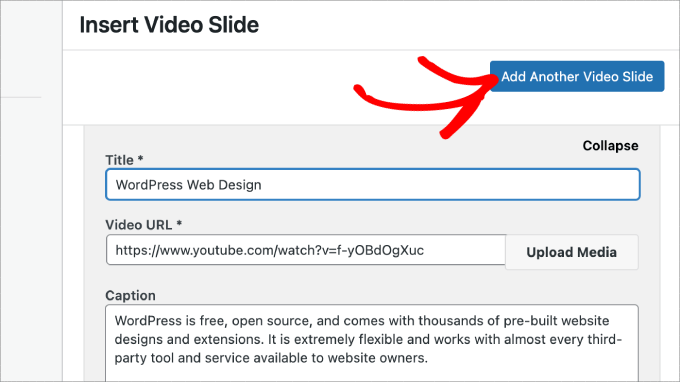
If you want to add more slides, all you need to do is simply click on the ‘Add Another Video Slide’ button.
Then, you will add in the information you need for this slide.
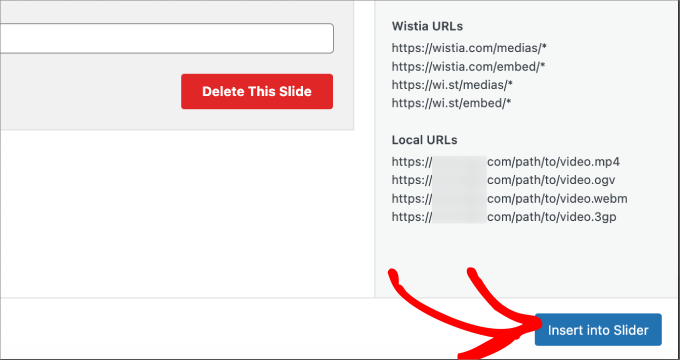
Once you’ve added all the video slides, go ahead and click on the ‘Insert into Slider’ button.
Your slides will appear at the bottom of the page to edit later if needed.
Step 3: Add Image Sliders in WordPress
Now that you’ve got all your video slides in place, you are ready to add image slides.
With image slides, you can just drag and drop pictures from your computer, which is the easiest way to add these files.
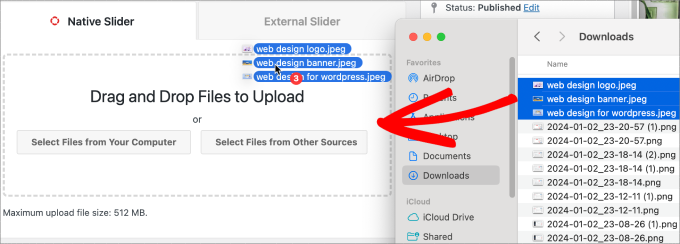
That said, you can also use the media library to add slides as well.
To add from your media library, simply click on ‘Select Files from Other Sources.’
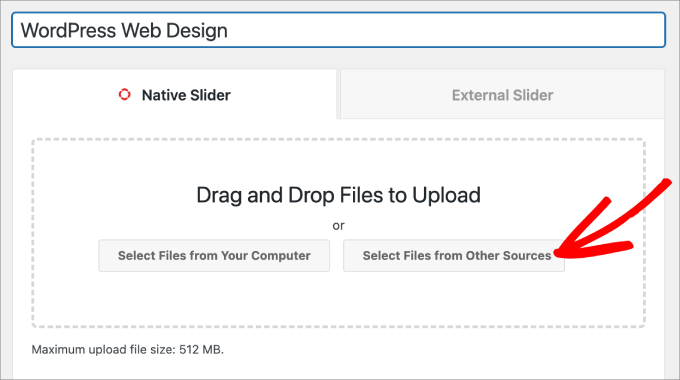
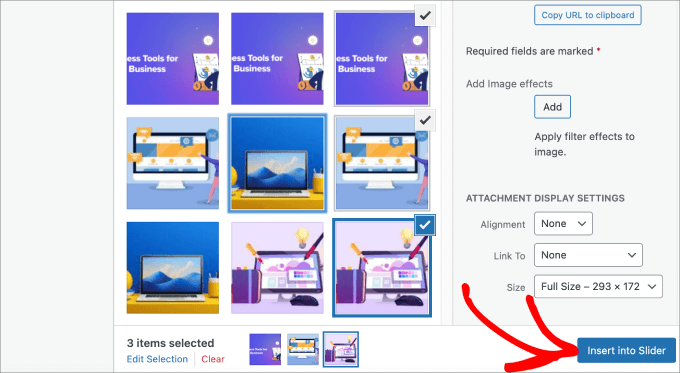
From here, the Add Media window will appear.
Go ahead and select the images you’d like to add. Then, hit the ‘Insert into Slider’ button.
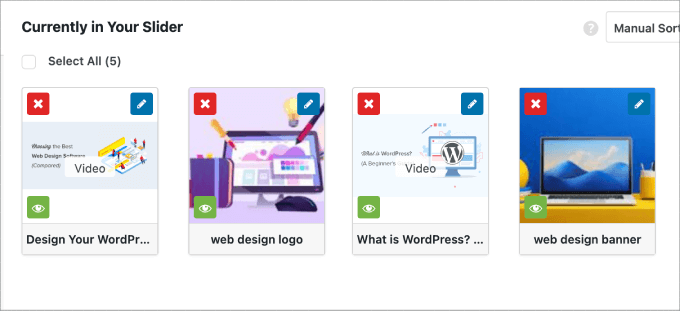
Once you are done adding image slides, you should see all of the slides in the bottom section of the slider.
Feel free to rearrange them in the appropriate order to fit your needs.
Step 4: Edit the Slider Settings
You can make minor adjustments to customize how the slider will appear to visitors. Scroll down and head over to the ‘Configuration’ tab to access the settings.
You can edit options such as the slider theme, image size, slider dimensions, and more.
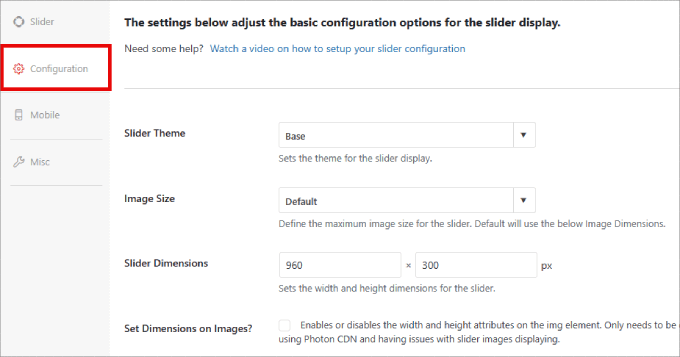
The slider theme affects the layout of the slide, so you can toggle the various options. If you have access to the Pro version of Soliloquy, then you can also install the Slider Themes addon for more customization options.
If you scroll down, you will see the ‘Autoplay Video’ option. You can check the box to enable autoplay so that the video automatically starts before the user can continue down the page.
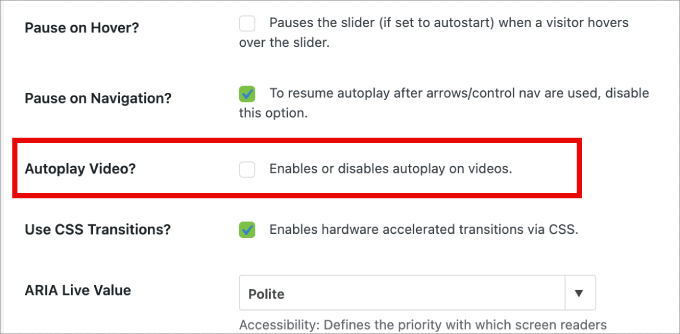
Autoplay can be great for product explainer videos or sales pages to engage users, reducing the chances they will click away.
After you’ve finished adjusting the settings, you just need to hit the ‘Publish’ button.
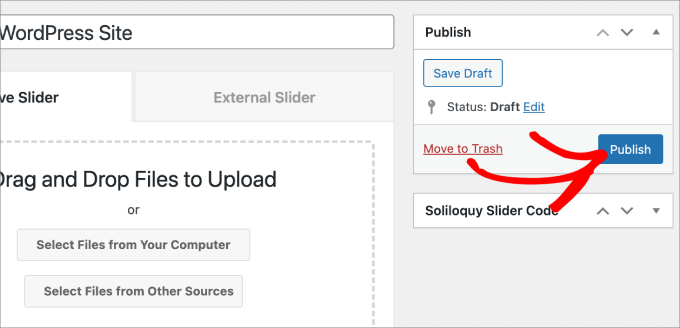
Step 5: Display Your Slider in Pages or Posts
Now, all that’s left to do is publish your slider on a page or post.
You could easily copy and paste the shortcode if you are still using the WordPress Classic Editor. For more information, follow our tutorial on how to add a shortcode in WordPress.
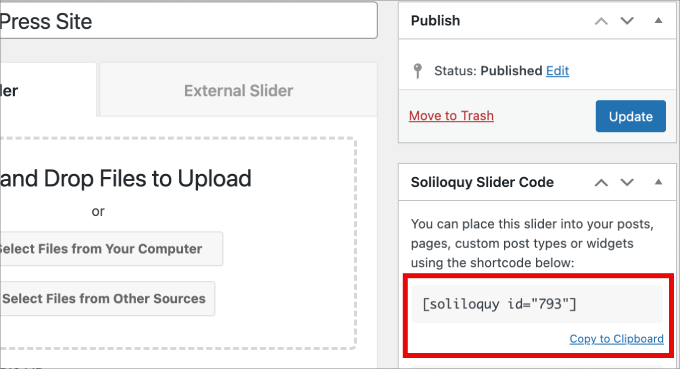
That said, if you are using the newer Gutenberg block editor, then Soliloquy has a block you can use that directly links to all of your sliders.
Just head over to Pages/Posts » Add New or edit an existing page/post.
Next, click on the ‘+’ icon and find the Soliloquy block.
From here, you can select the video and image slider you just created.
Once you are done, simply hit ‘Publish’ or ‘Update.’
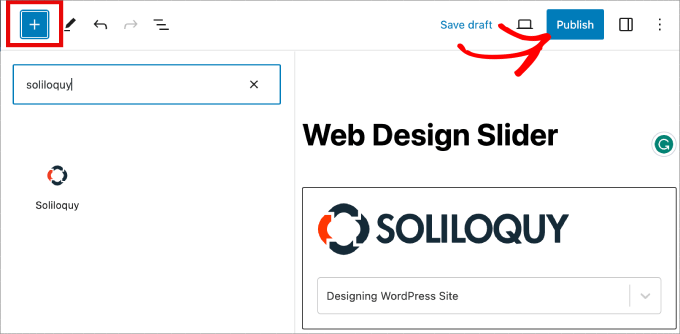
Then, you can preview your slider to make sure it looks good.
It should look something like this.

Bonus: Add a Lightbox to Your WordPress Sliders
Soliloquy has a wide range of addons that can enhance your sliders and provide a more interactive experience for visitors.
For example, if you are adding a slider, then there’s a good chance you will want to add a lightbox as well.
By adding the lightbox effect to your sliders on your WordPress website, you’ll be able to show off your content in a more professional way.
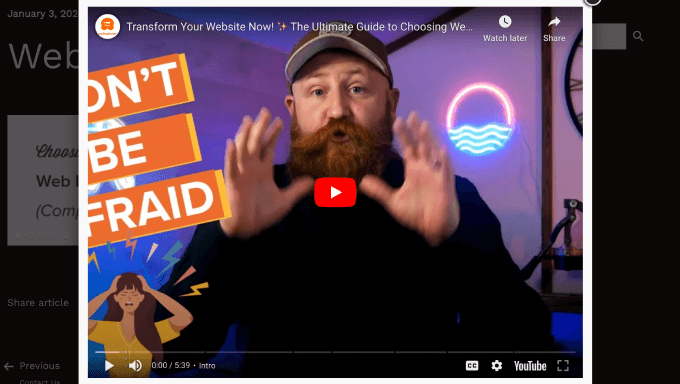
When users click on your images or videos, it will open in a popup window on your site. Lightboxes create a more immersive viewing experience for your visitors so they can view the content in greater detail. They can even download the media files on their computers or share the images on social media.
If you run a photography website, then the lightbox effect lets visitors view your images without the distraction of other elements on your site, which boosts engagement. For online stores, lightboxes will help to create more engaging product galleries.
To add a lightbox to your slider, just go to Soliloquy » Addons. Scroll down to the Lightbox Addon and click on ‘Install Addon.’
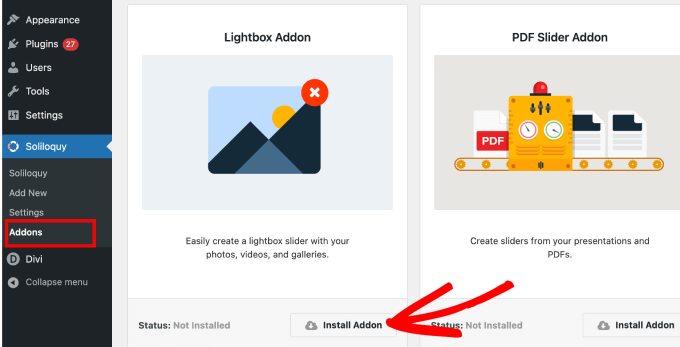
Once installed, it will appear in the settings for your slider.
From here, you will be able to adjust the effects and layouts, add navigation arrows, the theme of the lightbox, and more.
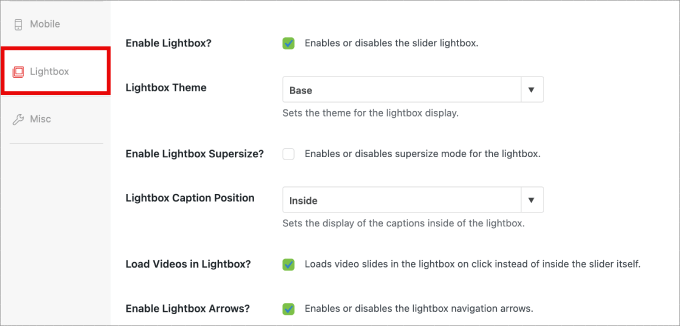
Once enabled, the lightbox should work automatically.
Preview your slider, and it should look something like this.
We hope this article helped you learn how to create a video and image WordPress slider. You may also want to check out our list of the must-have WordPress plugins and tools for business sites or our ultimate WordPress SEO guide to help you get more traffic to your website.
If you liked this article, then please subscribe to our YouTube Channel for WordPress video tutorials. You can also find us on Twitter and Facebook.


