
I’ve been using Mailchimp for the WPExplorer.com newsletter for many years. While it’s a powerful email marketing platform, it’s also gotten very expensive over time and includes countless features I’ve never needed or used. Because of that, I paused the newsletter for about a year while searching for a simpler, more affordable solution.
Recently, I discovered Flodesk (referral), which currently offers unlimited subscribers and emails at a flat rate. It has a clean, intuitive interface that’s simple to use and avoids all the unnecessary features often packed into more expensive email marketing platforms. Since Flodesk plans to retire their unlimited plan soon, I decided to lock in this pricing before it’s gone.
In this guide, I’ll show you exactly how I moved my subscriber list from Mailchimp to Flodesk. The process is pretty straightforward, and you don’t need to be super technical to do it. A few clicks, a quick file upload, and you’ll have your audience set up in Flodesk and ready to go.
Step 1: Export Your Subscriber List from Mailchimp
The first thing you’ll need to do is download your current email list from Mailchimp. This will give you a ZIP file containing a CSV file that you can import directly into Flodesk.
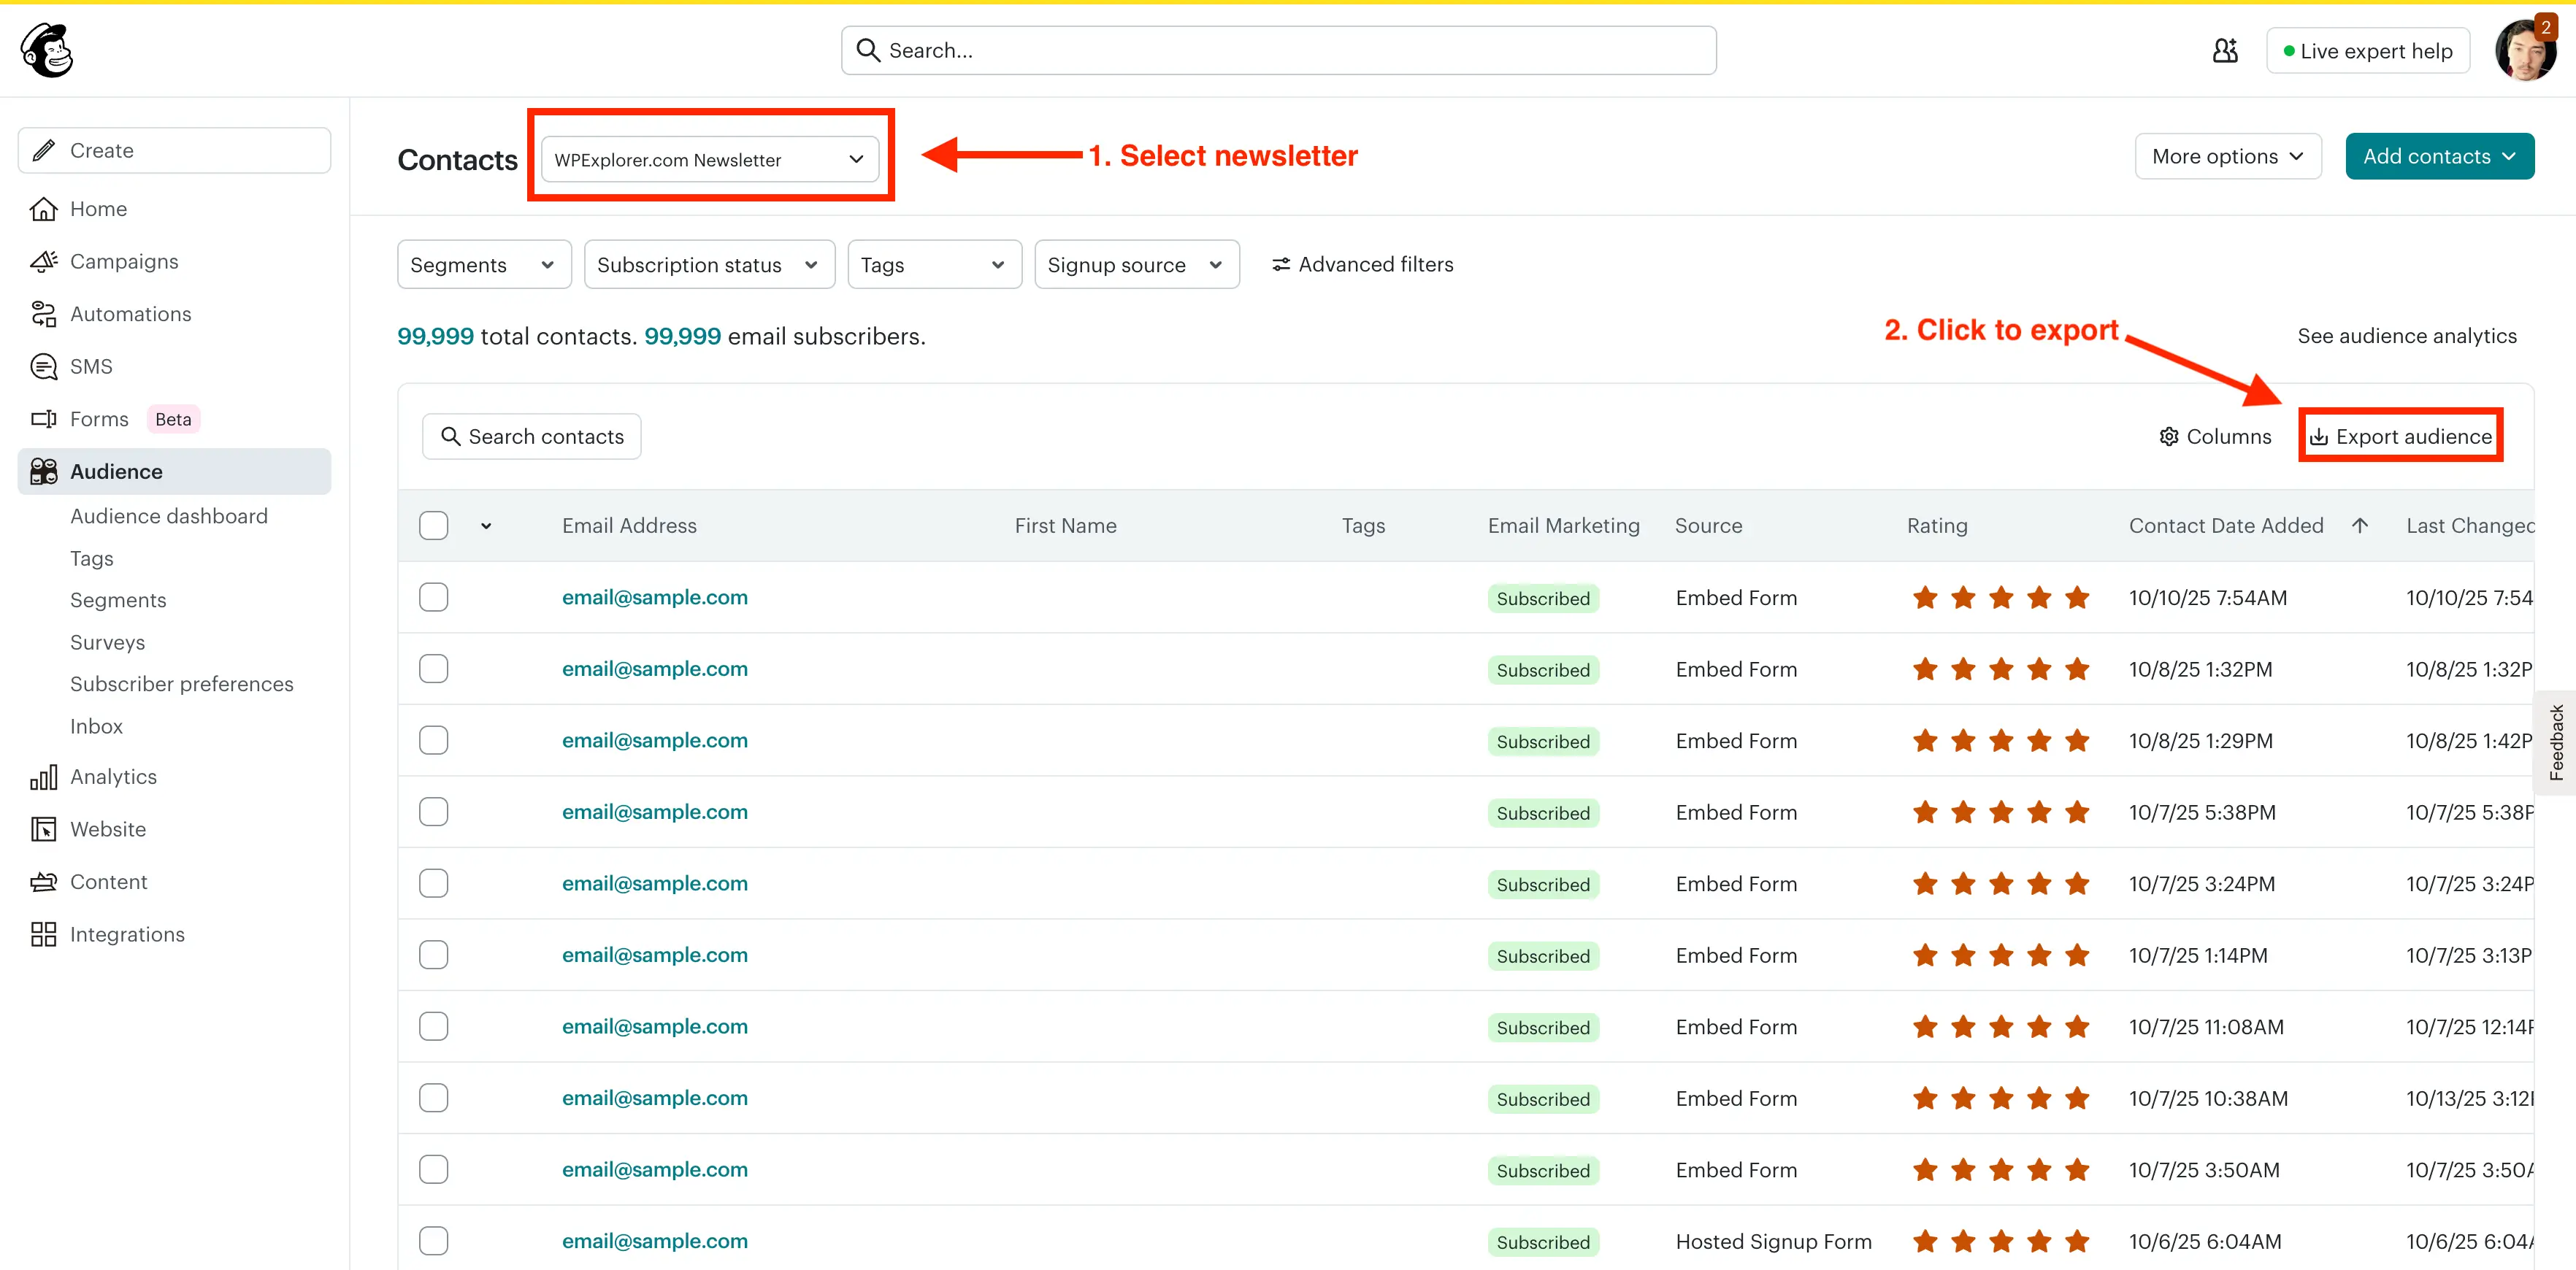
- Log in to your Mailchimp account.
- Go to Audience.
- Select your list from the dropdown at the top next to the word Contacts.
- Click the Export audience button.
- Mailchimp will prepare a ZIP file and send you an email with a link to download it.
Here’s a quick visual guide showing the steps in Mailchimp:
Step 2: Prepare the Mailchimp CSV for Flodesk
Once you’ve downloaded the export ZIP from Mailchimp, we’ll extract it to get the right file and optionally tweak the CSV to match Flodesk’s sample.
- Unzip the export file — it’s named
audience_export_{id}.zip. - Locate the CSV inside the folder, named
subscribed_email_audience_export_{id}.csv.
Modify the CSV File (Optional?)
I’m not entirely sure it’s necessary to tweak the Mailchimp CSV before importing it into Flodesk. Flodesk’s docs don’t really cover this, so I downloaded their sample CSV to see how they set things up. Matching my Mailchimp export to their sample seemed like a smart way to avoid potential issues.
Here’s what I did:
- Open the CSV in your preferred spreadsheet editor (Excel, Google Sheets, or Numbers).
- Rename the following fields to match Flodesk’s requirements:
Email Address→EmailOPTIN_TIME→Optin TimeOPTIN_IP→Optin IPCONFIRM_TIME→Confirm TimeCONFIRM_IP→Confirm IPLAST_CHANGED→Last Changed
- Delete any columns you don’t want to import. This helps slim down the file and speed things up for very large lists. I personally deleted the LEID and EUID columns which are unique ID’s used in Mailchimp.
- Export or save the edited file as a CSV
- In Excel, choose File → Save As → CSV (Comma delimited).
- In Google Sheets, choose File → Download → Comma-separated values (.csv).
- In Numbers (Mac), choose File → Export To → CSV.
- Make sure the file ends with
.csvand not.numbersor.xlsx.
Tip: Mailchimp includes many extra columns that Flodesk does not use by default. If you want to import them, you can map these fields to custom ones during the Flodesk import process.
Step 3: Create a New Segment in Flodesk
Before importing your contacts, you should create your segments in Flodesk. This way, if you have multiple contact lists in Mailchimp, you can import each one into its own segment. Using segments instead of a single massive subscriber list also makes it easier to manage your audience and create separate newsletters in the future.
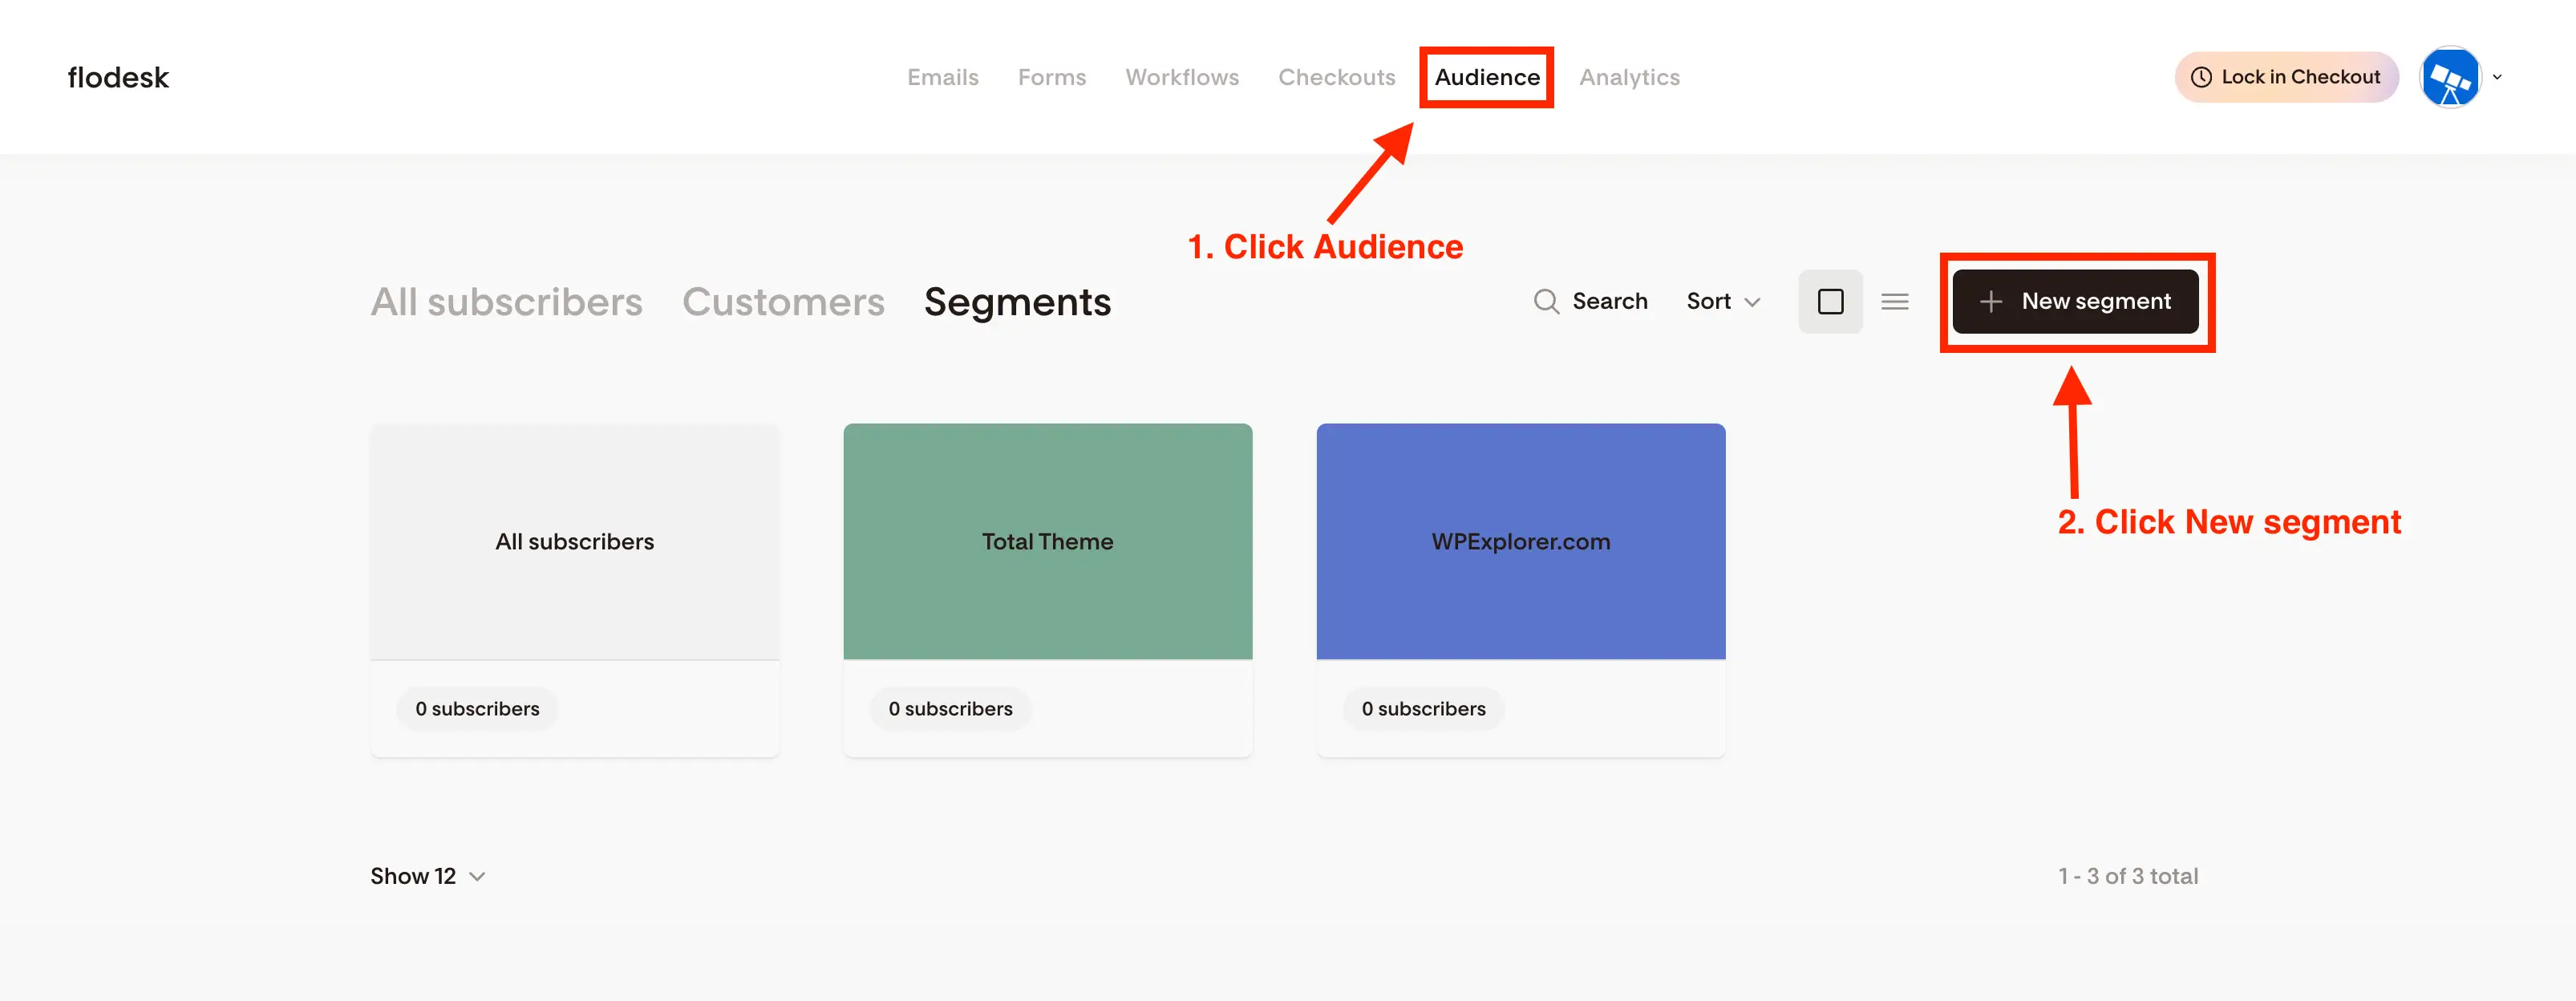
- Log in to your Flodesk account.
- Got to Audience.
- Click on the New Segment button.
- Give your segment a name and choose a color.
Tip: If you’re only importing a single list from Mailchimp, create a new segment with a descriptive name like “Imported from Mailchimp.” This makes it easy to recognize later.
Step 4: Import Your Subscriber List into Flodesk
Now that your segment is ready, it’s time to bring your Mailchimp contacts into Flodesk.
- Log in to your Flodesk account.
- Go to Audience.
- Click the segment you want to import contacts into.
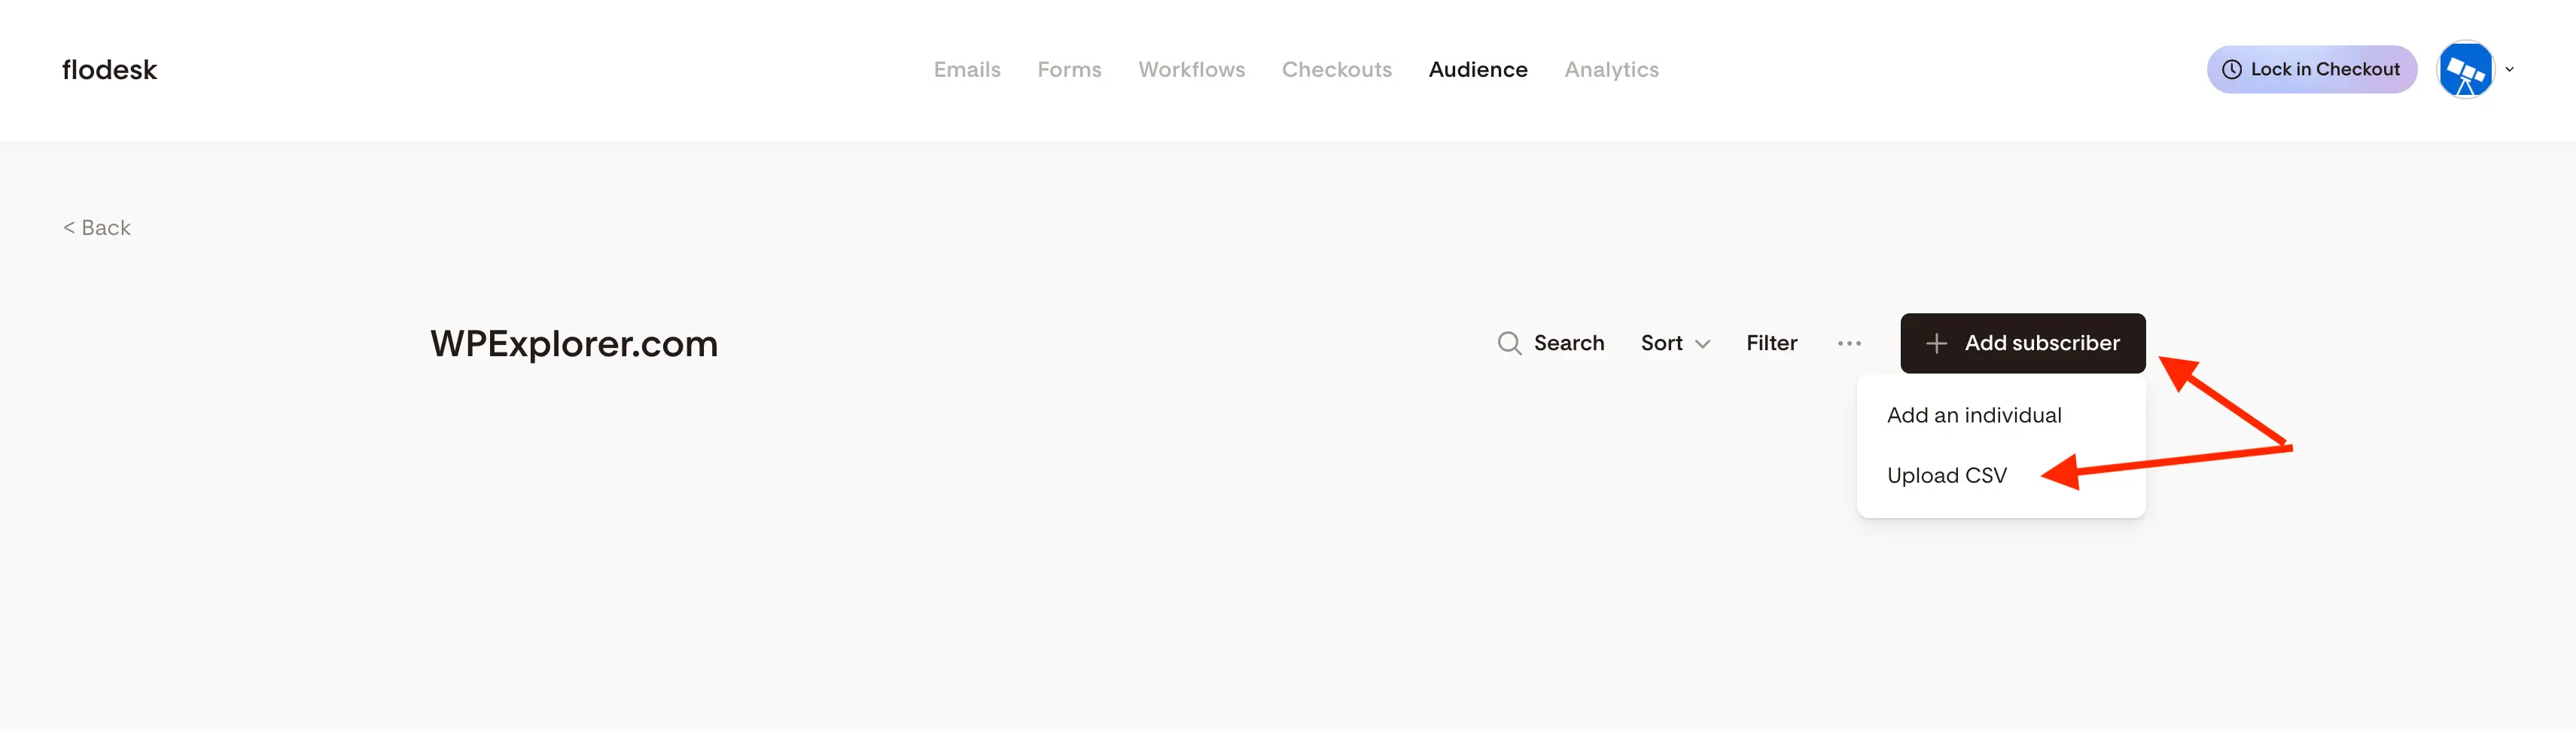
- Click the + Add Subscriber button.
- Choose Upload CSV.
- Locate your CSV file and drag it into the Flodesk upload window.
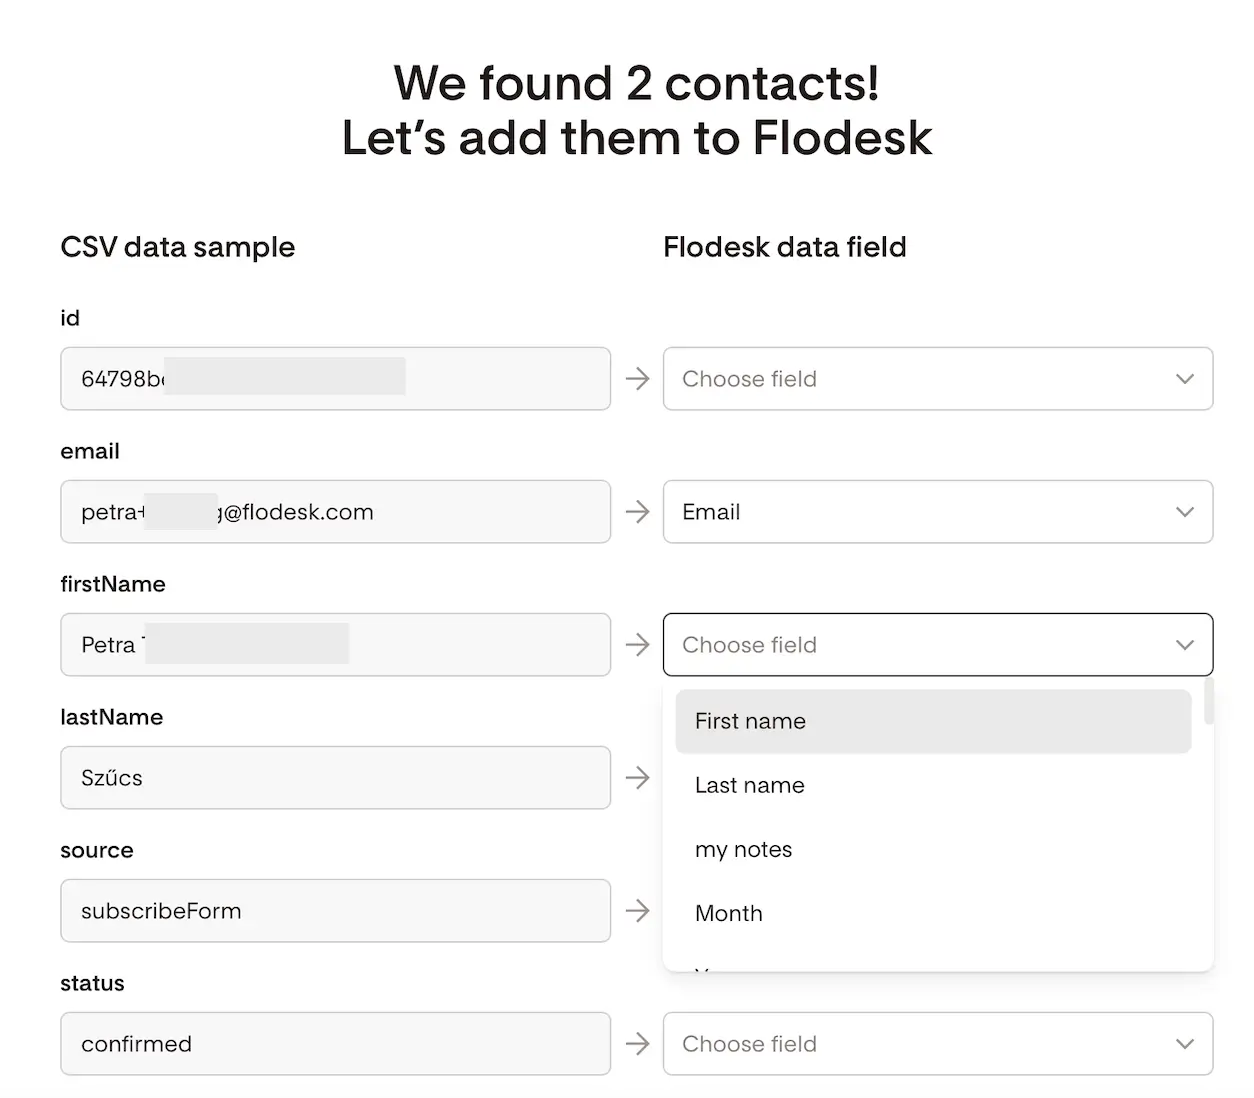
- Map the fields (Email, First Name, Last Name, etc.) to ensure the data imports correctly. For any field that doesn’t have a corresponding option in Flodesk, you can start typing to create a new one. For example, mapping Mailchimp’s Member Rating to a new field is a good idea, since you can use it later to send your first batch of emails to your highest-rated contacts.
- Click Continue to add your subscribers.
It can take a little while for Flodesk to process your list, so be patient. You’ll receive an email once the import is complete. At that point, you can go back to your segment and see all your imported contacts!
Here’s a screenshot showing how to get started with the import process:
And here’s a screenshot showing the window where you can map your fields:
Bonus: Warm Up Your Domain to Avoid Issues After Switching Newsletter Services
If you’re moving your newsletter to Flodesk (or any new email platform), it’s a good idea to warm up your sending domain before blasting emails to your full list. Warming up helps establish a good sender reputation with email providers and improves deliverability, so your emails don’t end up in spam.
Taking the time to warm up your domain will help ensure your newsletters land in inboxes and get the engagement they deserve.
A few simple ways to warm up your domain:
- Start small – Send emails to a small portion of your most engaged subscribers first.
- Gradually increase volume – Slowly increase the number of recipients over days or weeks.
- Engage with your audience – Encourage opens, clicks, and replies to signal that your emails are wanted.
- Monitor results – Keep an eye on bounce rates and spam complaints as you ramp up.
Remember above when we mapped Mailchimp’s Member Rating to a new field? You can use that information to warm up your domain gradually by sending your first emails to your highest-rated contacts. This helps establish a good sender reputation and improves deliverability before emailing your full list.
Conclusion
Migrating your email list from Mailchimp to Flodesk doesn’t have to be stressful. By exporting your contacts, optionally cleaning up the CSV, creating dedicated segments, and importing carefully, you’ll have your audience organized and ready in Flodesk in no time.
Remember to warm up your domain gradually, starting with your most engaged subscribers (like the ones you marked using Mailchimp’s Member Rating) to establish a strong sender reputation and improve deliverability.
I’m so glad I locked in this budget-friendly newsletter service while I still could! If you’re thinking of making the switch yourself, be sure to use the link at the top of the article, it gives you 50% off your first year and also supports me a little bit.


