Deemerwha studio / stock.adobe.com
Backing up your WordPress website is one of the best ways to ensure its security. If something goes wrong, restoring a recent version of your content, extensions, and settings is often much faster and easier than fixing a broken site – “recent” being the operative word here.
Fortunately, if you don’t have time to back up your site every day manually, you can automate the process. Scheduling a regular WordPress backup to Dropbox is one of the easiest ways to make that happen, and it’s possible with help from the right plugin.

In this article, we’re going to discuss why regular backups are important. Then we’ll show you how to save a WordPress backup to Dropbox in three steps. Let’s get to work!
In This Article ⌛
Why Backup WordPress (Often) ⏱️
If you run a website, you should back it up in its entirety on a regular basis, whether you use WordPress or not. Having copies of your site on hand can ensure your data remains safe if there’s a critical error or security breach.
[bctt tweet=”☝️ Backing up your WordPress site should be a top priority. #WordPress” username=”thewpbuffs”]
If you have a backup of your site, you can easily restore it. However, this failsafe is most valuable when the copy you’ve saved is a recent one. Restoring outdated content, settings, plugins, and themes means you’ll still have a lot of cleaning up to do.
To that end, it’s wise to create a backup schedule. Exactly how often you should make a new copy depends on how much your site changes. Large, dynamic sites may need to perform this task daily, or multiple times a day. Smaller static sites may be able to go as long as a month without a new backup.
Many hosting providers can make regular backups for you. However, if your server becomes compromised you may lose your copies as well as your live site. For that reason, it’s smart to save your WordPress backup to an external location such as Dropbox:

Ideally, you’ll also choose a secondary location for storing backups in case your cloud storage platform becomes unavailable.
How to Save a WordPress Backup to Dropbox (In 3 Steps) 3️⃣
Automating WordPress backups to Dropbox can save you from having to remember to carry out this key task, and help you recover your site if it becomes compromised. Fortunately, you can do so in just three steps.
It’s important to note that the steps below assume you already have a Dropbox account up and running. If you don’t, go set one up, then come back and jump into Step 1.
Step 1: Choose a WordPress Backup Plugin
If you want to automate WordPress backups on your own, a plugin is the easiest way to do so. There are several to choose from:
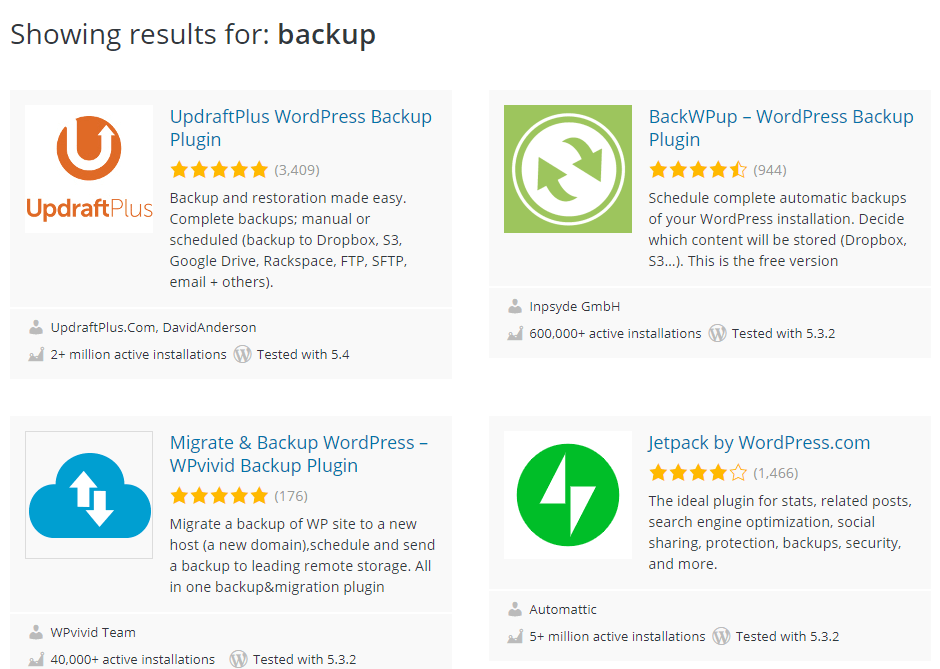
UpdraftPlus is one of the most popular. It enables you to create copies of your WordPress files and database with a few clicks. You can also use it to schedule backups, and it’s compatible with multiple cloud storage platforms, including Dropbox:

For the rest of this tutorial, we’re going to focus on how UpdraftPlus works with Dropbox. The process is fairly similar for most plugins and storage platforms, so you can likely follow along even if you use a different solution.
Step 2: Connect UpdraftPlus With Dropbox
Once you install and activate UpdraftPlus, you need to configure it to pair with Dropbox. First, go to Settings > UpdraftPlus Backups in your dashboard and select the Settings tab. Here, you’ll find a list of remote storage options:
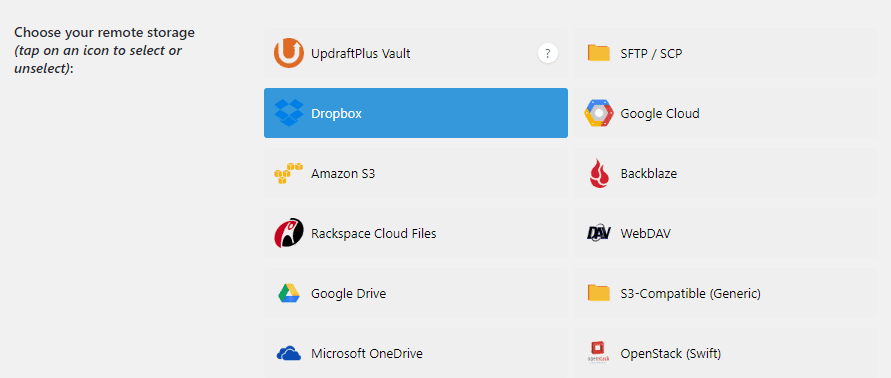
Select Dropbox and scroll down. UpdraftPlus will ask you which files you want to include in your backups. You can also apply exclusion rules to leave certain ones out:
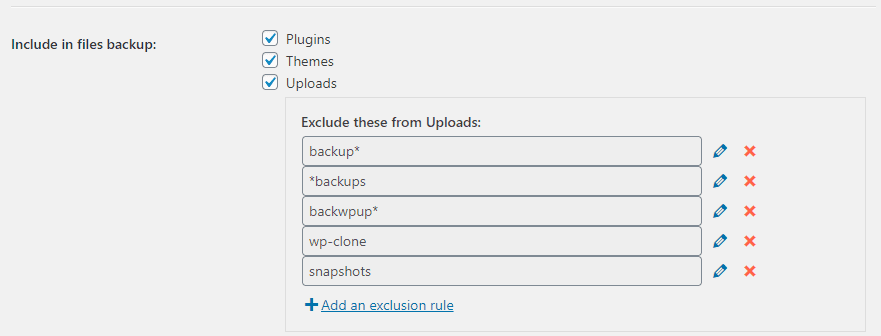
By default, UpdraftPlus will include all files and folders within your WordPress installation, aside from its own backups. Save the changes to your settings. Then you’ll be prompted to authenticate your Dropbox account. Click on the indicated link:

On the next page, log in to Dropbox:
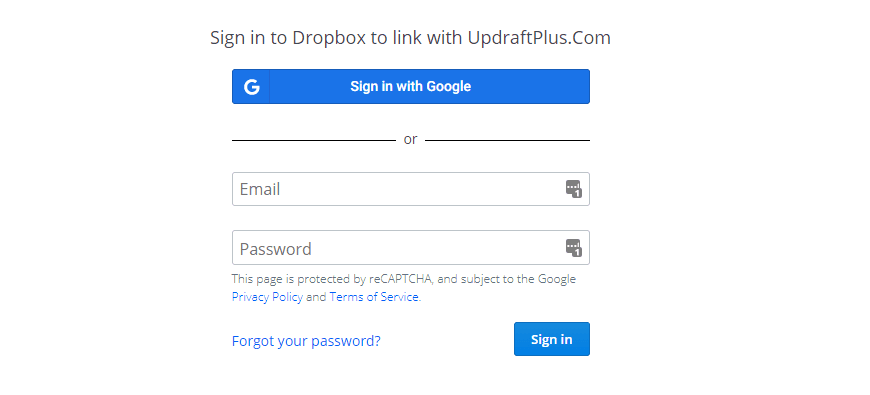
Finally, confirm you want to authorize the plugin to save data to your account. Dropbox will then send you back to WordPress.
Step 3: Automate the Backup Process
At this point, you can create a full WordPress backup and save it to Dropbox by going to Settings > UpdraftPlus Backups > Backup/Restore and clicking on the Backup Now button:

Depending on how large your website is, the process may take a few minutes or longer. Once it’s done, you’ll see your recent copies under Existing Backups. Notice the Dropbox icon, which indicates your backup was stored successfully:

If you click on the Restore button, UpdraftPlus can access the necessary resources without requiring you to leave WordPress. However, you can also view your backups in your Dropbox account:
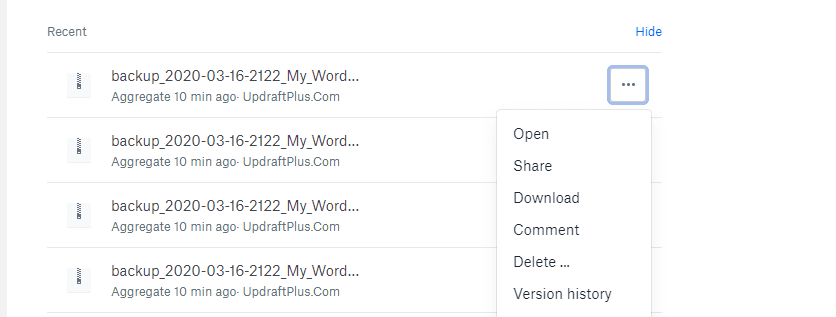
All that’s left is to return to your UpdraftPlus Settings page and automate the process. Look for Files backup schedule and set the dropdown to the appropriate interval, then do the same for your database:
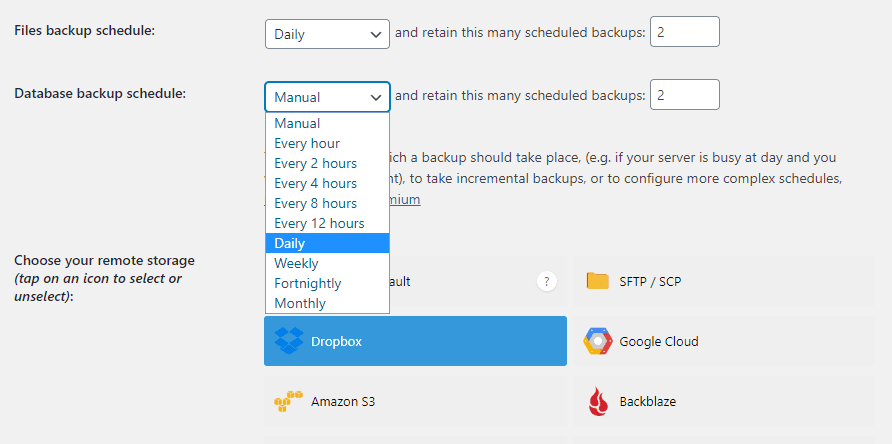
If you’re concerned about running out of storage due to frequent backups, you can limit the number of copies UpdraftPlus keeps at one time. However, keep in mind that it’s wise to have a few of your most recent copies handy. Remember to save the changes to your settings when you’re done.
Wrapping Up 🏅
Automating WordPress backups to Dropbox is a smart move for your site’s security and longevity. Fortunately, you can do so with minimal effort using a plugin such as UpdraftPlus.
As we covered in this post, you can back up your WordPress site to Dropbox in three steps:
- Choose a WordPress backup plugin.
- Connect your backup plugin with Dropbox.
- Automate the backup process.
If you want help from professionals, we can help you secure your website from top to bottom with our WordPress Care Plans. At WP Buffs, we take care of everything from backups to performance optimization!
Want to give your feedback or join the conversation? Add your comments 🐦 on Twitter!
Image credit: Steve Johnson.


