
It’s safe to say that the space between coming up with an idea for a website and creating that website has never been smaller. These days, we can do a lot with very few resources and basic coding knowledge because big site builders such as WordPress make it easy for us.
WordPress isn’t doing it all on its own. It is trying, though, as we’ve seen from the release of the Gutenberg editor. But what makes WordPress such an easy system to use for creating a website are page builders.
The Elementor plugin has quickly become one of the most widely used WordPress page builders in the world. And today we’ll find out just what makes it so special and show you how you can use it to create stunning WordPress pages. In our beginners Elementor tutorial, we’ll cover the following topics:
-
What is the Elementor Page Builder
-
How to Install and Set Up Elementor
-
The Anatomy of the Elementor Page Editor
-
How to Navigate the Elementor Panel
-
What is the Elementor Editing Screen
-
How to Customize Elements in Elementor
-
How to Make a Page with Elementor
predesigned templates, a popup builder, and more.
Elementor is also becoming more frequently included in bundles with premium themes. We’ve integrated Elementor with Bridge, our flagship theme, so our customers can choose between it and WPBakery, a veteran page builder. But that’s not all. We’ve also started shipping more WordPress themes with Elementor, where it’s the main page builder plugin.
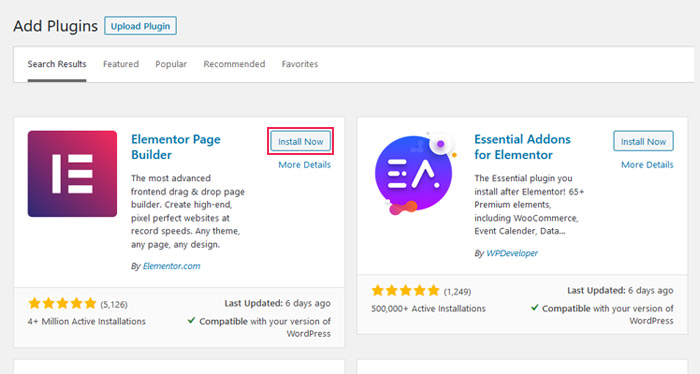
plugin installation steps you would for any other plugin. Find Elementor in the plugin finder, click the “Install” button, and then click “Activate.”
After you’ve activated the plugin, you can adjust Elementor’s setting. You don’t have to, however, because it comes set up well out of the box. Still, let’s go through the options you’ll be able to access right from the dashboard.
Settings
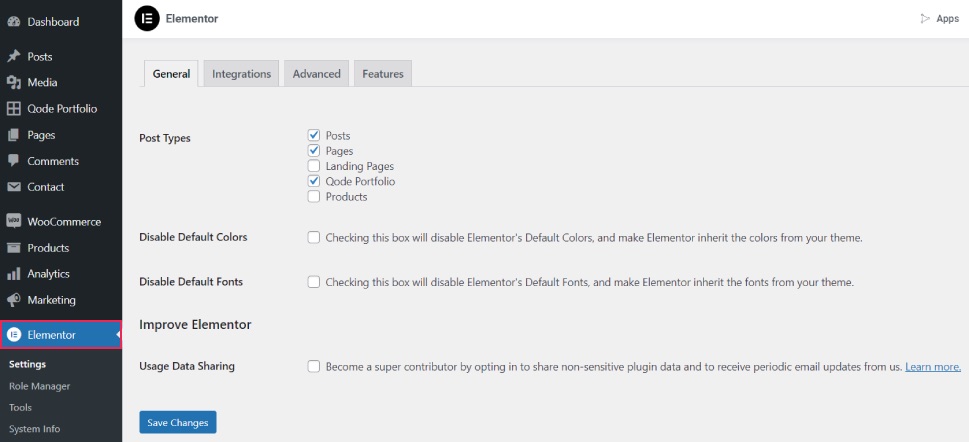
In the General tab of the Elementor settings, you’ll be able to select the post types you plan to use, as well as disable default colors and fonts — something you should do if you want your website to have the colors of the theme you’re using.
Under the Style tab, you’ll find options that include setting default generic fonts, tablet and mobile breakpoints, as well as a checkbox to enable image Lightbox. You’ll be able to access some of these options later, from within the editor.
The Advanced Tab is filled with things only advanced users should be concerned with. This is where you set the CSS print method, switch the loader method when troubleshooting server issues, and enable SVG support.
Under Features, which is a relatively new addition to the Elementor settings interface, you will find a range of new and “experimental” features, some of which have already become permanent. Here you can toggle on or off features and “experiments” such as Grid Container or Editor Top Bar, as well as stable features, in our case Optimized DOM Output, Improved CSS Loading, and the Flexbox Container.
Role Manager
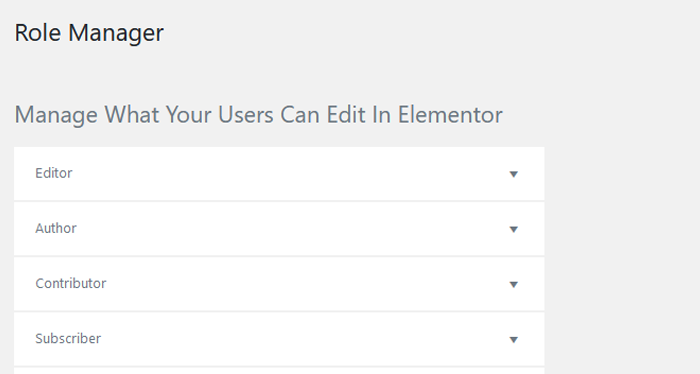
Different types of users can have different levels of access to your website, depending on their role. Elementor gives you some rudimentary role managing options, allowing you to exclude users from having access to the editor. If you have the Pro version, you can also limit the users’ access only to content.
Tools
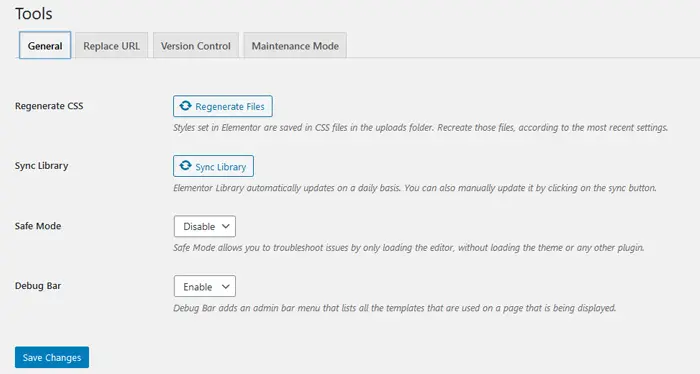
The general tools will let you regenerate the CSS on your website and sync your Elementor library manually If you need to. This is where you enable the safe mode and the debug bar, both of which come in handy when troubleshooting your website.
The Replace URL tab is a place where you can, as the name says, replace the URLs if you changed the site address. In the Version Control tab, you can roll back to a previous version of Elementor and become an Elementor beta tester. Neither of these things is something you should do without a clear reason.
In the Maintenance Mode tab, you get all the controls over the website’s maintenance mode you’ll ever need. Besides enabling maintenance mode, you can set who can access your website while it’s enabled and select or create a template for the maintenance mode page.
The remaining settings are either informative or accessible only by Pro users. Under System Info, you’ll see the information about the server environment, the WordPress version, the theme you’re using, the plugins you have installed, and more. Getting Started is an Elementor tutorial section with a button that leads you straight to creating a new page. Finally, Custom Fonts and Custom Icons are two sections you can use if you have the Pro version of Elementor to add custom fonts and icons.
How much you decide to dig into these settings is up to you. For some, such as the ones you find under the General settings, getting to them early would be a good idea. Others, such as the ones you find under the Tools settings, are only there for certain occasions.
View Collection
Bridge
Creative Multi-Purpose WordPress Theme

Stockholm
A Genuinely Multi-Concept Theme

Startit
Fresh Startup Business Theme
Bridge
Creative Multi-Purpose WordPress Theme
Stockholm
A Genuinely Multi-Concept Theme
Startit
Fresh Startup Business Theme
understand landing pages, you probably know that there are certain things a landing page needs to efficiently do its job. It’s a completely different thing, however, to create an “About” page, because that page will require an entirely different set of elements.
So the bottom line here is that, before firing up Elementor, you first need to figure out every piece of content you’ll want to have on the website. Next, you need to figure out how to best spread that content across different sections. Then, you can use one of three different ways to create a page.
1. Do It From the Grounds Up
With this method, you’re relying on what you’ve learned in this Elementor tutorial to get you through creating your first page. Don’t worry — it’s easy and can be lots of fun. Just remember to approach the content of your page one element at a time. Let’s see how to create a “team member” section for your “About Us” page, for example.
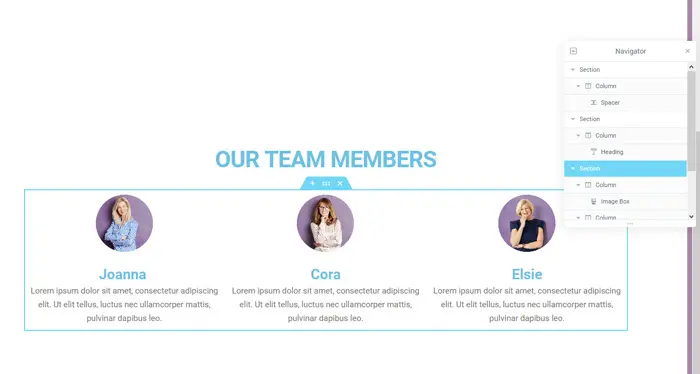
As you can see from the Navigator, we’ve used three sections here. The topmost contains one column and a spacer widget to separate this area of the page from the rest of it. The second section contains one column and a heading widget, while the third section contains three columns, each equipped with an image box widget.
We’ve slightly changed the bottom margin of the second section to make more room between the heading and the image boxes, and that’s it. If you have the time and curiosity, you can experiment all you want with your website. Elementor makes it very easy. One section after another, and you’ll have yourself an awesome page.
2. Use Pre-Made Blocks
If you don’t want to spend too much time on building sections for your website, you can always rely on a premade block to, at the very least, light a fire under the heels of your imagination. So instead of pressing the “plus” button in the section-to-be, you can press the “folder” button and go to the Elementor library.
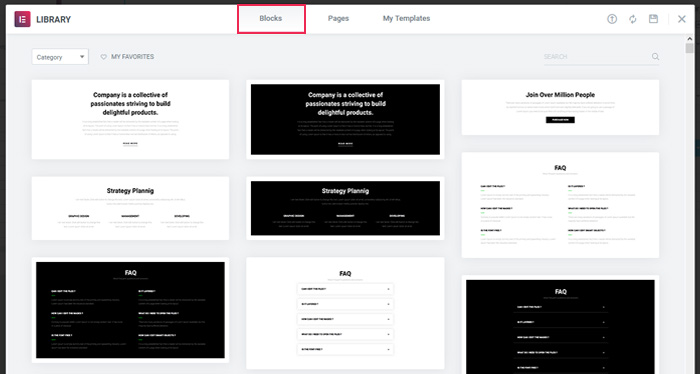
In the library, you’ll find whole pre-made blocks you can download to your page and then further customize to your liking. It’s a great way to get your creative juices flowing, although it’s just as likely to stifle your creativity and get you to settle for something that wasn’t custom-made for your website. You will need an Elementor account to access blocks, and some of them are only accessible by Pro users.
3. Use Premade Pages
If you want to spend even less time on building your website, you don’t even have to arrange the blocks on your page. You can simply go to the Elementor library and pick a whole premade page for your website. Some pages are available only to Pro users, and all of them require you to create an account for free.
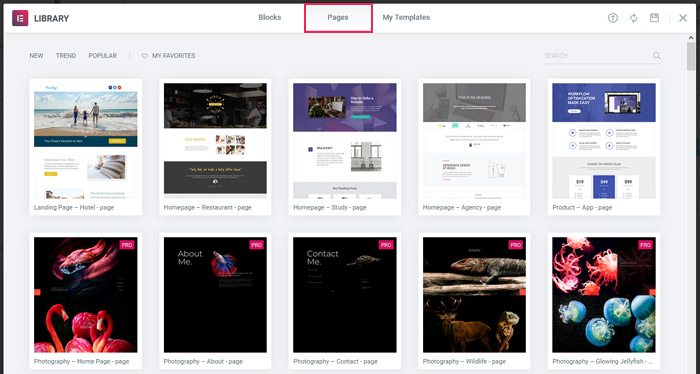
For someone who is in a hurry, or who doesn’t see the intrinsic value in having custom-made pages for their website, or who simply saw a layout they liked, pre-made pages are a great option. They are hands down the easiest way to populate your website with all the pages it will ever need.
Let’s Wrap it Up!
Most of us wouldn’t get too far in the digital world if it weren’t for entities such as WordPress that actively try to make it easier for everyone to participate. But even WordPress has its blind spots, which is why we have such a lively and vibrant plugin scene.
Page builders are among the more important members of that scene because, without them, it would be prohibitively difficult for most people to create a WordPress website. But if there’s a page builder involved, and if it just so happens the builder in question is Elementor, you can rest assured that the website will be up and running quickly and smoothly. And if you need some help along the way, you can always come back to this Elementor tutorial to get it.


