Most websites need a way for customers, potential clients or regular readers to reach out. You could buy a theme that has a custom contact page built-in, or try to code a contact page yourself, but these options are typically either costly or complicated. You don’t have time for that – which brings us to Contact Form 7.
What is Contact Form 7?
Contact Form 7 is a free WordPress plugin that you can use to create a variety of contact forms for your website. Not only is this plugin free, but the custom shortcode for each contact form you create makes it easy to add your contact forms to any post, page or widget area.
We love this plugin so much that practically every WPExplorer theme supports it, even our top selling premium WordPress theme Total. And other developers agree, as you’ll be hard pressed to find a theme it isn’t compatible with.
Why Choose Contact Form 7?
So now that you know what Contact Form 7 is, your next question may be why this plugin? There are tons of awesome contact form plugins to choose from so what makes Contact Form 7 the right choice?
Well first, it’s free – as in there is no premium version. So compared to other “free” form plugins you won’t see tons of up-sells built into the main dashboard which is really nice. It’s also customizable. There are also easy ways to tweak your forms with available parameters or with a bit of CSS. And as we mentioned, it’s compatible with a very wide range of free and premium themes, so should you decide to change your theme later on your contact forms should remain functional.
With that cleared up, let’s take a look at how you can use Contact Form 7 on your WordPress site.
How to Get Started with Contact Form 7

Installation is easy. Just navigate to Plugins > Add New and use the Search option to find the Contact Form 7 plugin. Install and activate the plugin.
Once active you should see a handy dandy “Contact” menu item in your WordPress dashboard. Click on it to go your main contact form management page.
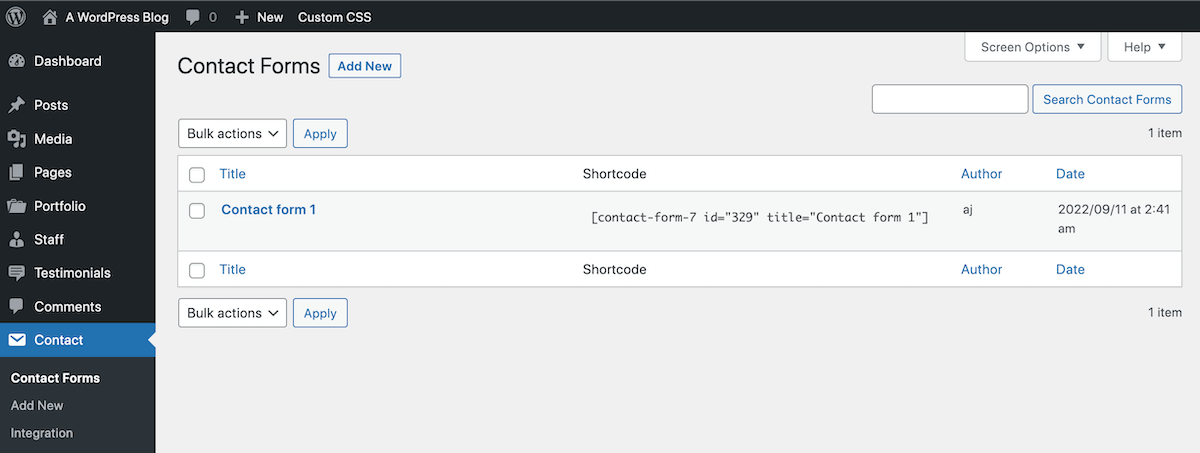
The plugin authors were nice enough to include some helpful information in the dashboard – feel free to dismiss this notice at any time. By default there will also already be an example “Contact form 1” waiting for you. We recommend deleting this form so you can start from scratch.
Add New to create your first contact form. You’ll see a lot of options when your contact form opens. Don’t be scared – I promise it’s easy.
First you’ll notice a box at the top of the page. This is where you can change the name of your form. We recommend naming the form something that makes sense to its purpose – like where or how you will be using it.
Now, moving on to the available settings. We’ll go through these tab by tab.
Form Settings
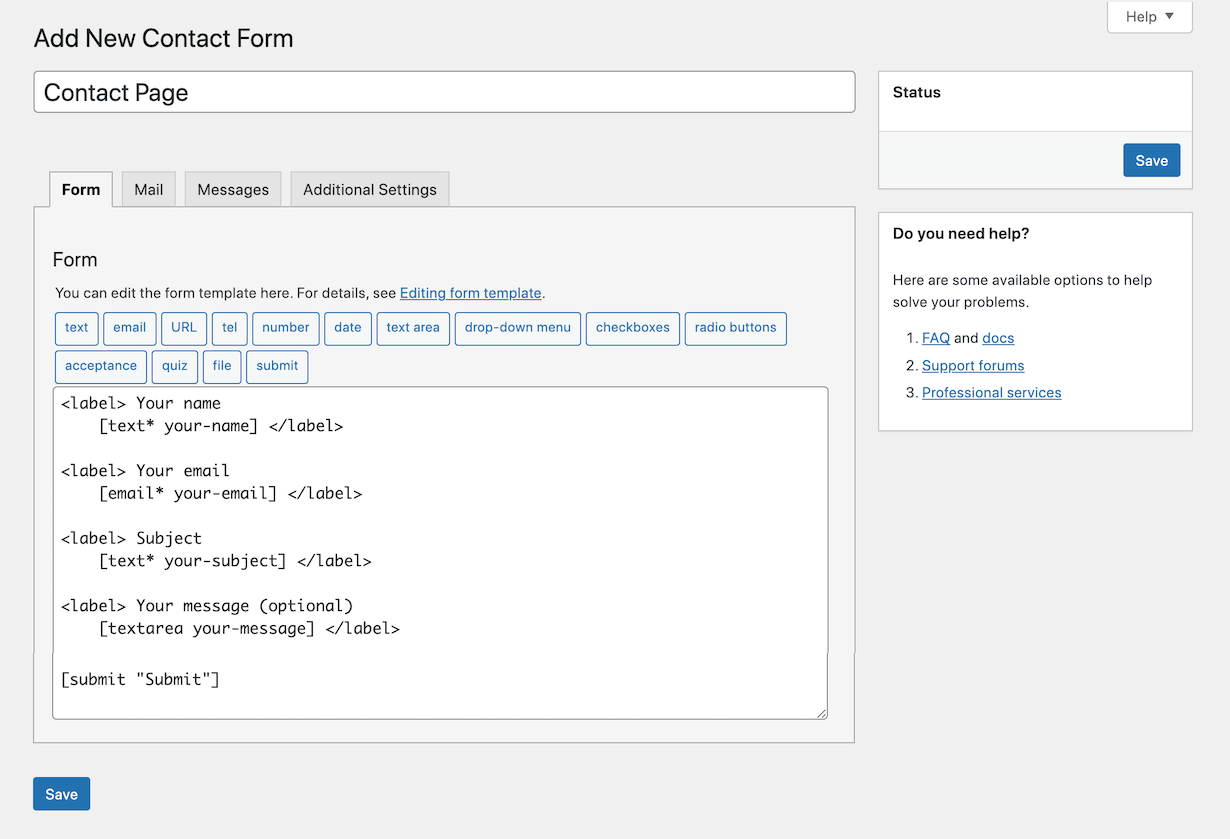
The Form tab is where you will actually build your contact form. Contact Form 7 uses various tags to add different form sections. The default contact form includes name, email, subject, message and send button fields.
To delete a field simply delete its code from the form.
To add a field just click on any of the available tags to insert the code into your form section. A popup will open so you can confirm relevant information before inserting.
You can generate tags for text, email, URL, phone, number, date, text area, drop-down menu, checkboxes, radio buttons, acceptance (e.g. terms), quiz, file upload and submit button.
Mail Settings
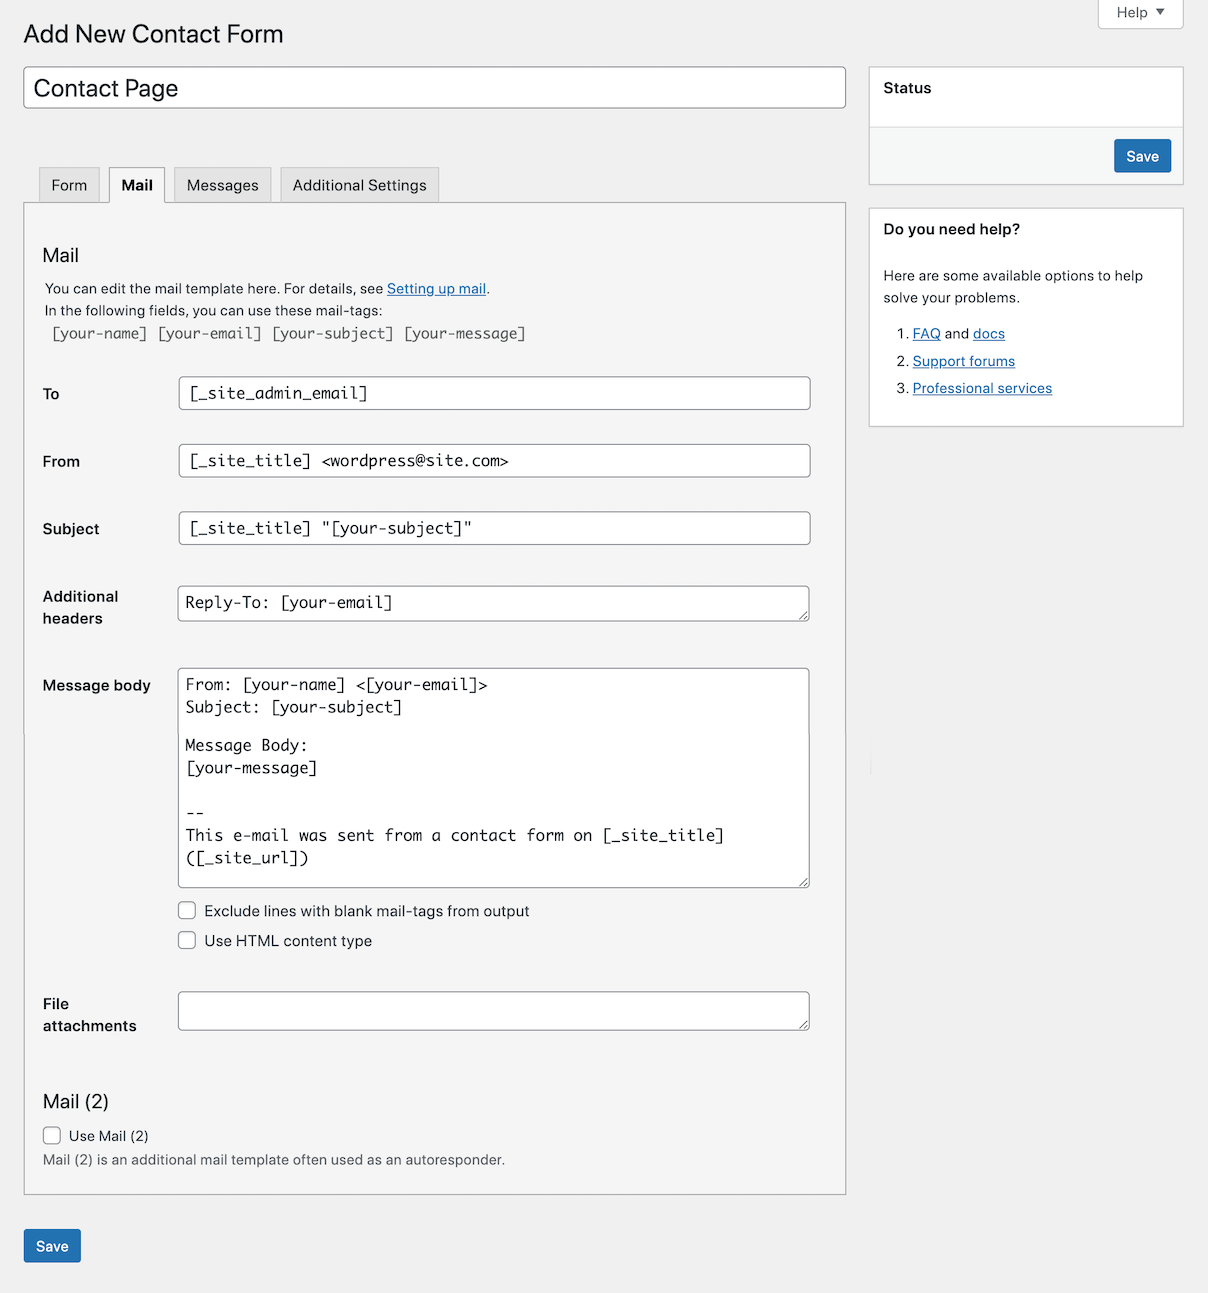
This is where you can make changes to the email you receive when users submit contact forms. By default the plugin will use your site admin’s email address, but you can easily change this to a support email or multiple email addresses.
Also, if you choose to add custom tags to your form be sure to add the shortcode chunk generated into the Message body. If you don’t paste in that bit of code you won’t receive the answers users submit for that field.
The Mail 2 option allows you to create an autoresponder that lets a user know their message has been received. Or it can be used if you’d like to send a different email to different recipients. Maybe you want to receive emails with the full contact form information included, but you only want your support staff to receive emails with one or two fields. There are multiple ways you can utilize this feature.
Messages Settings
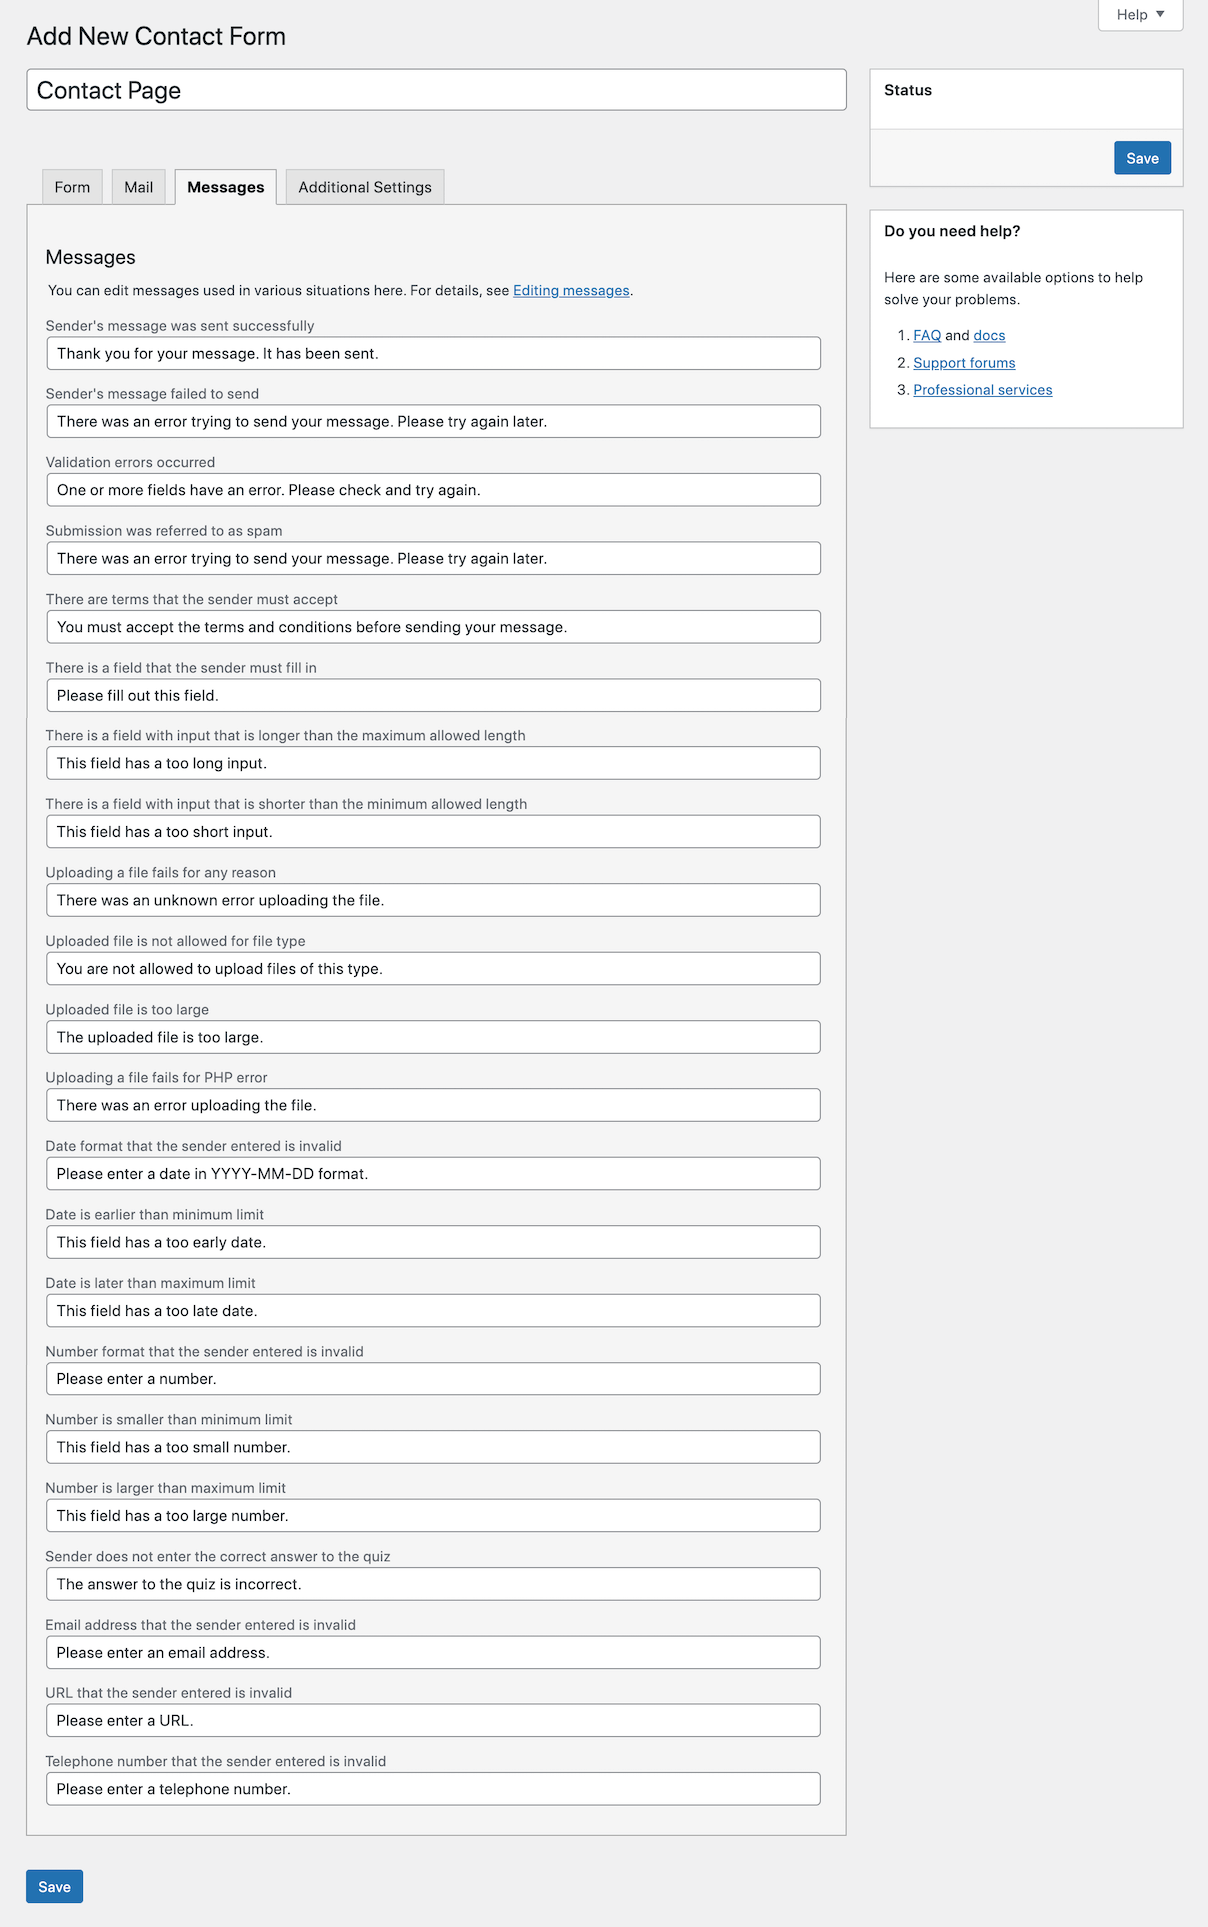
Edit the messages displayed to users for a variety of completed (or incomplete) tasks. You can create customized messages for events such as a successful contact submission, validation errors, incorrect formatting and more.
Additional Settings
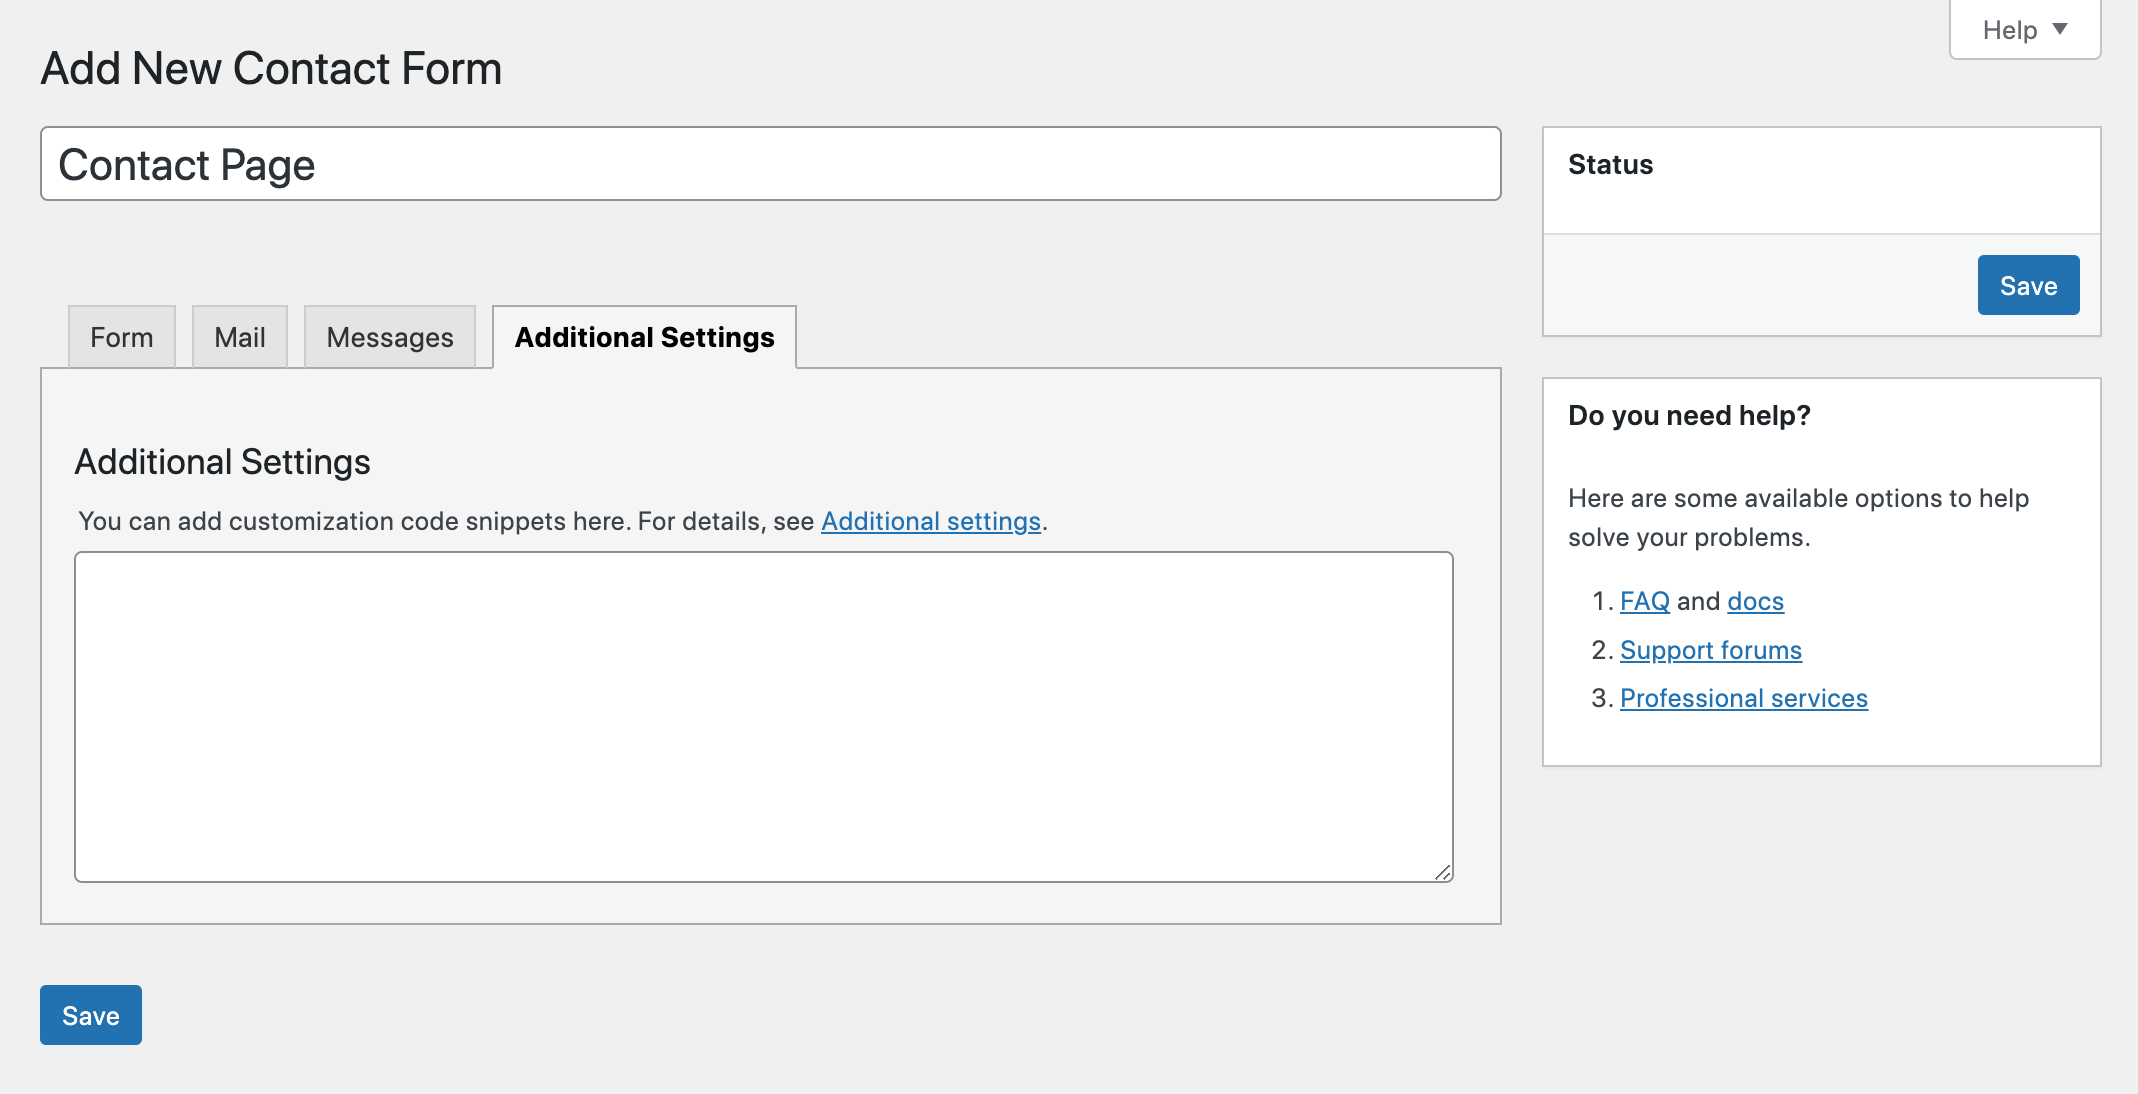
The last tab for Additional Settings allows you to enable various built-in options for subscribers only, demo mode (so no emails are actually sent), acceptance validation, message storing options and more. You can view more Contact Form 7 additional settings in their documentation.
Once you’re done editing make sure to save your changes.
Using Your Form
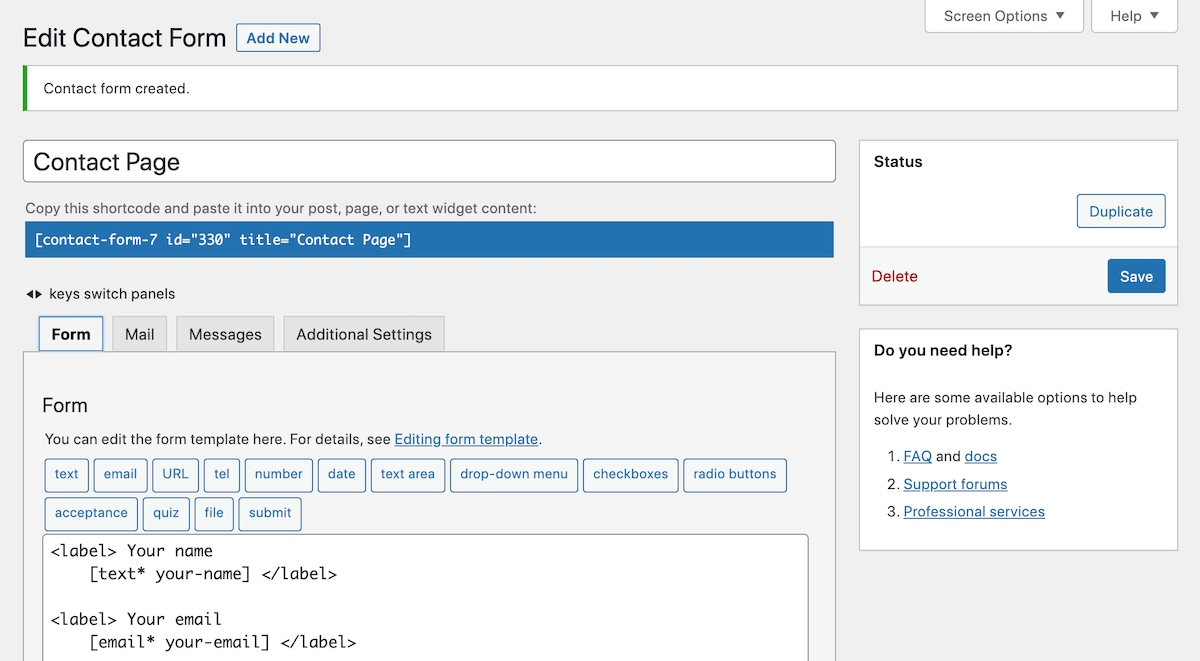
With your contact form done and ready to use you can copy the form shortcode to insert into a page, post, widget area etc. The shortcode can be found at the top of the contact form creation page just below the form title once you save (it’s highlighted). It should look something like this:
[contact-form-7 id="330" title="Contact Page"]
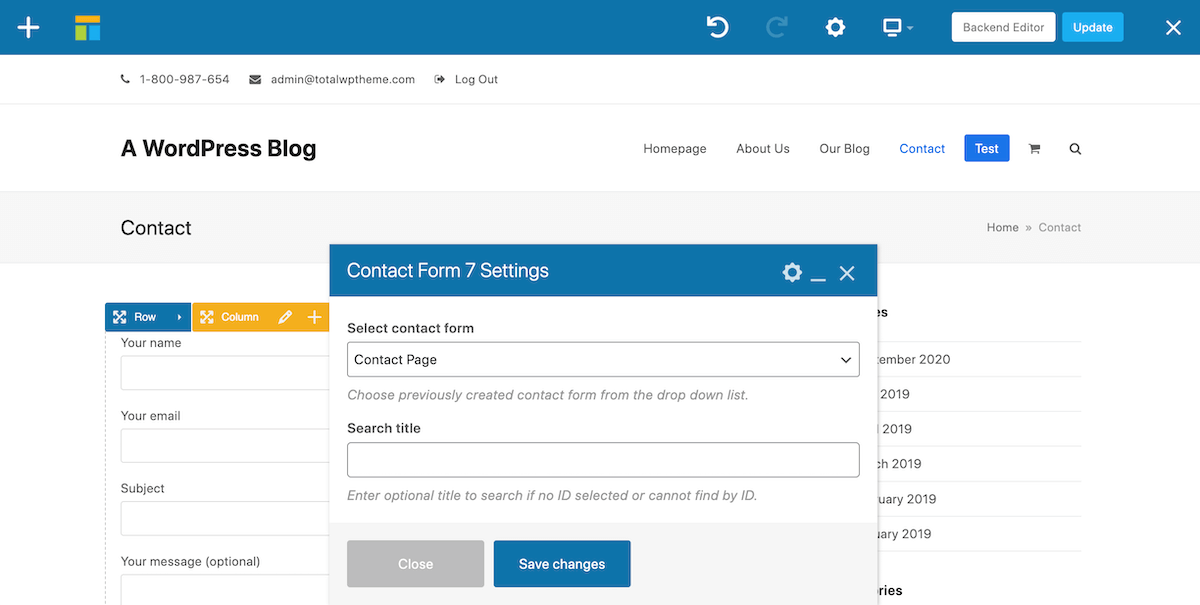
Or if you are using a page builder like WPBakery or Elementor, you can simply use the related Contact Form 7 builder module to select and insert your form on a page.
Contact Form 7 Advanced Tips
Now if you want, you can get really fancy with Contact Form 7 with just a tiny bit of custom code. Here are a few of my favorite tricks that you can use to create an impressive contact form for your website.
Place Holder Text
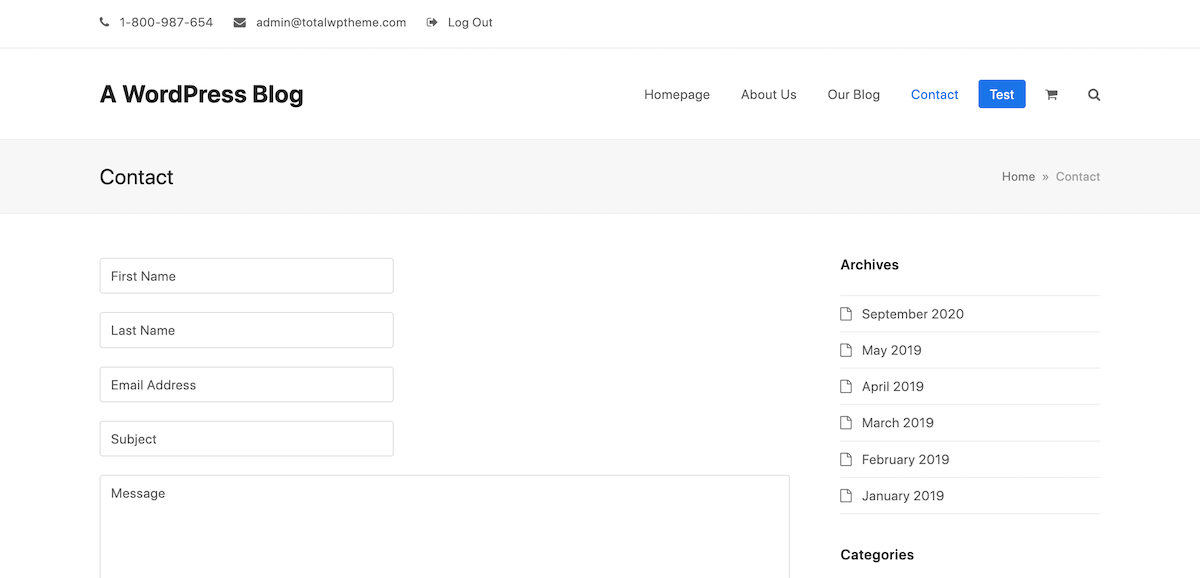
Maybe you don’t want headings on your forms fields, or maybe you’d like to add text to demonstrate to users what they should be entering in a particular filed. Adding a placeholder is easy, just remove the labels from your fields, then add your preferred text with quotes to the end of your code within the square brackets like so:
[text* your-name "Your Name"]
Full-Width Entry Fields
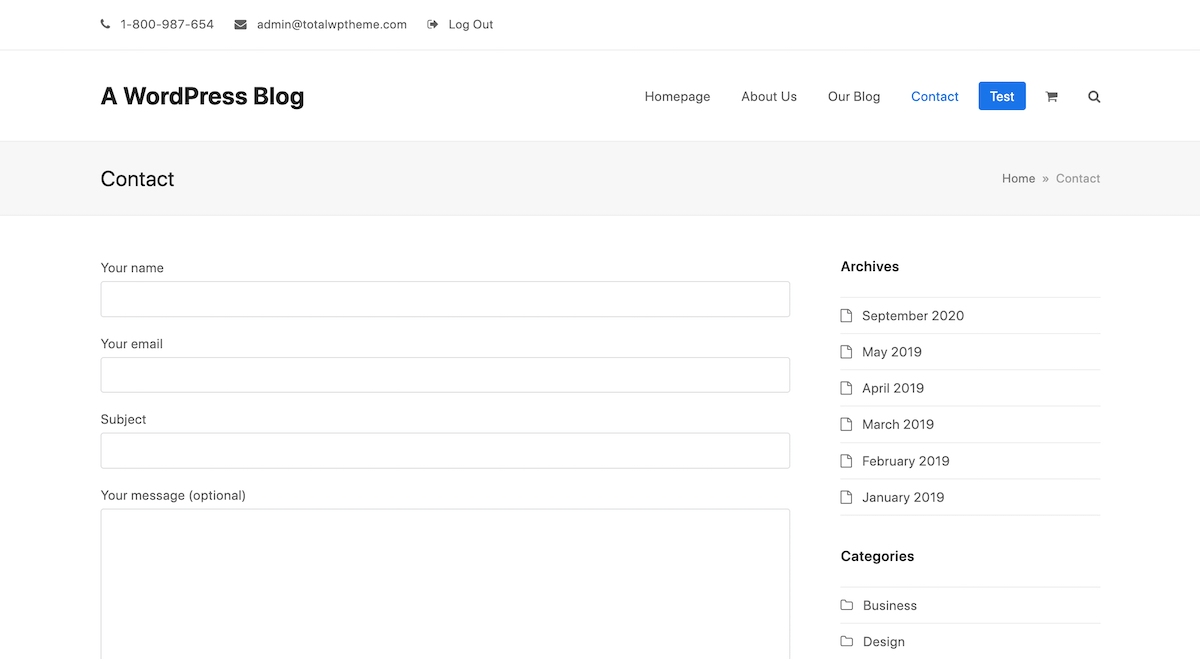
I personally don’t love how the default text fields are so short. There are two ways to change the width of a text field. The cheater way is to simply add the character length width you want to the code for that field in the form section. So if you want a full-width field with room for 300 characters, add 300 followed by a backslash like so:
[text* your-name 300/ "Your Name"]If you want to do it the right way, you’ll need to add the following code to your CSS stylesheet:
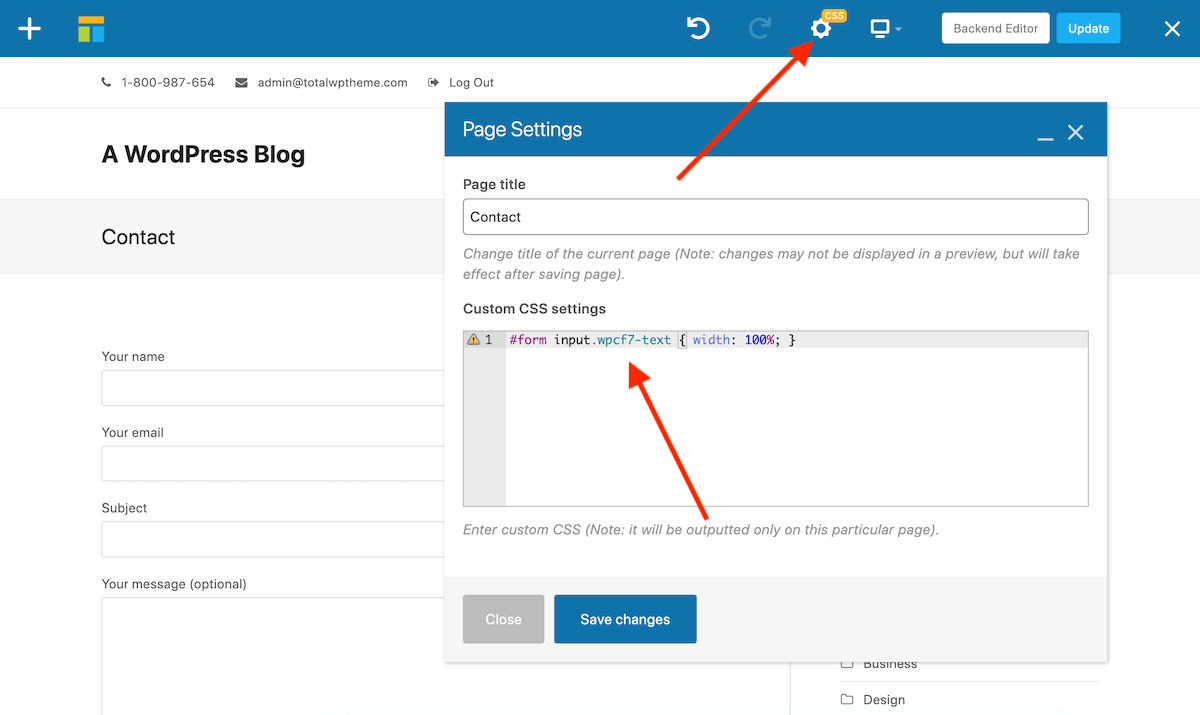
input.wpcf7-text { width: 100%; }But this will effect ALL the Contact Form 7 text fields on your entire WordPress installation.
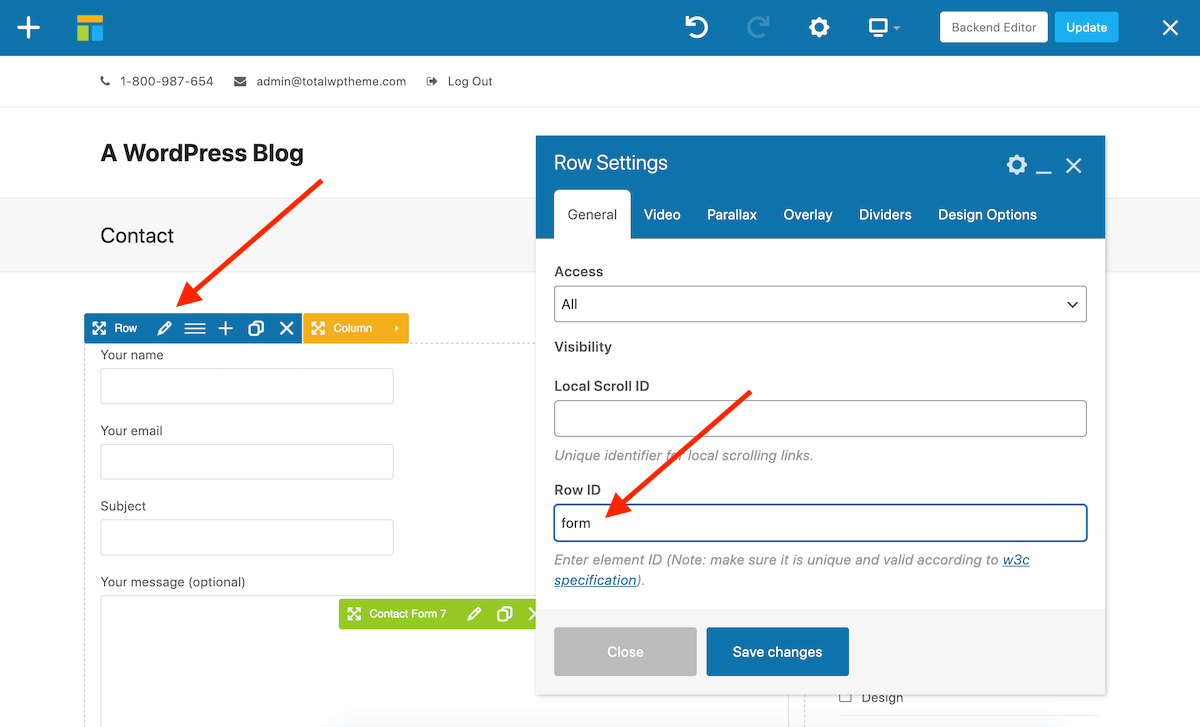
If you are using the WPBakery page builder you have the option to work around this and target a specific row on a specific post or page so only one isolate contact form is style. First click on the the row and add a custom Row ID. Then save.
Next click on the gear icon just above the main content area of your post or page and type #YOUR-ROW-ID followed by the CSS code mentioned above.
Side-by-Side Entry Fields
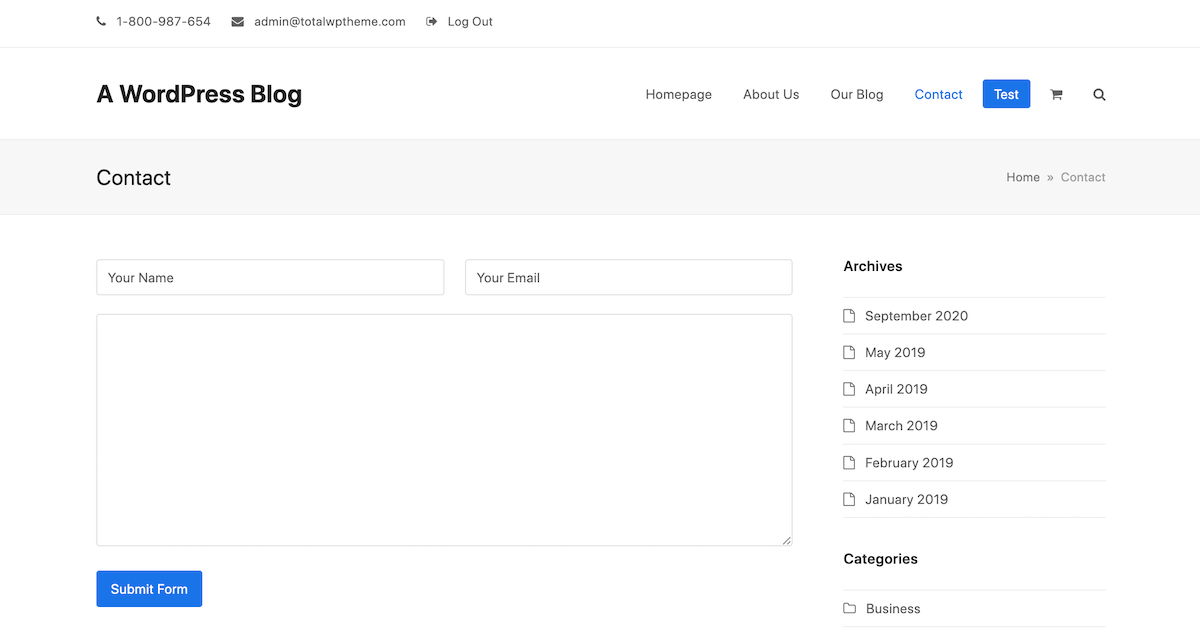
Another neat trick is to add your fields side by side. I think this keeps the contact form super clean and professional. To do this with the Total WordPress Theme we’ve made it easy for you and added a custom class. Just add in class=”one-half” to your p tags like so:
<p class="one-half first">[text* your-name "Your Name"]</p>

<p class="one-half">[email* your-email "Your Email"]</p>

<p>[textarea your-message]</p>

<p>[submit "Submit Form"]</p>
Note: This tip is specifically for Total theme users, but other themes may have similar form styling built-in.
Fancy Email Tags
Sometimes you need more information than the user submits. This is where Contact Form 7’s special email tags come in handy. With these you can add email time stamps, submission IP address, the ID or title for the post containing the contact form and more. All these tools can help you keep your form submissions organized.
Learn More About Contact Form 7
For more tips on using Contact Form 7 please reference their documentation. Here you will find detail explanations of the various tags and what they are capable of, useful tips from the plugin authors, and helpful articles on troubleshooting if for some reason the plugin isn’t working for you.
Contact Form 7 is one of the best free plugins available, and it’s one of the best options for creating contact forms on any WordPress website. Hopefully this guide was helpful, but if you have any questions or want to share your thoughts on Contact Form 7 please leave us a comment below!


